Friday, August 30, 2013

Cherry Block two update

Thanks to Annelies for checking my pattern.  A mistake was found in the Cherry block.  Thankfully it's an easy fix.  The pattern called for (60) 2.5" squares, this should read (60) 2" squares.  I've made the adjustment to the pattern on the tutorials tab.  Sorry for any problems this might have caused, I'm just thankful that it was to big instead of too small!  

While I'm here...sneak peak at what I'm working on today.  The borders are on, just adding some finishing touches to the flimsy.

Lea
Pin It

Tuesday, August 27, 2013

More on borders

So I've had a chance this morning to play around in EQ.  I'm still doing the math because the technique I plan to use to get this look is a little different than EQ drawings.  If it works out on paper then this will be it!  Yep that's gingham in that scallop!  
Now this has nothing to do with quilting but I wanted to show the cutest old man in the world.  My DADDY!  Looks like a little yard knome....LOL!  Everyone loves my daddy, he's always full of old man stories to tell, and he never forgets a persons name!  As cute as he looks here if you don't like the site of blood stop reading here, the next picture is not so cute.

After dealing with this getting bigger in his eye and getting a bump inside the eye, he finally went to the eye doc yesterday.  It's not serious, doc said he coughed, sneezed or blew his nose to hard, basically causing a bruise.  Looks yukky!  But nothing a person can do for a bruise.

Well back to my math ...
Lea

Pin It

Monday, August 26, 2013

Design Wall Monday 8-26-13

Its that time again already!  My goodness time flies.  Must be that we were having to much fun!  Well the fun hasn't stopped yet, hop on over to Judy's and see what fun other quilters have stitched up. 
So tell me...borders or no borders?  I've played around with my stash and in EQ and I just can't find a darn thang I like...any suggestions?  There's so many colors in the quilt, just about anything would work, huh?
Googling scrappy quilt borders gave me a few ideas.  So here's the ones that caught my eye.
 Looks like Katie  used the scraps of different sizes to make this border.  Love that binding idea....hmmm!
http://kakorner.blogspot.com/2011_11_01_archive.html
Ariane added standard Piano Key border, interesting corners...My quilt has 9 patches so this could fit right in.
http://www.arianequilts.com/search?updated-max=2011-12-07T22:22:00-05:00&max-results=6
Look at this beauty that Claudia made!  Looks like she just pieced scraps into a block and cut diagonally, then added the white square....easy enough.
http://couchpotatoquilts.blogspot.com/2012/04/switching-gears.html
I love the inside scallops on this little quilt.  Wish I could give you a direct link but it led me to pinterest and then a dead end. 
Well thanks for stopping by!  If you have any ideas for my border I'd love to hear them!  

Lea


Pin It

Sunday, August 25, 2013

Gramps is home

gramps, me, lucy
 Finally he's home, lets hope for good.  Gramps is almost 91 and his wife Lucy is 88.  His wishes are to die at home.  No one really likes to talk about these things but lets face it, its a part of life we all are destined to do it.  
Now can you believe that someone in my family made Lucy cry today?  Oh that compassion thing really gets me.  Why? you say.  Well, I wanted to jump and smack the offender but compassion is about understanding both sides!  So I took many, many, many deep breathes and carefully chose my words.  Defusing, and restoring peace wasn't easy.  Communication is at it's worst right now for this family.  Lies and deceit, alliances, oh yes we've a real life reality show going on down here in Podunk!  This could replace Honey BooBoo!   Death can bring out the worst in folks.  Oh you know why....$$$$$$$...Yep he may look poor but he's loaded.  I've nothing to gain from his death, so it's easier I suppose to be neutral.   Oh well tomorrows another day!  See ya'll for DWM!

Lea
Pin It

Saturday, August 24, 2013

Morphing into a quilt

notes taken for current quilt (above)
Often I'm asked about inspiration for quilt designs.  Really I'd like to take credit for the quilts I  make but often I see something that gets the wheels in motion.  Rarely making a pattern as it is printed.  Pictures via the web, books and magazines inspire and then it starts morphing into my own design.  When I do this, I also like to give credit to those who inspire.  So here's another peek into my mind.  Enter my mind at your own risk!
SOOOO.....
Lori Holt was having a Row along.  LOVE, LOVE, LOVE the quilt and would love to make it but at the time other things were in the works.  So I saved all her tutes to a flash drive for later reference.  You can find her tulip design here.  
One day I just happen to be browsing and saw this...HMMMM....Love it, scrappy, but not scrappy enough in the tulips, but something.....What if I took Lori's tulip pattern....
Time passed and I saw this (below) while wasting precious time on the never ending web.  A little more scrappy, that little circle in the center could be a button or yo-yo....I've yet to do this to my block but it's a pretty good possibility.
All of these ideas came together to make this, my design which will have something in the crossing.
That's how the block came to be.  But I need a finished product...sashing ideas, borders. A cute quilt below but the sashing is what caught my eye, made by Happy Zombie.  I've been meaning to make this quilt pattern for years.  It was a free block of the month from Bunny Hill that is no longer available free.  Sorry girls(and guys if your reading)
My tulip blocks have a white background.  Hmmm.... how would the scrappy sashing look?  And I want a solid border....so this gave me the boost to have a solid border.
And here's how it's morphing along so far.  
The borders aren't a done deal yet.  If you follow me on a regular basis you know that's where I stall.  The auditions for them has already begun, no pictures just yet of the contestants.  The narrowing down process has begun but there's to many to share at this point.  The plan was for a solid border...But...
 I'll show you what I like for a border...boy is this a lot of extra piecing.  This is Lynn Wilders Toyland Tree quilt.  I love the scrappy border.  Well heck I love the whole thing!  But for now stay focused on borders.  
Well there you have it!  My process, a crazy design process, that's just how my mind works!

Lea


Pin It

Thursday, August 22, 2013

Finding time to quilt

My goodness!  The last few weeks have been so busy.  Gramps is coming home for a trial run. At the age of 90 I'm not sure they'll be to much running on his behalf but I'm pretty sure he'll keep us running.  Yesterday mom and I did the tour of nursing homes just in case this adventure gets more than the family can handle.  Girls let me tell ya, I was totally pooped out yesterday when I finally made it home.  But I did find a couple hours after my recoop nap to finish cutting the scrappy 2" sashings for the Tulip quilt.  Turning on the TV and listening to the movie "Oh Brother Where Art Thou" kept me motivated.  Great music and plenty of laughs to keep me going.
 Who can resist playing around with all the pretty fabrics.  
 The tulips produced a big pile of HST scrap.  Now what to do with these?!
Well there's more running to do!  Hopefully I'll be home early afternoon and get the sashings all sewn up.

Lea


Pin It

Wednesday, August 21, 2013

Crazy corn

This corn has me puzzled.  Its in the field next to my house.  Was it a bad seed?  A different variety?  It stands there wavy at me every time I leave my house.  Looking over the field there doesn't seem to be another like it.  I can't help but slow down the truck and stare at this oddball.


Pin It

Tuesday, August 20, 2013

Block 2, Cherry Block


And its on time!  Yeah!  Let me add a little disclaimer before we start.  I'm only human should you find mistake please let me know so I can correct it for other quilters.  My suggestion would be to cut and make one block, just in case.  Also there's tons of scrap with this quilt.  If you don't like working with leftover HSTS this quilt block isn't for you.  However I will be doing a tutorial later using some of the leftovers.  Also the seam allowance is the standard quarter inch seam unless otherwise stated.
 
Also I've been featured with this quilt!  I was so excited when I checked my mail this morning and 
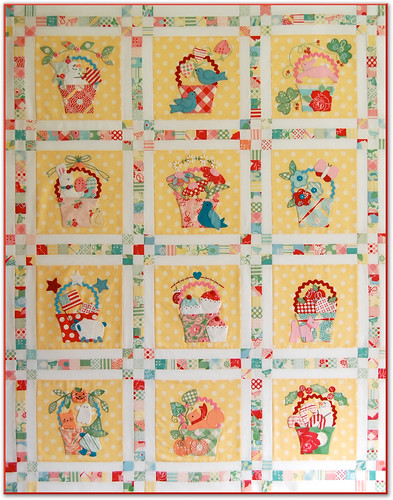
Connie from Free Motion By the River had sent me an e-mail letting me know that she featured the Cherry on Top Picnic quilt on her Linky Tuesdays.  So hop on over and see what others are linking up, you never know what surprises you'll find.

So lets get started
Cutting instructions

White
 (120) 1.5"  squares
(15) 1.5" x 5"
(60) 2" squares
(30) 2.5"x 3.5"
(30) 3.5" squares
(30) 3" squares
(30) 1.5" x 10.5"
(30) 1.5" x 12.5"

Red
(30) 5" squares for cherries( I used 2 different reds, 15 each)

Brown
(30) 3.5" squares

Green
(30) 5.5" x 3"

What you'll need for one block
The pic above shows (4) 2.5, it should read (4) 2"  squares.  And
(2) 1.5 x 10 should read (2) 1.5 x 10.5

Here's how one block is laid out before piecing.  Of course chain piecing is the best way to go.  But this will give you an idea of how all the pieces come into play.
Lets sew all the corners on the cherry unit.  Sew each corner by marking a line down the middle of the 1.5 white squares and sewing on that line or just sew corner to corner like below.  Sew all four corners the same.
After all for corners are sewn, trim and press.  The picture below shows two seams per corner.  After doing this I decide to scrap these small scraps so there's no need for you to do that unless you're more adventuresome than I!

Okay lets do the green 5.5x 3 , Now I make those two seams on each corner, we'll save that scrap for another quilt.  Cut between the two seams.  Make sure you have them in the proper corners!

 Press seams open.
Now take the brown 3.5 square and the white 3.5 square and sew from corner to corner.  Then make that second stitch  if you plan to use the scraps. 
  
 Cut between the seams and save the larger section. Press the seams open on the larger section.  That's the one we'll use for this quilt.
 Lay the 3" square on top of the brown HST lining up to the brown side.
  
 Again stitch from corner to corner and then make the second stitch for the leftover HST.  Cut in between the two seams, toss the extra piece aside and press the seams open.
 TADA!  I know there's tons of waste, but really these cherries are so worth it.
Sew these 2 stem units together.   Pinning ensures accuracy of the seams.
  
Press the seam open, then add a 2.5 x 3.5 to each side and press.
  We're on the home stretch!  Now all we need to do is sew all these units together.
Sew the 1.5 x 5 white to the cherry unit.
 Press towards the white
 Sew the second cherry on to the 1.5 strip and press again towards the white.
  
Alrighty lets speed through the next few steps.
You should have 3 sections that look like this.  Sew'em together..
And press'em
Add the 1.5 x 10 strips to the right and the left of the block.  Press towards the white
Finally add the 1.5 x 12.5 strip to the top and bottom and press towards the white.  YEAH!  
It should measure 12.5.  Now you can go ahead and put the body of this quilt together alternating blocks.  You can find the directions for the alternating block here and the yardage requirements for the entire quilt.  The borders measurements can be found here .  And my finished quilt is posted here.
If you make this patter I'd love see pictures and share them with others!

Lea


Pin It
Related Posts Plugin for WordPress, Blogger...