Thursday, May 4, 2023

Tips For Making Lone Star Quilts And Choosing Colors

 The progress on the Lone Star quilt is slow going.  I try my best to get all my errands done in one day but the last couple of weeks I've had to go out almost everyday. Today I'm staying in my jammies and ignoring the phone. 
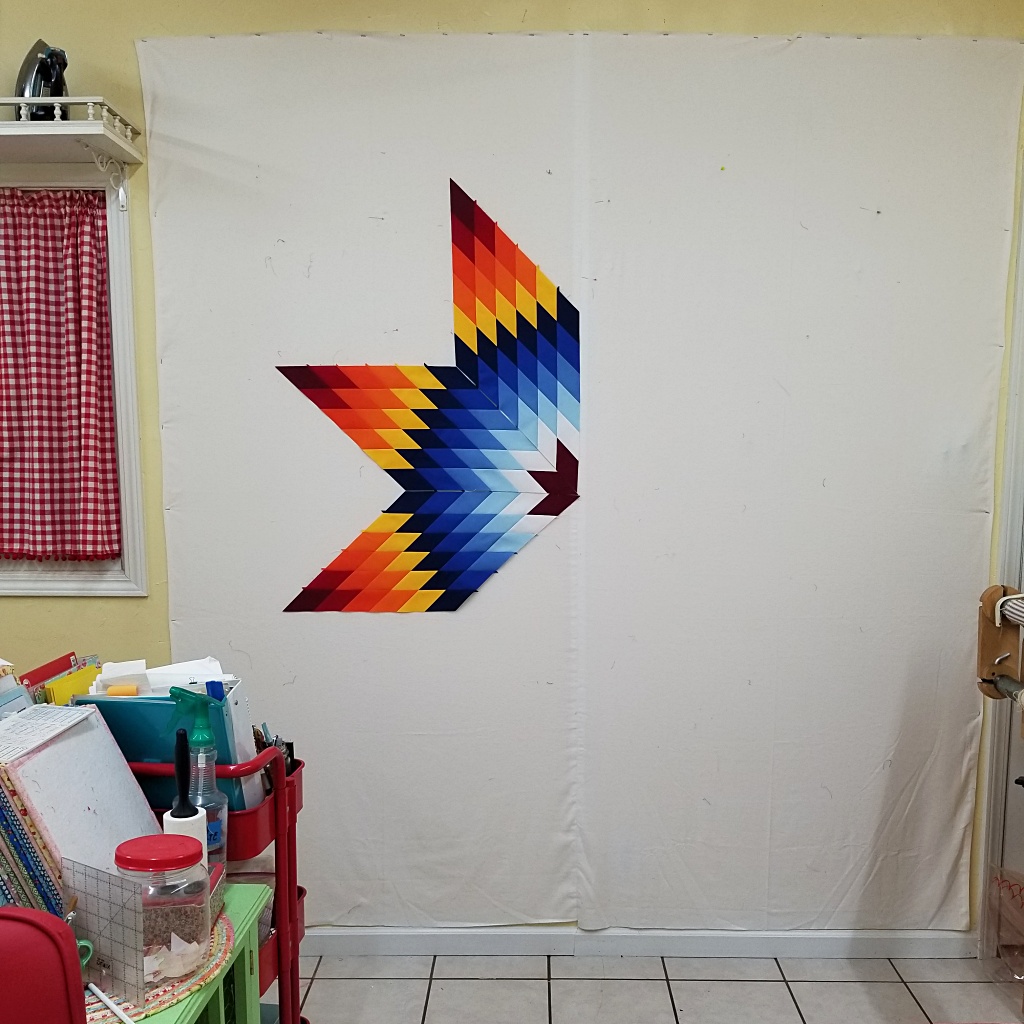

In my last post I received a comment about color placement for lone stars.  That is a hard question for me to answer.  


It really all boils down to your style and color preferences.  The Lone Stars I've been making were not my color idea. Years ago I saw this colorway on Diane's Native American Quilts website and thought it was beautiful.  The quilt below is not mine, it was my inspiration found on Diane's website but I couldn't find it again to link to it.


I also purchased her book to make my first Lone Star quilt about 12 years.  Her book is not written in the typical quilters lingo and was hard for me to wrap my mind around but I did it and still use this book as my reference for making a Lone Star.

  My best advice to anyone wanting to make a Lone Star is to first think about what colors you want in the a quilt and then google.  Lets say you want to make one that is purple and yellow.  Then that's what you will Google....Purple and Yellow Lone Star Quilts.  Another good place to search is Pinterest.  Just do the same search in the search box on Pinterest. 

  Here's a link to my Lone Star Quilt Pinterest Board.  There's over 100 quilts saved.  Many are Native American but there's also some so called normal Lone Stars.  

Another option to help you decide colors is search for Lone Star Quilt Coloring Pages.  Print out as many as you need and color until you find what you like. 

When it comes to actually making a Lone Star you first need to decided the pattern you will use.  Diane's book uses the inset corners and triangles.  The video below about inset seams.


If you would prefer not to do inset seams then you will need to find a pattern that makes things a little easier by cutting those inset sections into two pieces.  Many quilters find this to be easier.  I just see it as more cutting and more sewing.  But to each their own.  Whatever works best for you is the best way to do it!  Watch the video below for this method.  Donna pieces the star one diamond at a time.  I strip piece mine instead of cutting and piecing a bunch of diamonds. The good thing is the video has a link to a free pattern!


 I made a tutorial a few years ago with tips and tricks for making a Lone Star.  They can get wonky really easy due to the bias cuts.  I still cut them the same way but I've changed my markings to the back of the quilt instead of the front.  You can see my markings below under the stitches.  These marks are for pinning.  You can find my tutorial here.


With the last 5 Lone Stars I have been using Frixxon pens and Water Soluble pencil for marking.


I found this white water soluble white pencil at Hobby Lobby.  I was leery about it but it works great.  It stayed on the quilt until I sprayed it away.  But if you handle it a lot it will wear away.  I'm very mindful to not over handle a Lone Star.  They will stretch out of shape very easily and then it's hard to get them back into shape.


In the tutorial I also talk about ironing/pressing.  In the tutorial I pressed the strip sets to the side.  Now I press open using a seam roller.  After the top is complete I use my iron and a light hand to press...NEVER IRONING.  And by all means avoid finger pressing, it too will stretch the quilt pieces out of shape.


Are my seams perfect?  Well heavens no!  But they are close enough.  


Lone Stars are not hard to make and come together pretty quickly.  Seriously!  There's not that many pieces in one of these.  I've made quilts with thousands of pieces.  This Lone Star quilt top only has 304 pieces.  That includes the borders but not the backing and binding.  The one I'm making right now will be exactly like this one but it will have a different color border.  Maybe yellow or orange.  Which color do you think I should use instead of red?  Leave a comment below.


Until next time...

I hope you find time to stitch up something sweet!


Pin It

Monday, May 1, 2023

Lone Star Quilt Progress

 Hello Quilty Friends!  Just a quick pop in to share the progress on the Lone Star quilt.  It was another busy weeks so I didn't get as much done as I would have liked.  Only three of the six strip sets were pieced.


Hopefully this afternoon I can finish the other three and subcut them into strips.


This quilt will be exactly like the last four Lone Stars I made last year.  I used EQ8 to help with the color placement.  The only difference is the background will be black instead of white.


I'm such a visual person.  In order to keep the color placement correct I cut out one section of the star and number them.  


This basket of scraps is from the first four quilts I made.  So many piecing errors.  It was quicker to make more strips sets than to rip out stitches so I have a ton of scraps.  Not sure what I'll do with them, maybe an improv quilt.  It's not my thing but it'll use them up quick...someday.


Until next time...

I hope you find time to stitch up something sweet!


Pin It

Wednesday, April 26, 2023

What Is This Fabric?

Hey Quilty Friends!  I'm almost ready to start piecing the next Lone Star.  Most of the fabrics have been cut and ready since last fall.  About the only time I use solids is in Lone Star quilts.   Over the years I've made several of these quilts in the same colors.  So when I made four of them last year I thought why not go ahead and cut all the fabric into strips for later use.  It was a good plan until it wasn't.  There wasn't enough strips of the navy blue and the lightest blue.   A quick dig in the stash and I found a navy blue that would work but no light blue.  So I purchased the light blue a couple weeks ago.   I'm ready to knock this one out in a jiffy!


I just need to starch these two and get them cut into strips.  It should be easy to get all of them pieced and subcut in 2 or 3 hours.  
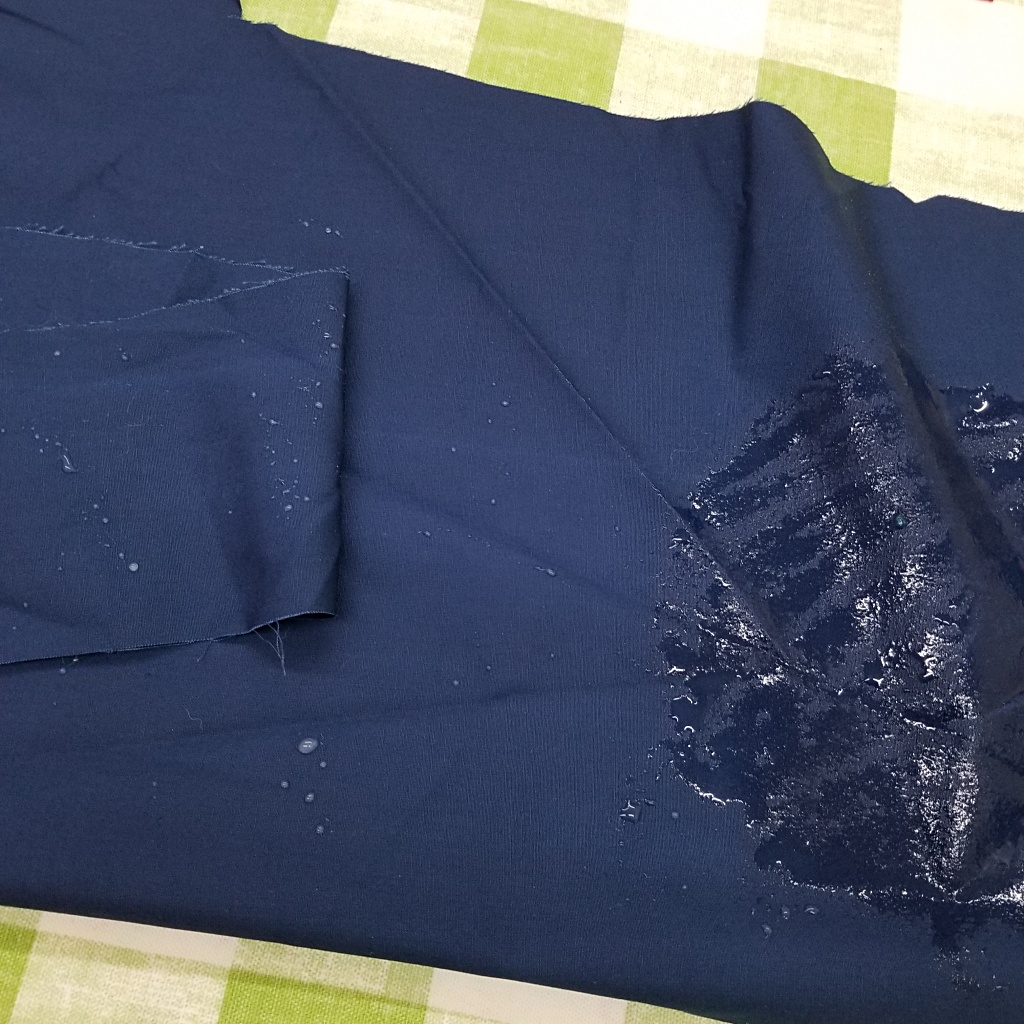
Then this happened.  The starch is beading on the fabric...what?


This happens sometimes with some fabrics.  I think they get too much sizing, no big deal, I'll just give it a little rub and it'll soak into the fabric.  Nope.


Okay, this one is being a little contrary.  Let's fold it over and see if it's soaking through to the other side.


Nope, well what in the world?  What is this fabric.  Even poly cottons will soak up starch.


What if I fold it over and smoosh it really hard with my hand?  Well it did soak through a little.  If you look real hard you can see where my hand was on the back of the fabric.


When I opened the fabric I got a good chuckle.  This reminds of those ink blot tests.  What do you see?  I see a candelabra.


This isn't cotton but it feels like cotton.  What in the world?  I decided to do the burn test.  Cotton will burn like paper leaving powdery chard flakes.  Synthetics will melt.  I pulled a scrap of white cotton, lit it on fire and it started making ash.


The navy blue burned slow, smoked and melted. BOOHOO.


This is the only navy blue I have on hand.  So....if I can sew it, I'm using it in the quilt.  TADA!  I can sew it with no issue.   But will it melt under an iron?


Will it shrink when pressed?  Test #2
I cut a two inch piece.


Set the iron to the cotton setting and gave her a press.  Please don't stick to my iron!


Well would you look at that!  It didn't melt and it didn't shrink!  Praise be!  What kind of magical fabric is this?  The recipient of this quilt will be non the wiser.  It's going in the quilt.


I decided to iron the larger piece with the starch still beading on the surface.  Of course it flaked and still didn't soak in to the fabric.  It just made an oogie mess.  Oh well, I'll shake it off and use it anyway.  Once it's in the quilt, quilted and washed no one will know or care.  


Until next time...

I hope you find time to stitch up something sweet!


Pin It

Tuesday, April 25, 2023

Maintenance and Mending

 "I'm a quilter not a seamstress!" All quilters have said this or at least wished we had the ability to scream it loud and proud.  Normally I don't have a problem saying no to mending or alterations. 


But when Mr. Podunk asks, I have to say yes to the man who funds my quilting obsession. So when he asked me to patch a hole in his favorite pair of around the house jeans, I happily agreed, tossed them into the Studio, and let them get lost below the ever growing clutter.  That was about a year ago.  He never mentioned it again and I forgot about them until yesterday when I found them at the bottom of a pile of projects to be completed.  
It was a simple fix since I have a huge collection of blue jeans saved for making a jean quilt.  A patch was quickly cut from a pair of old jeans, added a little Heat and Bond Ultra to the four edges of the patch. Once pressed in place, it only took a few minutes to wrestle the leg under the needle and do a simple double zigzag around the outer edges of the patch.


It's not pretty but it's functional.  I'm a quilter not a seamstress.


In order to sew around the patch I need to use the free arm on my sewing machine.  This meant it needed to be removed from the homemade recessed table.   As you can see below it was pretty simple.  Just lift it out of the hole, remove the extension table, and add a pressing board over the hole in the table.  When the mending was finished just drop it back down in the hole.


Well while I have it out.... I can't put it back in this filthy hole.  It's been two years or more since I last cleaned under here.  


Honestly I don't really know how long its been...maybe longer.


Looks like there might have been more than dust, thread and pins under here.  Is that spiderwebs?  Oh my goodness.  To think about spiders being right there above my legs...EWW! and YIKES!  A good reason to check under here more often.  I'm going to be thinking about spiders crawling on my legs for a long time.  Sewing will not be the same for awhile.  Imagine the spider dance I would do if one of those creepy crawlies came creeping up my leg. 


A quick wipe down with a wet paper towel and all is well again.  No dust bunnies or spiderwebs...for now.


I don't know about you but when I start dusting I can't stop.   And in this case I really shouldn't.  Take a look at the top of the machine.  Shame on me for letting it get this bad.


So I removed the thread, cleaned the entire outside of the machine and put things back to normal.  I rarely use the spool area for spools of thread.  This is where I keep my bobbin piecing thread.


The top piecing thread is on my handy dandy homemade cone holder.  It's nothing more than a coat hander and a scrap of oddly shaped wood I found in Mr. Podunk's scrap wood box.  Again, it's not pretty but it's functional.


All is good and back to normal and I can start cutting for the Lone Star needing to be finished in less than two weeks.  The deadline is self imposed and the recipient doesn't know I'm making it for them.  But I would like to give it to them on a very memorable date.  More on that after it's gifted, just incase they lurk around my blog.


Until next time...

I hope you find time to stitch up something sweet!


Pin It
Related Posts Plugin for WordPress, Blogger...