Friday, February 27, 2015

Flimsy Friday

 I'm loving the snow!  My studio gets brighter earlier in the day due to the sun reflecting off the snow.  This is how I started my day.   So bright and happy, it  washes away any gloomy and glum cabin fever blues that might be lurking about.  


 When I started making strings last week I didn't plan on making a Wedding Ring quilt, but...failure on Plan A.  Onto Plan B which I pulled out of thin cold air.   My attempts at piecing the blocks ended in disaster.  Good thing there's always a Plan C that doesn't require so much pinning.  If you look closely at the picture below you can see where I marked a grid on a solid piece of fabric.  100 % applique.  All I had to do was add glue to an arc and press.  Much easier than a bazillion pins.


Add a few posies....


Now all I need to do is do an invisible machine stitch around ALL of it! 
Why can't I get a good picture of this quilt.  Maybe its because it's so bright.


When all else fails...put on your husbands boots and brave the weather.


Hmmm...the colors are still showing brighter than real life.


Oh well you get the idea.  She's happy and bright and puts a big ole smile on my face.  


Found another new to me Linky Party over at Modern Tradition Quilts, hop on over and link up.   You could win a free pattern if your project is featured next week!

~ Lea Anne ~
Pin It

Wednesday, February 25, 2015

Podunk Posy

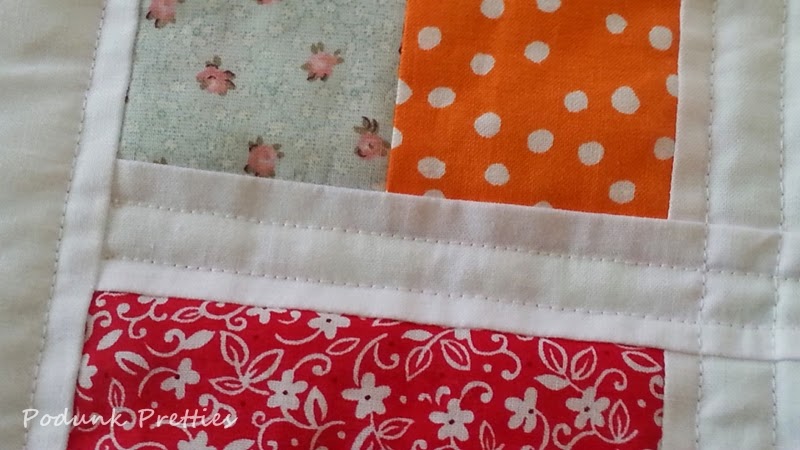
 After running into a couple of design snags in my string quilt  I decided to take a short break from it this morning and do a quick Studio clean up.  As I was putting away some scraps I ran across the sweetest little scrap of pink posy fabric.  The little posies jump started an idea....  That's all it took to side track my mind and whip up a quilt block design on some graph paper.   Well what the heck let's go ahead and make a test block.  I need several more of these!


The adorable Podunk Posy block finishes (in quilt) at 6 x 12.  The design wheels are turning for a super simple, quick and easy, scrap busting quilt using a few of these Podunk Posies and scrappy charms.  Can't wait to get started!  But...I've a string quilt calling me back to the Studio.  Actually screaming load!  Wait till you see the colors...sunglasses required!


I found the perfect spot for her while I finish up my string quilt.  Maybe I should make a couple more, there's plenty of room on the curtain rod!


~ Lea Anne ~


Pin It

Monday, February 23, 2015

Let the fun begin!

Happy Monday morning quilty friends!  I hope it's warm and cozy in your neck of the woods.  It's sunny and 7 degrees here in Podunk.  The studio temp is 54.  Yes you read those number right, it's not a typo.   So while letting the Studio warm up lets take a look at the string quilt progress.   All the strings are pieced and ready for cutting.  It took a tad longer than expected to get enough sets for my design.  Would you believe I ran out of strings and had to MAKE more?! 


My granny used to say "There's more than one way to skin a cat".  Well that statement is very true in quilting.  When making string quilts there's several ways I could piece them.  Some quilters use some sort of foundation such as muslin, phone book pages, newspaper, or store bought foundation paper.  I chose to use none of them.  The reason is simple..bulk in the quilt and I don't want to remove any papers later.  I know there's a water soluble product on the market but I'm too cheap for that!  The next major decision was pressing of the seams.  Open or to one side? This topic is highly debated among quilters.  To be honest I do both.  It really  depends on the quilt and the amount of bulk that will be made if I don't press open.  As general rule I prefer pressing to the side.  It makes for a stronger seam, and although I've never put a quilt in a quilt show, should I decide to, most judges look for pressing direction and if they can see piecing stitches... that's BAD.  It could be the difference between a ribbon and a list helpful advice.  For this quilt I decided open seams was best.  Shew that was a chore!  Not a decision made lightly.  Pressing to the side would have been so much quicker and easier.


Finally I can start cutting and shaping these stacks into a quilt.  
Let the fun begin! 


~ Lea Anne ~
Pin It

Friday, February 20, 2015

Got strings?

The last scrap quilt was so much fun why not make another out of the growing pile of strings.  The inspiration for a string quilt struck when I saw Emily's quilt over at Em's Scrapbag.  


We've seen a gazillion string quilts of every shape and size.  How can I make this one my own, make it different, original, a one of a kind?  Nothing lubricates the creative quilty gears like some mindless speed piecing strips of technicolor  fabric.  


Once the sewing began the ideas flowed out of my brain like the curse words out of my mouth when my expensive sewing machine broke earlier in the week. 
(yep I'm still peeved)
One sweet idea after another until...I HAVE A NEW PLAN!  Something I've not seen before.   I've Googled, Binged, and YahOOOOO'ed and not one quilt with this idea.  Now that doesn't mean it doesn't exist ....and I'm sure somebody with better knowledge or skills of searching will let me know if does.  
So what's my plan you say?  
Before I go getting too cocky and spouting off at the mouth, there's still oodles of design elements that need a little tweaking.  So until then I'll show you what I should be working on but can't seem to come up with any ideas.

Oh yes, my nemesis....NOVELTY FABRIC!  UGG! YUK!   My sweet little grandson(Hunter) wants a Spidey quilt.  Well guess what granny had in the stash?   After hours of searching for some type of inspiration, I'm feeling inspired to toss it in the trash can, because you know 6 yr olds are very critical of quilt patterns...wink wink.


~ Lea Anne ~
  

Pin It
Thursday, February 19, 2015

Flit and Flutter Friday


This has been finished for a couple of days, waiting to be photographed.  Our  weather had other plans.  With temperatures in the negative digits my photo shoot took place indoors.  Don't get me wrong I love snow but I don't like freezing my patootie off in order to get a good picture.  It's a pretty good bet that those temps wouldn't be good for my camera or phone camera. 
Anyway...this was a quick and fun way to use up some scraps.  The four patches are 2.5" squares and the the solid blocks are 4.5" squares.  Sashed with 1.5" strips.  Doesn't get much easier than that!  


The hardest part was drafting the cute 8" butterfly blocks, but once the pattern was drafted they went together in no time. 


It's so cozy and soft due to the low loft poly batting and the minimal quilting. No fancy free motion to weigh down the butterflies flight, just straight line quilting done on my domestic machine.


For the backing I chose to use up some not so loved yardage from the stash.  It's a field of flowers for the butterflies playtime.


There can never be to many ginghams and plaids in a quilt so I pulled some green plaid from the stash for the inner border and binding.


She folded and ready for her flight to my grand daughters house.

~ Lea Anne ~
Pin It

Monday, February 16, 2015

In a bind

The simple quicky quilt is close to being finished.  My daughter put her name on this one while she was here this weekend.   As soon as I can whip together a new quilt for my Spiderman loving grandson, both will be shipped to their new home.
This quilt could have been finished yesterday but....


And its a big BUTT, that's putting it nicely.  I was just stitching along and my sewing machine made the most horrible noises and locked up.  Of course it locked up with the needle down in the quilt.  This machine is only 3 or 4 years old, there's absolutely no reason why should behave this way.  I don't take my machines in for the yearly checkup.  With the older machines it wasn't necessary.  And it should still be that way unless the computer parts on the machine fails.  In my failed attempt to fix her I found that about half of her gears are plastic.  For almost $900 I got plastic!  NEVER AGAIN will I purchase a new machine.  They are good for the fancy stitches and that's about it.  And really how often do we use them?  The auto cutter hasn't worked right for about 2 years, and I've had to program my own tiny blanket stitch because the MAN who designed the blanket stitch on this machine decided I didn't need to make a tiny stitch.  Obviously he's never heard of invisible machine applique.
It costs $100 for the yearly inspection, cleaning and setting the timing.  Additional charges for any broken plastic and labor.  Now should get her fixed and sell her then buy a good old fashion simple low maintenance machine or should I keep the high maintenance pain in the rear?  


Why did I give my good girl away(below).  She never gave me trouble.  It was one of the machines from my high school.  When the school bought new machines they were going to toss these in the trash.  So a friend took one thinking she would use it, a year later she gave it to me.  Oh well, live and learn.  For now I'm sewing on the other money pit you see in the background.  


~ Lea Anne ~
Pin It

Saturday, February 14, 2015

Sharing the love Cherries

 It always tickles me pink to get picture from quilters using one of my quilt patterns.  Earlier this week I received this email from Debbie Bunch...
       

  Isn't it just gorgeous?!  The Green border fabric was the perfect compliment to the cherry blocks. 


I love those fussy cut chain blocks!   Then she finished off the quilt with a super sweet edge to edge cherry quilting design.  Thanks Debbie for making my day!


The tutorials for this pattern can be found in the tutorials tab at the top of this blog or you can just click here , here and here.  Of course if you make this pattern or any quilt from one of my tutorials I would love to see them!

~ Lea Anne ~
Pin It

Friday, February 13, 2015

Fabric Friday

My goodness what a week it has been.  And it's not over yet.  Let's start with the good news.  Mr. Podunk made the top of my list this week because he bought  these!!!  The sweetest fat quarter bundle of Pam Kitty Garden.  If you love Pam Kitty as much as I do and you've been putting off buying them now is your chance.  Westwood Acres has the bundle at the lowest price I've seen and the shipping was free.  Not only that they threw in a mini charm pack FREE!  


More good news, my daughter and grandbabies are coming in for the weekend!  YEAH!  So I'm having a big party tomorrow with all of my kids.  It's a rare occasion to have them all them in the same room at one time. This will be an extra special Valentine weekend.    
Now for the bad news.  
Mr. Podunk also made the top of the bad list by letting my dog Lobo in the house last night.  Normally that's no big deal.  He's a German Shepard and stays outside unless the weather is bad.  We either let him in the laundry room or the garage if he's muddy.  Yesterday evening Lobo decided he would like to play with a SKUNK!  Oh yes my dear quilty friends, he was sprayed and he doesn't smell like roses.  Even though he was only in the house long enough for the smell to reach my nose.... my house stinks!  What on earth was that man of mine thinking?  So I grabbed the rubber gloves, tossed the dog bedding out the back door, and the dog.  Mr. Podunk should consider himself lucky, I wanted to toss him out with the dog.  Today I'm doing everything I can to get the smell out of the house.  It's not as strong this morning as it was last night but you know its like the old man that won't take a bath.  You can smell him but he can't.  Maybe if I change tomorrows menu to something with a lot of garlic or sauerkraut it'll cover the skunk smell.  Oh well it'll still be nice to have the whole stinking family in one room.

~ Lea Anne ~
Pin It

Thursday, February 12, 2015

Lining up sashings

In the rush to make this quilt a quicky I forgot the very important step of lining up the sashing strips.   I've marked the error in the picture below as if it doesn't stick out like a sore thumb.  As obvious as it is, it's staying as is.  I did take the time to line up sahings in the rest of the quilt.


I've tried eyeballing this process, and "feeling" the seams until they "feel" like they line up.  It never works for me.  It only takes a few extra minutes to mark each sashing strip in the seam allowance. 


 Line up the sashing of the next row and pin.


Now that looks better and it only took a minute.


~ Lea Anne ~
Pin It

Wednesday, February 11, 2015

Fluttering about

I tried really hard to fight the urge not to make a quilt block while piecing a simple squares quilt.   The squares were lacking something and just didn't set right with me.  So I grabbed a cuppa and took a quick trip through the internet looking for a simple 8 inch butterfly pattern.  After coming up empty handed I decided to just draw up my own.


  The horizontal rows might become vertical columns or frames for the butterflies.   HMM...we'll just have to wait and see what the day brings.  You can see below that the rows were numbered ready to be pieced into a quilt when inspiration hit. 


 I mentioned earlier in the week..... sticking to a written pattern is pretty much impossible, it seems that the same is true with my own pattern.  


 ~ Lea Anne ~

Pin It

Tuesday, February 10, 2015

Purging the scraps

How long will it take to use up all these scraps?  Walking down memory lane to a day when I was envious of the quilters stash, dreaming of the day that I could just open up a cabinet and make a quilt.  No running to the store for fabric.  What on earth was I thinking!  What you see below is just the tip of the iceberg.  My honey stash of fabrics I love most....at least for now.  There's several more of these bins scattered about the studio with not so loved scraps.  Is it possible to use up all the fabric purchased over 20 yrs?  Not if I don't stop buying it!


Well one things for sure, whining about my quilting disorder doesn't make a bit of difference if there's no action.   The best way to use fabric up fast is to make quick simple quilts, right?   Well I spent all day yesterday sorting and cutting.  
(68) 4.5 squares and (136) 2.5 squares is all I managed to get cut.  Barely even made a dent in my stash.  But they sure look pretty, and I'm anxious to stitch them into a quilt today.  
So do you have any tips on scrap reduction and storage?  By the looks of my scrap bins I could use some good advice!


Linking up with SheCanQuilt for Scraptastic Tuesday in hopes of getting some scrappy ideas and advice.
~ Lea Anne ~
Pin It

Monday, February 9, 2015

My Tweets center block

At last!  The last block is ready to be hand stitched.  It may sound like the end is near but when making a mental list of what still needs to be done before the quilt is complete it seems the light at the tunnel is still very small.  Hopefully by the time this last block is complete the block setting and borders idea will be set in stone.  It would be easier to just follow the pattern. 


Erin gave 3 different finishing instructions, all of which are great but....I just want mine to be different.  Following the quilt making instructions 100%, NEVER, ever... that I can recall. 


I fell in love with the quilt pattern at first sight over 3 years ago.  So much so that  I've made a couple different projects from single blocks.  This blue one hangs in the spare bedroom.  


Another one made for my mom'ma using block 2 of the series.  You can find the pattern for the entire set of quilt blocks here.   A tutorial for the border on the quilt below can be found on Erin's blog here.


Since this post seems to be all about Erin Russek, have you seen her new 
FREE BOM called Happy Dance?  The picture below is from her blog,  Onepieceatatime
 If your not a big fan of applique she's also giving instructions for pieced blocks that will surround the center applique.   I hadn't planned on doing this years BOM but I just couldn't say no to that cute watering can.  It's not to late to join in the fun!   All you need to do is purchase the center block, and the rest is free!  


~ Lea Anne ~
Pin It

Saturday, February 7, 2015

Beginner Update...WOW

 Some of you may remember last months post about my aunts new quilty adventure.   Well the quilt top is complete!  Let me tell you I've studied this picture close up for flaws and can't find one.  Jealousy doesn't even begin to describe how I feel.  My first quilt wasn't that nice.


Yep she's a real quilter, on to the next project leaving the first one unfinished.  Well Aunt Brenda if your going to be one of us you need to learn the quilty lingo.  You now have your very first UFO, which means Unfinished project or object.  Welcome to the slightly insane world of quilting!


~ Lea Anne ~
Pin It

Friday, February 6, 2015

Cabin or Spring fever?

Happy Friday!  We made it through another week.  That means only 5 more weeks till spring.  Whoohoo!  Just thinking about all the glorious spring colors makes me all giddy inside.  The little crocus's should be peaking through the snow by the start of next month.  We've already started planning for this years veggie garden.  Planting will start next month with spinach and lettuce in the hot bed.  With all the preparations for spring there's been neglect of the Studio.  It seems spring fever or cabin fever has made it's way to Podunk.  Side effects are doing anything but sewing.  Even though I'm not physically working on quilts my mind is twirling with ideas.   As I flutter and flit about the house there's always time for a quick peek at the explosion of color from these two new love birds.  They look so young and innocent as they do their ritualistic bashful courtship dance.  It occurred to me since they have so much character they needed names.  Instantly I knew they were Daphne and Delmer.  Who knows why, they just seemed to fit the whimsical feel of this quilt.


 Hopefully the afternoon can be spent working on the rest of the block.  In an effort to make things a little easier a design change was necessary.  The leaves in the red circle will be the same as the leaves at the bottom.  Not much of a change but at least there won't need to make more templates.  


Do you have "The Fever"?  Now I'm no doctor but I hear tell that a good dose of quilty inspiration is the best thing for "The Fever".  You can find a pretty good sized dose over at Richard and Tayna Quilts Friday Linky.

~ Lea Anne ~
Pin It

Thursday, February 5, 2015

Out with the old

The time has come to replace my rotary cutter that was given to me over 20 yrs ago.  I've put it off long enough, it's becoming dangerous to use.    My old one has been dropped on the tile floor one to many times, it has more dents and scratches than a Walmart shopping cart wheel.  Even with a new blade she was stiff.  I've tried cleaning, oiling and even used graphite powder to help make her smooth rolling, but no such luck.   The overall design of the Olfa rotary cutter has pretty much stayed the same, but the new colors are much more appealing.  And let me tell you the new one rolls and cuts SO NICE.  
I've had a couple other brands of rotary cutters over the years.  They too were gifts, and then re-gifted because they just didn't feel right in my hand even though they were sold as more ergonomically correct.


The sewing box above was a given to me when I was 18, that was a few years ago, it's older than my rotary cutter.  
Well inside is the free label that came with one of the old Olfa rotary cutters.  It's been pinned there since the day I got it.  I thought it was ugly, and didn't see a reason to put any type of label on my quilts.  Funny how things change.  These days almost every quilt I make gets a label or at least signed with a sharpie pen.


Even though my old Olfa is no longer being used she'll still have a place in my sewing box.  We've made a lot of memories together.
Do you have a favorite tool that you just can bare to replace?

~ Lea Anne ~
Pin It
Related Posts Plugin for WordPress, Blogger...