I want to thank all of you for being so understanding of my crunch for time. With spring finally here there's tons of outside work to be done. And with spring weather you get out there while you can. If you take a nap the weather could change. This morning I planted Snow Peas in the rain. No need to water that seed when mother nature can do it for me! Now I can do what I love the most, share my love of quilting with you. So let's just get right to business.
My fickleness has emerged once more. After spending so much time looking at this layout it seems to be ...CHAOS.
 |
| this quilt finishes at 72" square |
By adding two small inner borders it gives the eye a place to rest. However it also adds one more Podunk Posy block to each side of the quilt. So I'll be giving instructions to finish both ways. But not today!
 |
| this quilt finishes at 78" square |
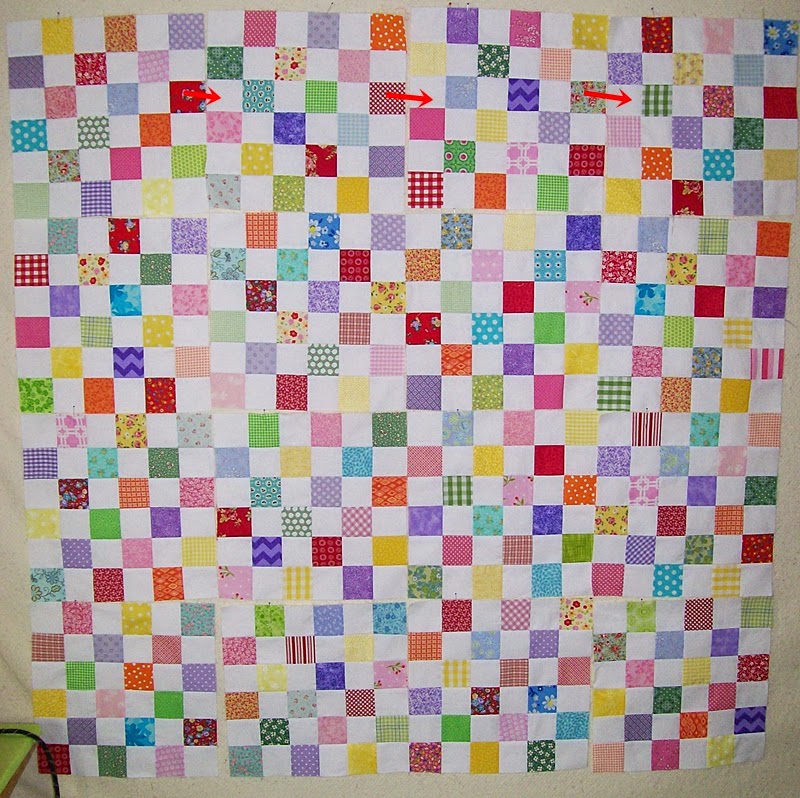
Today we'll be working on the center panel.
It's made up of 16 very simple 12" blocks. TIP each block starts with a white square in the left top corner.
Now I know most of you could put this together with your eyes closed, but I always want to make things as clear as possible for the new quilters.
Since this quilt is scrappy I can't give you yardage requirements for the prints, just make the most out of all your scraps! And the white well there's 4 different options for the finish so I rounded up, you might have some left over. Better to have to much than not enough.
Fabric yardage for entire quilt
6 yds of white or background fabric
3/4 of a yrd for the inner green border (if you want inner borders)
1 yd of green binding fabric
What you will need for the center panel.
(17) strips of 2.5" x WOF strips from white yardage subcut into
(288) 2.5 white squares
(288) print squares
A design wall or large floor space is great for laying out these scrappy blocks before piecing. Just to make sure you like where your scrappy prints fall.
You can find more information about placing on the design wall
here.
Once your happy with your design wall layout you can start piecing one block at a time.
Each block measures 12.5" unfinished and 12" finished.
Flip the second row onto the first row, right sides together of course. I won't mention that again, I'm assuming every one knows that we always sew with right sides together.
Starting from the top of your block grab the first pair and stitch down the right side using a quarter inch seam allowance. Stop your needle one stitch off the fabric. Then butt the next pair right up against the needle and continue stitching. Continue this method until the first row is finished.
DO NOT CUT THESE APART. Press towards the print fabrics. (I finger press) Continue to add each row in the same manner.
You'll end up with something that looks like this.
That one little stitch holds your seams together with no need to pin. However I pin anyway. This method also keeps your block in the correct placement order.
To show you that it really does work with no pinning I made the first block with no pins. After that I couldn't help myself.... I'm a pin-o-holic.
After you've sewn all the columns together you'll need to go in and clip that tiny one stitch.
Clipping the stitch will allow you to pop those corners open as pictured below. These will need to be carefully pressed open with an iron.
Here's what the back looks like when finished.
And the front.
Okay only 15 more to go. You could make all 16 in an afternoon.
Once the blocks are complete take a chocolate break, you deserve it and then just start stitching them together in rows.
Because we popped open the seams every thing will match up perfectly when sewing the blocks together. Pin at each seam and stitch, or live on the wild side with no pins and hope for the best.
Pop open those seams again and press.
Once you have 4 rows of 4 blocks rows stitched, and the seams popped and pressed, Grab another piece or two of chocolate and sew the rows together.
WooHoo! We did it! Snip, pop and press your last 3 seams. Your center panel should measure 48 1/2" square. And you should just about ready for a couple more chocolates.
As always if you find an error in the instructions or they are lacking clarity, feel free to email me.
~ Lea Anne ~
Pin It


.jpg)


.jpg)


