Thursday, August 29, 2024

3 Applique Starch Pen Reviews

 The three brushes in todays' review from left to right.
                                           1.  Ohuhu Water Color Brush Pens  $6.99(amazon)                                                                                 2. Traditional Primitives Starch Brush  $12 plus shipping                                      3. Clover Fabric Folding Pen  $11.16(amazon)


Each pen was fill with diluted Sta-Flo Starch using a spray bottle.


Filling the Traditional Primitives pen was a little harder due to the smaller opening.  Traditional Primitive sells a bottle of starch with a special tip for filling the pen.  The price is $5.95 for 3.4 ounces of starch.  Since I'm cheap I chose not to purchase their starch.


The Clover Pen comes with a small bottle of fabric folding liquid. I've not tested the liquid because it's too pricey.  The tiny refill bottle is $ 8.95.


All three pens hold the same amount of starch.


Each pen has a gripping area that reads push.  


Give it a little squeeze to push the starch out to the tip of the pen. 


The Clover pen(left)has a hard porous tip.  It's hard to see the starch coming out of the tip and it doesn't glide across the fabric.
The Traditional Primitive(middle) has a paint brush tip made with what feels like a soft synthetic material.   It seemed to glide across the fabric nicely and it was easier to see the starch as it was squeezed into the tip.
The Ohuhu pen(right) has a paint brush that is slightly stiffer than the Traditional Primitives and doesn't glide across the fabric as well.  But it's better than the Clover tip.


All three pens were used to make a few circle appliques.


The Clover Fabric folding pen will be my go-to pen because I have arthritis in my thumb and it's easier to squeeze the starch to the tip.  The other two pens made my thumb joint hurt with every squeeze.  If the Traditional Primitives had been easier to squeeze it would have been my first choice.  I really liked the paint brush tip. I tried to put the Traditional Primitives tip on the Clover pent the threading was different.  EDIT....I also tested each pen for leaking. They were laid on the table with the caps on overnight.  None of them leaked and the caps were not stuck to the pens.


Pin It

Monday, August 26, 2024

This Weeks Plan

 The top priority for the week is to get the border applique glued in place on my Bumpkin Baskets quilt. 


Before that can happen I need to finish recovering my pressing boards.  I started this late last night.  Normally I recover each of these 3 or 4 times a year.  I'm pretty sure these were neglected all last year because they looked horrible. (I have a video for how to make pressing boards)  The two smaller boards will be recovered with the fabric you see below.  On the largest board the fabric was washed and will be reused. Since this my ironing board for almost all fabric it gets more wear and tear.  It needed a total rehaul after more than 10 years of use.  All the layers under the cover have been replaced.


About a year ago I purchased this fabric at Joann's to recover my large board.  It's just too cute and I can't bring myself to use it for an ironing board cover.


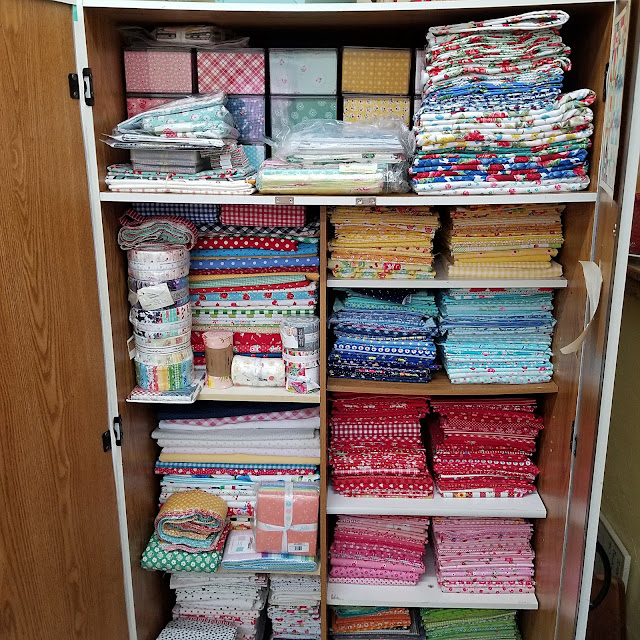
I also need to do a little cleaning.  Remember the fat quarter break up blog post?  Well, I'm still working on the organizing of the fabric cabinets.  Here's what it looks like so far.  Worse than it did before!  It's a work in progress.  Today I'd like to deal with the tall stack of yardage on the top right shelf.  

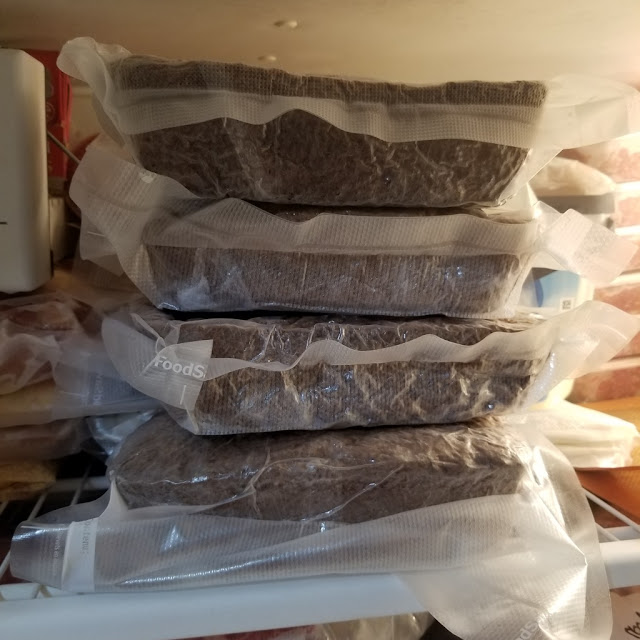
BUT, before I can even step foot in the Studio I need to finish preserving Zucchini bread.  I made five batches of bread this weekend.  One batch makes two loaves of bread.  They are frozen and used throughout the year.  I froze six loaves a couple of weeks ago and four more this weekend.


I also made a few mini loaves for Mr. Podunk.  He loves a sweet treat every now and then in his lunch box. These have been in the freezer overnight and today the need to be vacuum sealed.


 Under the mini loaves is the zucchini muffins that have already been vacuum sealed.  Once the mini loaves have been vacuumed I can put them along with the muffins in a bag for storage in the deep freezer. 

A few more chores need to completed after processing the bread.  Hopefully by noon I can get back to work in the studio.


Pin It

Friday, August 23, 2024

Oopsies Happen

"The true measure of a quilter is not how perfect the quilt but how well they hide their mistakes"

Even the most seasoned quilters make some of the most common mistakes from time to time.  I think it's important to share the mistakes and how they were fixed.  


Sometimes the fix is pretty simple like this one.  These were sewn together wrong.  


The fix was to rip out the stitches and sew them together correctly. 


And sometimes the fix is more about hiding the mistake.  In the picture below I accidentally sewed my flippy corner onto two background squares.  The mistake wasn't noticed until after I had cut off the corner.  


Had I noticed it before cutting off the corner I would have removed the stitches.  In all honesty it could be left as is and it would cause no issues and no one would know.   If I were a hand quilter it might be a little harder to quilt but hand quilters quilt through several layers all the time, right?  My fix was to cut off the extra background piece as close to the stitches as possible without cutting the stitches for no other reason than I might be able to use this piece of scrap someday. HAHA! 


Red Bow-Tie block update....Yesterday didn't go as planned but I'm calling it a success.  All the red blocks were sewn together, just not all in one setting.  This morning I'll finish pressing the seams on the last few blocks.  Then it's back to working on the Bumpkin Baskets applique.


Pin It

Thursday, August 22, 2024

Ready, Set, GO!

 That's right, it's pedal to the metal time.  The last of the red Bow-Tie quilt blocks were cut yesterday and they are ready to be sewn together today.  


By my estimation these should take about three hours to complete.  Since underestimating is a problem for me, let's bump that three hours to five or six.  The first set of blocks are on the design wall in front of my sewing machine for inspiration.  It's my way of telling myself to keep stitching.


The top drawer of my sewing table has been pulled out and a design board placed on top to hold the background pieces and momma's Case XX shears for cutting of the flippy corners.  These old shears are the best.  I've had them for about eight years and they are still just as sharp as the day she gave them to me.


The handy BladeSaver Thread Cutter is ready to work its magical cutting powers as I chain piece the morning away.


A pressing station has been set up to my right.  Finger pressing is my go to method but occasionally some of these older and not so great fabrics need a little extra help to lay flat.


The pressing board has been covered with a cheap Walmart fabric due to the scorching cause by the Bumpkin Baskets applique work.  I don't want the scorching to transfer to my Bow-Tie blocks and I don't want to remove the scorched fabric because there's still applique work to be done.


Before leaving I want to share a super cute quilt found on Pinterest. There was a link to a blog.  You can find it here along with a few other vintage quilts.  As you can probably tell, this is a vintage quilt.  Hand pieced and quilted.  I love everything about this quilt.  A future quilt project for me?  Maybe.  I'm feeling pretty inspired but fickle all at the same time.   Anyway, I just thought you might want to see it too.


See you soon, wish me luck on those Bow-Tie blocks!


Pin It

Wednesday, August 21, 2024

Bow-Ties, Tomatoes And SPIDERS

 In my quilting lifetime I've heard many quilters say they don't like scrap quilts.  How is this possible?  To me they are works of art even if it's a just a bunch of squares sewn together.  The joy of a scrap quilt is seeing the different prints. 


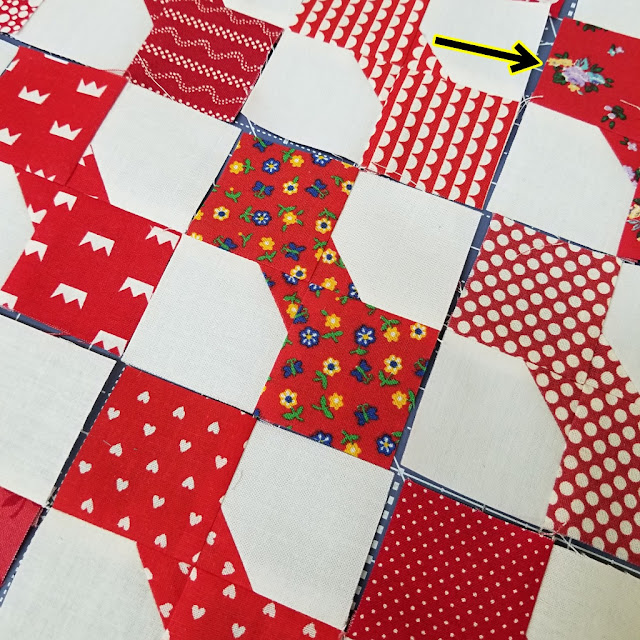
Let's be honest, they are a pain to make.  It's understandable why someone would not like them for that reason alone.  Digging through the scraps to find the right size fabric pieces. Pressing and cutting tiny pieces.  It takes 10 times longer to make a scrap quilt.  Cutting for this quilt would be much easier if I only had to deal with one dark color yardage and white yardage.  It would still beautiful but not as interesting.  This is literally a pain in the neck but I'm loving it!  Even the mistake of not paying attention to the directional fabrics makes me a smile.  My neck is stiff and sore from looking down, pressing and cutting fabric.  Whatever is causing it, it's worth a little discomfort and the visit to the chiropractor later this week.  I love seeing the vintage prints playing well with the newer prints.  The calico floral in the middle  and the one with the arrow are both from the 60's or 70's.  I still have about one yard of both.  They were purchased at an estate sale years ago.  How do I know they are older?  Width of fabric is less than 40 inches and the weave of fabric isn't as "smooth" as todays quilting fabric.
EDIT 8/22/24  The print with the arrow is from the 80's.  Confirmed by Facebook friend.


The 25 red blocks were made on Monday night.  Some of the fabrics used are from my earlier days of quilting when I didn't starch the dickens out of my fabric.  I chose to use them as is, just press.  Well, that was a mistake.  As we all know starch helps in many ways.  It makes piecing and cutting easier and more accurate.  And it stops fraying.  Fraying can be a really bad situation when you have a white background fabric.  Those tiny red strings could show through the white background fabric and be visible on the front of the quilt forever.


From this point on all fabrics will be starched.  A little time consuming but worth the extra work.  The rest of the red prints have been starched, pressed and have been waiting patiently for me to return to the studio.  There's a total of 96 different red prints.  That includes the blocks in the above picture.  The quilt requires 900 bow-tie blocks.  Every color but black will be used in the quilt.  So I will need
100 of each color. Red, orange, yellow, green, blue, purple, pink, brown and gray.  I don't have 100 different prints of each color.  Low volumes and larger florals will need fill in the gaps.  Of course I may end up using a print more than once.  Not desirable but if necessary I will.


Hopefully today I'll be able to get back in the studio and make a few more blocks.  Yesterday I didn't have any stitching time due tomatoes needing to be preserved.  We have a bumper crop of tomatoes this year in the garden.  I wasn't going to process anymore tomatoes.  A good rule of thumb when preserving is a two year supply because next years crop may not be as good.  Best to have it and not need it than to need it and not have it.  Our Roma tomatoes didn't do well this year but I cut off the bad bug spots and used them anyway.  I'll never plant them again.  They may be good for sauces and salsa but they require too much care and chemicals to be worth my time.   And I don't do chemicals in my veggie garden.  100% chemical free!


How long did it take to process all of these and clean up the kitchen?  Eight hours!  Tomatoes take so long even when you do what we like to call rebel canning.  Now, don't get all preachy on me but I do an old fashion method for tomatoes called Open Kettle canning.  It was the way I was taught by my mom and granny.  This means I don't water bath or pressure can tomatoes.  The process is to have sterilized hot jars and hot tomatoes.  Just add the hot tomato's to the hot jars.  If you're interested in this process I found a video to show you the method. 

I ended up with 29 pint jars of salsa, 8 quarts of tomato juice and 2 partial pints that will be used for veggie soup this evening.  The next topic is spiders.  If you don't like spiders this would be a good point to leave.  Thanks for dropping by!


A few weeks ago Bonnie Hunter of Quiltville posted her daily quote. If you don't follow Bonnies blog you're missing out.  She's an amazing quilter and teacher.  I've been reading her blog almost daily since 2005!  Anyway, her daily quote gave me a good chuckle because I could relate.  There has been many times I thought a wad of thread on the floor was a spider.   


But this week I had a run in with a wolf spider and at first I thought it was thread.  For 3 or 4 days this spider would come out, scare the dickens out of me and run faster than Forrest Gump to evade capture or death.  


Wolf spiders jump and they are fast.  They get HUGE.  This one is just a baby.  They get about 3 times bigger than this, if not bigger.  I've seen them as large as my hand.


  If you're thinking I could have caught it and put it outside you obviously have never seen a wolf spider.  They are almost impossible to catch due to speed.  The slightest movement spooks them and they flee.  You would think since they are so big they wouldn't be able to hide very well but they can get in the smallest of spaces.  They don't typically bite humans but they can.  And really who cares, they are scary!  So I went into fox mode. Moving as slow as humanly possible until I was close enough to make my move.


Game over!  I win!


This post is being link up over at Quilt Fabrications for Midweek Makers.  Hop over to for quilty inspiration!


Pin It

Monday, August 19, 2024

Starting A New Scrap Quilt 3 Inch Blocks!

Hi Quilty Friends!  I'm so excited today to share my newest quilting adventure. Three inch finished Bow-Tie blocks.  


The plan is for a 90 x 90 quilt.  That's 900 Bow-Tie blocks.  


Assembling the blocks is a breeze.  The challenge is digging through the scraps.  It's going to be 100% scraps, even the background fabric.  You see, I have this large tote of white scraps.  Different shades of white fabric and a few white on white fabrics.  If I had to guess I would say there's about 12 years worth of fabric in here.  


For the white background fabric I will need (1,800) 2" x 2" squares.  So, I just grab what's on top and start cutting.  I don't care if they are the same shade of white.


Oh boy, this was quite the chore.  Cutting 1,800 squares from odd shapes took all weekend.


Today plan is start cutting the (1,800) 2" x 2" and (1,800) 1.25" x 1.25" prints.  


This is what it looks like after cutting all those white squares.  It barely made a dent.


The plan is to work only from my scrap bins.  Using every color except for black.  I think some of the low volume fabrics will work too if they have enough color on them.


Are you wondering why I'm starting a new quilt?  Well, I ordered a couple new tools to help me with the applique on the Bumpkin Basket quilt.  So, until they get here I need a project.  Another UFO would have been the smart choice. But a lunch break and scrolling Pinterest took me down a rabbit hole.  This was the image on Pinterest that stole my heart.  Those are 2" blocks!  The picture is from a blogger I know well.  Missy no longer blogs but is on Instagram.  Clicking on the image will take you to her blogpost about this quilt.

https://missyscakesandaprons.blogspot.com/2013/04/bow-tie-blocks.html

Then a couple hours passed as I searched for images of Bow-tie quilts and making my own Bow-Tie Pinterest board for the many different layouts and sizes.  There was no plan at the time to make this quilt, I was just killing time.  Something happened in those two hours and here we are making tiny little Bow-Tie blocks using Bonnie Hunters 2011 Leaders and Enders tutorial.


This post has been linked up at
And
Hop over for more quilt inspiration!


Pin It
Related Posts Plugin for WordPress, Blogger...