
Hi-diddly-O Friends! Progress is being made on the patriotic baskets. The striped fabric for the basket handles adds a nice movement to the block, don't you think? Kind of gives it the look of a real weaved handle.

The handles look difficult to make but they are easy when you have the right tools. Cutting the fabric on the bias(45 degree angle) and using the Bias Bars made quick work of the handles. I'm not sure if this brand of bias bars are still available but there's a few other brands available in both metal and plastic.

This set of pressing bars includes 7 different width bars. Of course you could could make your own, which I have done as you can see below. All you need is Dritz No Melt Mylar Quilters Template, a ruler and rotary cutter.

The instructions tell you how wide to cut the bias strips for each different size bar. A time saving tip is to label each strip with their width and fabric cutting width.

After cutting the strips to the proper width, fold them in half, wrong sides together, longways and sew a 1/8" seam. If the thought of sewing a tiny seam sounds crazy, you can cut your fabric wider and sew a larger seam. Just make sure the finished opening isn't too wide or narrow. Here's a link to a video about how use the bias bars per the product instructions.

After stitching down the long side, it's time to work the magic by sliding the bar into the pocket made. My strips are longer than the bar, this means I will need to press a section then slide the bar down and press again. The seam needs to be lined up in the middle of the bar then we press the seam to one side.

Below you can see the left side has not been pressed and the right has been pressed. The scrunched fabric in the middle is how I moved the bar down farther in the fabric tube. As soon as I snapped the picture the scrunch the fabric was stretched out on the bar and ironed.

Word of warning!! The bar gets hot so be careful when removing them from the fabric. This is something I forgot...I said a naughty word! After pressing the entire bias strip and removing the bar, the strip needs one more press. The picture below shows before and after pressing. You can spritz with water for a flatter strip. Starching isn't a good idea, it may over stiffen the fabric. The fabric need to be flexible in order to make the curves without puckers.

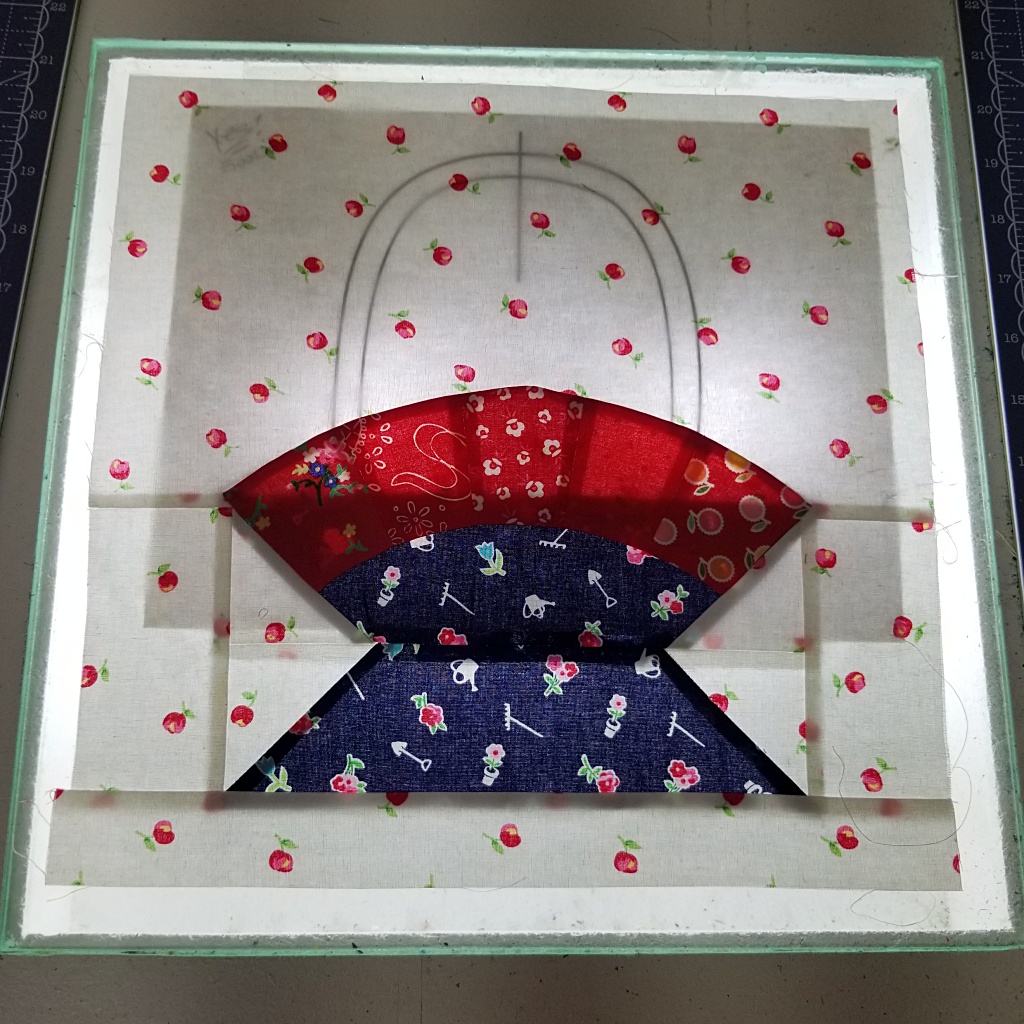
To apply the applique to the background fabric you may need a lightbox or window. If the background fabric is light in color and the applique template is dark enough you may not need a light source. Below is without a light behind the template and quilt block.

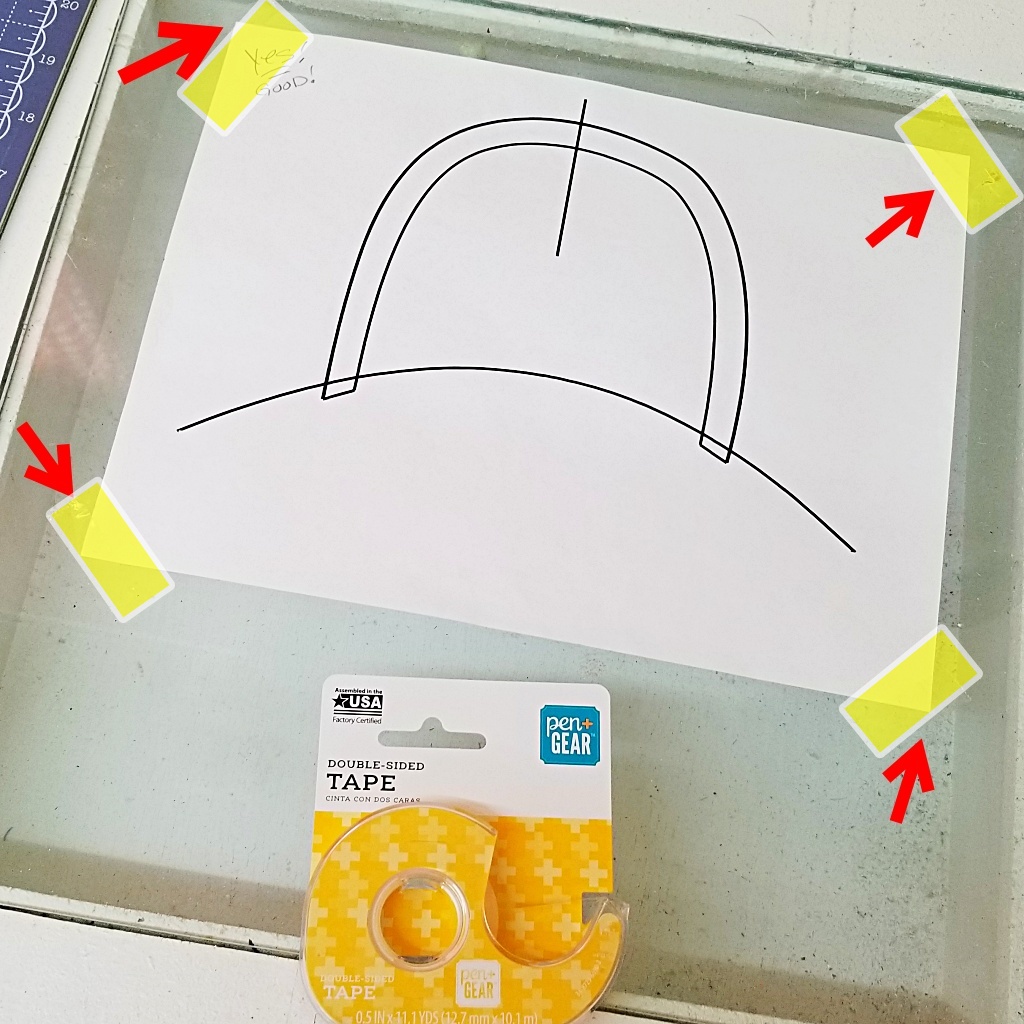
I have a lightbox built into my cutting table. It hides under my cutting mats. Mr. Podunk installed it using a piece of tempered glass. The light switch is inside the table.

It's much easier for my aging eyes see the dark lines on the template.
Another tip to save you time and money. To tape a template in place use clear double sided tape on each corner of your template paper. Place the tape on top of the paper. This stops the paper from shifting and now you can line up your block and it too will not shift.
Instead of pinning the bias strips in place before stitching I glued them in place using washable school glue. It works just as well as basting glue. You can even buy fine tips to fit the glue bottle if you want. I haven't had an issue so I use it as is. Plus those fine tips must be cleaned after every use. The original tip on this bottle doesn't clog like the finer metal tips.

It doesn't take much glue to hold the applique in place. A few little drops. But if you need more, go for it! If it makes a mess, it's okay. It'll wash out! Ask me how I know...yep I've made a mess with the glue on a previous quilt and it came out in the wash. Being careful not to touch the tape on each corner, I press the basket handle to dry the glue fast.

Now all that's left to do is stitch the handles in place. A teeny tiny blanket stitch is my go to for invisible machine applique.

And of course Invisble thread helps too. I love this stuff. It's expensive, about $10-$12, depending on the store. Worth every penny. It's softer and more durable than other brands. I've tested many and trashed many before finding Superior Threads Mono-Poly. It out preforms the suggested iron heat setting. It's not as shiny, so it's good at hiding in the quilt. It's softer to the touch. And last but not least it doesn't twist and curl under tension in my sewing machine.

Once the quilt is washed and dried the puckers and pokes in the fabric will disappear and so too will the thread. It will still be there, just less noticeable. The only reason we can see it now is because of the puckers and holes.

Now that the handles and basket tops are stitched into place it's time to start on the rest of the applique on the blocks.

Luckily when I started this quilt years ago I printed out the applique templates on Heat N Bond sheets. Yes, I'm mixing fusible applique and turned edge applique in this quilt. The stars and flowers would take a considerable amount of time if I did prepared(turned) edge. I would guess an afternoon, maybe more. So fusible it is!

But these won't all be done in a day. There's much to be done. Today I'll be picking wild blackberries and making a cobbler. Whatever is left will be frozen. The picking will continue every two days until the berries are gone or I tire of picking. There's also weeding to be done in the gardens. If the cucumbers and tomatoes ripen then they will need to be preserved. It's never ending this time of year. I'm looking forward to fall!

Pin It

These blocks are so beautiful, the striped fabric for the handles is perfect!
ReplyDelete