
Showing posts with label Prepared Edge Applique. Show all posts

Friday, September 6, 2024

The Twist🎵🎵

Hey Quilters!  What a fun few days I've had doing the twist while stitching this applique in place.
🎵Come on quilters...Let's do the Twist!🎵


And 🎵.Let's Twist again!🎵


For a little fun let's do the🎵 Peppermint Twist... Round and Round, up and down...one two three kick🎵


Yes, it was so  much fun while I was 🎵Twisting The Night Away!🎵
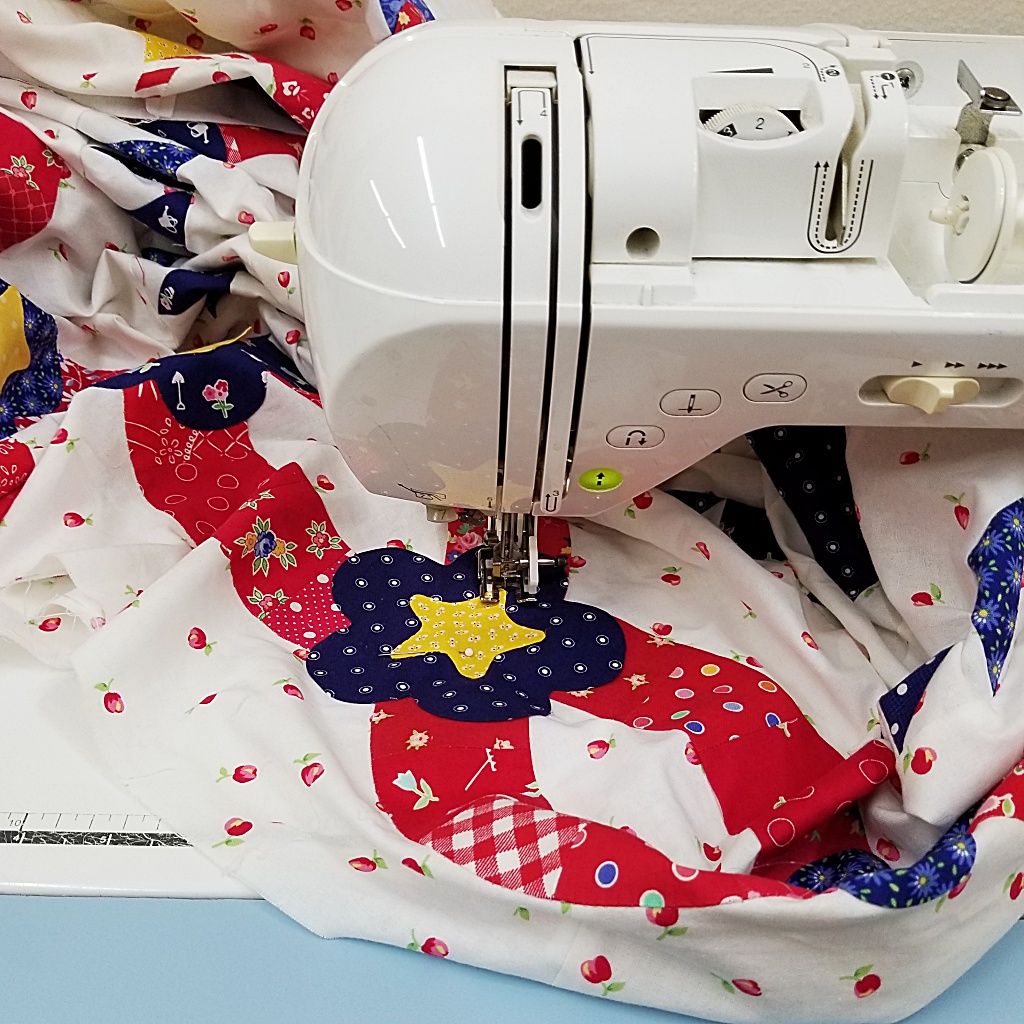

SHEW! What a fun workout!(sarcasm) but an ole gal like me can only do so much twisting.  My dance partner quilt top is getting quite the workout as well.  She's just a baby and too much excitement makes her a little frazzled. 


 After be-bopping around five or six stars it occurred to me there's an easier way to do the twist.  A real slap in the forehead moment.  I've known this for years.  Stitch together as much applique as you can before adding it to the quilt top. !!!SLAP!!!


Sure, I'll still need to stitch the blue flower in place but it's a little less of the fun twisting with the entire quilt top.


If I pull off the rest of the blue flowers and stars it will make it easier to stitch the red applique to the quilt top.  That's the new plan because  an old gal like me(55) can only do The Twist for so long and then she's ready for a lazy 🎵Tennessee Waltz🎵


By the way you can click on the song titles to listen/watch the music videos on YouTube. Enjoy!  If you're like me you might want to end with a good cool down waltz.


Pin It

Monday, August 12, 2024

Seeing Stars ~ Bumpkin Baskets Quilt

Star light, star bright, first star I see tonight, I wish I may, I wish I might,  have these finished by tonight.


The little stars have put a twinkle in my eye.  I'm loving it!  Only nine more to make. That's about two hours worth of work.  How do I know?  I timed myself yesterday.  Well...I didn't start a stopwatch.  I watched(listened to) two episodes of Mike and Molly.  During the two episodes, five stars were made.  Trying to speed up the process only made my time worse. So five and hour it is. 


You're going to think I'm a little crazy but I'll also be making the other plan of light blue circles for the center of the flowers.  


Sounds nuts, I know.  Once all the stars and circles are finished, the quilt can be laid on the floor and I can start playing with the circle and star options. All stars, all circles, every other, stars only in the corners.  And you never know, maybe I can use the leftover applique pieces somewhere else in the quilt. 

 As I looked at the picture below while writing this blog post I noticed how the flowers were nesting perfectly on the bottom of the red arches.


  Oh my goodness!  I did not plan this!  I could scallop the border by cutting away the fabric below the arches...that would be cute!  However, it would leave the quilt too small for my bed.  So, the struggle begins...the battle with me, myself and I.  Which one will win?  Only time will tell. 


This post has been linked up at
And
Hop over for more quilt inspiration!


Pin It

Friday, August 9, 2024

Applique Ideas

 The Bumpkins Baskets quilt is slowly coming to life and evolving along the way.  Below is one option for the final border applique.


And then there's the next option.


The original plan below was ditched when it came time to make those small cluster of flowers.  One big flower is easier and in my mind it looks better.


Some of the applique on this quilt is raw edge and some of it is prepared edge.  To make prepared edge applique some type of template is needed.  Normally I would use multiple layers of freezer paper to make the templates but not today.  The template below was made with No Melt Mylar Quilters Template.  It's sold in     18" x 12" sheets for around $6 to $7 at the local quilt shop, Joann's and of course Amazon.  I've been hoarding a couple sheets for years.  It's easy to store and forget under the cutting mat.  


The template material is smooth and slippery when trying to turn the edges under.  To stop the template from sliding a little basting glue is helpful.  I spray the back of the template, lay it on the fabric then cut about 1/4" away from the template.  


A watercolor painting pen filled with starch makes the turning process a little faster.


After ironing the edges into place, the template is removed.  The inner points of the flower need a little anti-fraying protection.   A very tiny amount of Aleene's Ok To Wash-it does the trick without being super stiff.  I've used this for years with no issues when stitching the applique by machine or by hand.


The hardest part of the process is deciding if I want blue or yellow in the center of each flower.  Maybe both?  What do you think?


I'm going to end the chat with a little real life photography.  Not so pretty.  I often wonder if every quilter is this messy.


Pin It
Related Posts Plugin for WordPress, Blogger...