Showing posts with label #quiltdoodledesignsmysteryBOM2017. Show all posts

Friday, September 1, 2017

~ Cutting it Close, August Blocks ~

Happy Friday Friends!  I'm happy to say I'm keeping up with the Quilt Doodle Designs 2017 BOM, putting the last stitches in the August blocks yesterday.  The theme of this BOM is Grandma's house.   This months blocks really hit home.  Both of my grannies canned everything they could.  One of them even made her own ketchup and butter!  Ok the butter I liked but the ketchup...Heinz will do for me.


Once again I've made a few changes to the blocks.  Turned edge applique for the Ball label would have been impossible for my skill level.  The double machine stitch worked out great.   It was slow going but worth every minute in results.  


The little tomato stems were also way to tiny for turned edge applique so once again I just took my time, outlined the stem with the double machine stitch and then filled it in with more stitches.  This took about 45 minutes.  But I think it adds some nice texture to the block.  If you decide to try this for yourself I should tell you I did use a sticky tear away interfacing on the back of the block.


Up till now all the blocks in this quilt remind me of my Grannie.  It was nice to add a little touch of Gramps in the quilt also.  My Gramps had several tractors, most of them were red Farmalls, but a green Tractor seemed to fit my in my quilt a better.  I left out one of the stripes on the tractor simply because I didn't want to make another.


A little double stitch for the steering wheel and grass...


.... and the puff of smoke...too cute!  All of the applique was secured into place using a teeny tiny blanket stitch.  Lori Holt's line of Aurifil thread was used for the bright colors and Superior Threads Monopoly was used on the gray and brown fabrics.  The black thread is Gutermans. 


The new block for this month was just released this morning.  You can find it and  the details for the other blocks by clicking here.


Thanks for stopping by my little spot in Podunk!

~ Lea Anne ~


Pin It

Thursday, July 6, 2017

Throwback Thursday ~ Old Technique revisited

While putting the recently finished Quilt Doodle Design 2017 BOM quilt blocks on the design wall this week I noticed some fabric shadowing in my blocks.  What's that?  It's when the darker fabrics show through the lighter fabrics on the front of the block.  Let's hang one on the window so we can get a better look.  You really can't see it at a distance.

So let's get up close and personal with my blocks.  The green arrow is pointing to the white seam allowance, which is good.  The red arrow is pointing to the colored fabric that extends past the normal seam allowance, which is bad.  The excess seam allowance should have been dealt with before attaching to the background fabric.  No need crying over spilled milk, all I can do is get inside the back and fix the problem.


   Most quilters these days think if you can't see it from a galloping horse then don't worry about it.  Honestly most of the time I think the same thing.  But I've put far to much time and effort into these appliqued blocks to let  the finished quilt be ruined with something that can easily be fixed in an afternoon.  There was a time back when I first started quilting that it was standard practice when doing applique to cut away the excess fabric on the back.  This would reduce the amount of fabric when hand quilting.  Once you had the back cut away you could fix any shadowing.  Most quilters no longer hand quilt so this technique has been eliminated.  And I personally think there's a little marketing going on here also.  You can buy products to sew or iron into your project in advance to help with shadowing, but it adds more bulk and cost.  And most designers just don't worry about how it looks, its all about selling more fabric and patterns and meeting tight deadlines.  Where do you think the galloping horse statement originated?  Now let me say, I altered this pattern which caused the shadowing.  In the original pattern the center was to be curved pieced and with proper seam allowance there would be no shadowing.  So the above statements do not apply to Cindy's wonderful free pattern.   With that being said let's open this baby up!


  I used my sharpest pointy scissors to poke a hole and start cutting.

  
Snip, snip, snip...it was not hard and went pretty quick.


Now that I'm in here there's two options.  Option one is to cut a large circle of fabric and slide it behind the seam allowance.  I'm using paper for demonstration purposes...I'm cheap!


It would be tucked up under the seam allowance and be carefully tacked into place.  


The second option and the option I chose is the old fashion way of dealing with shadowing.  Just cut away the excess.  I snipped a few of the stitches between two of the dresden blades to make it easier to start cutting away the excess.


This really is the fastest, easiest and cheapest way to deal with an unsightly little issue of shadowing.


TADA! Finished all twelve blocks while I watched the noon news.  


This will look so much better in the finished quilt.


 And I won't need to borrow the neighbors horse to look a my quilt and be happy with it.


The best thing about fixing the shadowing is now I have some pretty low volume scrap to add to the scrap bin.  A happy mistake indeed!


~ Lea Anne ~
Pin It

Monday, July 3, 2017

Two fun Mystery Blocks

Happy Monday Sweet Quilting Friends!  Did you get in some quality sewing time this weekend?  I love it when I can spend an entire day in my Studio.  It recharges me for whatever lies ahead for a few days.  This weekend I made the July blocks for the Quilt Doodle Designs Mystery BOM 2017.  While I've enjoyed making all the blocks so far, these two are my favorite.(I think I say that every month)


 The theme for the Quilt Doodle BOM is Grandma's House.  So each block brings back so many good memories of both of my Grannies and the simple pleasures of years ago.  


A few changes were made to the pattern again.  The main reason for changing most of the patterns is.... the pattern calls for raw edge applique which is much easier to make.  Since I'm doing turned edge applique I sometimes need to alter the pattern to make the process of making the block a little easier on me.  Take for instance the fence.  The original pattern calls for a few more pickets and the fence also covered the front door, it was all one big applique piece.  My fence has fewer pickets and 10 small pieces.   


After  making all the tiny pickets I was searching for ways to simplify the rest of the block. The window applique template was cut and ready to use when an epiphany hit.   As you can see below the fancy stitches on my machine are finally being used.  A simple scallop stitch to dress up my double stitched windows.  And since the entire door is exposed a doorknob was added by using another sewing machine fancy stitch. 


 The next change was the smoke stack.  Both my grandparents heated their homes with wood, so adding a little puff of smoke seemed like a good way to make this block a little more personal, it also added a touch of whimsy, don't you think?


The Singer sewing machine block really opened up a flood gate of memories.  The Podunk Pretties Studio has many old machines.  Not just any old machines but machines that belong to my mom, both grannies, and a great aunt.  There's been several machines passed down to me over the years.  Not all could stay, some have been donated and re-gifted.  My aunts, cousins, and a best friends machines have also passed through my studio.  And allof them have been Singers.  So when I saw the Singer logo on the applique...adorable!  Again some modifications were made to suit my applique technique.  The original pattern has 6 applique pieces, mine has 3.


The Singer Logo was a challenge to do by machine.  It probably would have been quicker by hand or embroidery machine, but I was at the sewing machine so I went with it.  The little buttons are part of the original pattern.  My button color choices aren't sitting well with me.  Might need dig a little deeper in the button stash.


Can you believe it, I'm almost caught up on this mystery?  All that's left to do is stitch the dresdens to the background fabric.  The plan is to get that done today, but it's so sunny outside and there's blackberries to pick.  See that is why I get behind.  Oh well whatever happens...happens.  Are you doing the Quilt Doodle Mystery?  If not, it's not to late to join in the fun.  You can get all the information about these two blocks and the previous months by clicking right here.


Pin It

Tuesday, June 27, 2017

Quilt Doodle Designs 2017 BOM

Hi-diddly-O happy quilters!  It's been so long since my last post, but I assure you I'm still here and still just as obsessed with quilting as ever.  So come on in, grab a cup of your favorite giggle juice and have a seat while I share what I've been up to lately.  Since all the blocks have now been released for the Quilt Doodle Designs free 2017 BOM it was time to get my hiney in gear and get them done.  I've never been able to keep up with BOM's.  This year I'm determined to give it my best shot.


 Over the last week the studio has been a complete mess as I made the blocks.  Tiny little pieces of freezer paper pieces all over the floor.  I was doing my best impression of Eleanor Burns...just get rid of that with a quick toss over the shoulder.  The freezer paper applique was a little bit harder than expected.  In order to make some of the blocks changes were made to make it a little easier on me.  Cindy from Quilt Doodle Designs had designed them for raw edge applique.  When doing raw edge you can have tiny sharp points.  Those tiny sharp points are almost impossible (for me) freezer paper applique. 


Now I'm going to admit one major change that had nothing to do with points.  The theme of this BOM is... things you would find at grandma's house.  Well one of the blocks was Lilacs.  My grannie had lilacs but her hummingbirds and feeders were EVERYWHERE.   So I decided to change that block to fit my grannies house.


These blocks are all 100% machine stitched.  No handwork.  The applique was done using a teeny tiny blanket stitch and a collection of Lori Holt Aurifil thread that matched her Calico Days fat quarter bundle fabric used for the blocks.


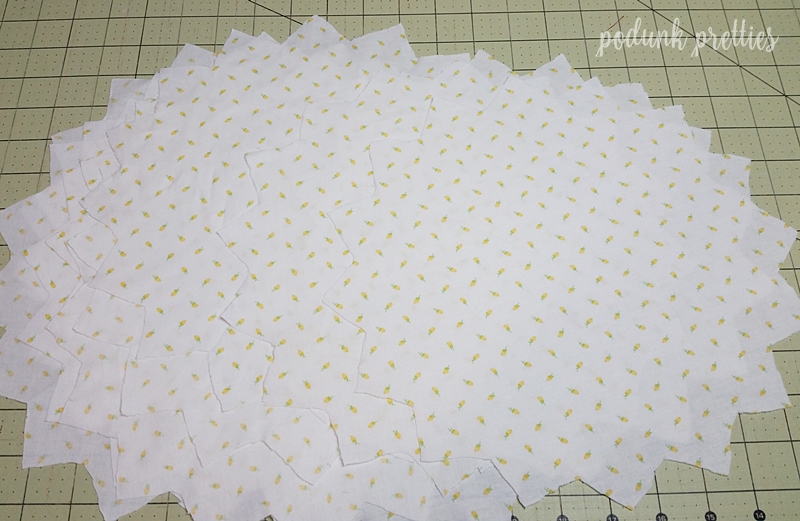
Calico Days line of fabric is one of my favorite lines of fabric.  However I've a complaint about how Lori is doing her prints these days.  Instead of having 42 prints that can be bought in yardage she designs 3 panel pieces, each having 8 fat eighths printed on them.  I DON'T LIKE THIS.  I WANT YARDAGE IN ALL.  So I'll no longer buy any line that doesn't allow me to purchase all prints in yardage.  Why you ask?  Because I needed more of the small white prints used for the applique background.  In order to get them I needed to buy 3 yards of fabric but only getting a fat eighth of each of the fabrics I needed and then 7 fat eighths of prints that I didn't need.  So I decided to buy a different print.   The little yellow rose buds below is what I've decided to use for the centers and possibly the background fabric.  What do you think?


I think it's adorable.  Wishing I could get in several colors.  Now let me tell you a little secret...shhh... Lean in close and swallow your coffee.... It's Walmart fabric,   can you believe it?  Paid $2 a yard!  You betcha I bought the entire bolt!


~ Lea Anne ~


Pin It

Monday, May 22, 2017

Little by Little

Happy Monday Morning!  It's another beautiful spring day here in Podunk.  I love these crisp chilly mornings when the windows have been left open the night before.  The smell of sweet honeysuckle vines goes perfectly with my morning cup of coffee while snuggling on the couch with my favorite quilt.  Not even the morning news programs can shake that feeling of sweet serenity.


It's gonna be another busy day of working in the gardens so these pretties on my design wall will just have to wait.  Can you tell I love dresden quilts?  One of these days I'll count just how many I've made over the years.  Each one uniquely different.  The dresden block is such a versatile and fun pattern that works well with my love of flowers and gardening.  The bright dresdens above are part of a free block of the month by Quilt Doodle designs.<---click there for more info.    Every month a new applique for the center is released.  It's not to late to join in but you'll need to purchase the first four months at a very reasonable price.  The rest of the year is free as long as you get them the month they are released.  Cindy's pattern are very well written and easy to follow.  And for the beginner she has added some in depth online tutorials on her blog.  She much more talented than I when it comes to curved piecing, so I had to make a slight change in my version of her pattern.  If you would like to see my alteration of appliqueing the center using her template click here.


The pastel dresden blocks are from a pattern called Sugar ~n~ Spice.  You can read more about the pattern and my alterations to this pattern by clicking here.
The little yo-yo's were time consuming but add a stunning effect to the dresdens.


Hopefully there will be some time at the end of each day this week to work on both of these projects.  Plus there's a new patriotic quilt I designed that I'd like to make a test block.  If I'm going to get all this accomplished I better get moving.  Happy Stitching, See you in a few days!


Oh I almost forgot to mention Design Wall Monday Linky party has a new host.  You can find the new party hosted by Judy Hansen over at Smallquiltsanddollquilts, hop on over link up or just be inspired.

~ Lea Anne ~
Pin It

Friday, January 27, 2017

Quilt Doodle Designs Mystery 1&2 ~ No curved piecing Tutorial

Hello quilting friends!  I've got something to share with you today that is so stinkin cute and easy.  Blocks one and two of the Quilt Doodle Designs Mystery BOM 2017 are almost complete.  All I need to do is decide on a background fabric.


Since this mystery is spread out over several months I've plenty of time to find the Pur-fect fabric to put behind the dresden blocks.  


Before starting the tutorial let's talk about the pattern.  It's a free BOM from Quilt Doodle Designs.  But don't take the word free for granted, these two blocks are only free for one month, and that month is just about over.  Once Cindy posts the new blocks for February these two will no longer be free but on sale in her Crafty and Etsy Shops.  So click right here to be taken to the free PDF downloads.   Maybe you're not interested in making this quilt.  Well don't let that stop you from browsing the huge selection of cute reasonably priced patterns for sale, and I saw some free ones too!  


Designing and writing quilt patterns is very time consuming.  So I want to thank Cindy for the sharing her talent with us at no cost and allowing me to share my alteration of her pattern with you.

 No Curved Piecing Tutorial

In the original pattern this center circle is pieced. (Click here to see Cindy's tutorial for piecing the center.)  I'm not a fan of curved piecing, it's a skill I've yet to master.  Today I'll share with you how to use the templates provided in the free pattern to make an inexpensive applique template for the center circle.


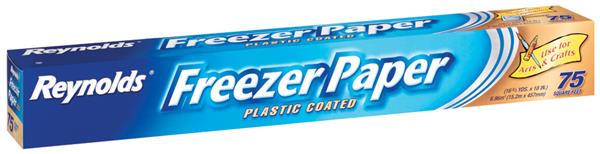
The first thing you'll need is Freezer paper.  Notice on the left hand side of the box.  An advertisement for use in arts and crafts.  Now if your freezer paper doesn't say it can be used for arts and crafts, its still okay to use.   


You'll also need some type of starch.  I use Sta Flo concentrate because it's cheap.  But any type of starch or sizing will work.


We've got our supplies, let's make an applique template.   I also made my pig and kitty applique using the scraps of freezer paper leftover from the center circle.

1. Cut a piece of freezer paper about 16 inches wide. 
2.  Next we need to cut it into 4 sections.  I did this by folding it in half and then in half again.  
3.  Using my square up ruler to cut away the folds.  This will give you 4 equal sizes.  
4. From this point on we will be working with the shiny side down.


Pre-shrinking the freezer paper is necessary to keep your templates from shrinking as you use them.  
1. With shiny side down spray each piece of paper with water. 
2. Then with a medium heat iron(wool setting), iron each piece separately to your ironing surface.  Yes they are going to stick to your ironing table.  Don't worry, there will be no residue left behind when you remove them.  Sometimes this shrinking process causes the paper to wrinkle.  No worries here either.  Just peel it off, don't spray with water, iron them separately again.  I've never been able to get them completely without wrinkles.   
3. Next peel up two of the papers.  Lay one of them on top of the one still stuck to the table.  Iron it. Repeat with the third piece. 
4.  You have 3 layers ironed together.  Allow them to cool before removing.


1.Next cut out the template provided in the pattern.  Cut outside the outer circle.
 2.Glue this circle to the non shiny side of the layered freezer paper.  I used quilt basting spray but any glue will work.  
3. Then carefully cut on the seam allowance line.  You now have a usable applique template.  
4. Iron the template shiny side to the wrong side of your circle fabric.  Cut 1/4 inch away from the template.  You might need to iron with the fabric on top.  Just make sure it's shiny side to the wrong side of your fabric.
5. Using a paint brush apply starch to the seam allowance.  
6. Then iron the seam allowance over onto the template.


1.Remove the fabric from the template and finger press in half and then in half again.  As you can see in the picture below I only pressed the very edges.  Use these pressing marks to line up with 4 seams on your dresden.  This will center the circle onto the dresden.  
2. flip over your circle to the back and add a few dots of  Roxanne's basting glue to temporally hold it in place.  
3. Turn it back over and line up your marks with 4 of the seams.  
4. Press with a medium iron to dry the glue  Elmer's washable school glue is a good substitute if you don't want to use Roxanne's .  Pinning it in place will work also.


See wasn't that easy?  In past projects I've used one template as much as 20 times and it still sticks.  Freezer paper applique is cheap and one roll will last a long time.   Saving money in one area of quilting allows me to spend more in other areas like thread and fabric.   To stitch my circle in place I used Invisifil 100wt thread.  It's a little more expensive but lasts forever.  This super fine thread melts into the fabric and is barely noticeable.


Just because it's fine doesn't mean it's not durable.  When I bought my first cone of thread I gave it the pull to break test.  OUCH!  This is some tough stuff. It nearly cut my finger.


Just look at those close up results.  


For the pig, kitty and embroidery I used Aurifil 50 wt.


It doesn't melt in quite as nicely but it was just the look I was after.  The embroidery work was done on my sewing machine with those fancy stitches we pay for and never use.


To stitch down my little critters I used a tiny blanket stitch and went very 
S-L-O-W.  Not much room for error!


But the results are Marvelous.


Well that's it, I hope this inspires some creative stitching.  

~ Lea Anne ~


Pin It

Related Posts Plugin for WordPress, Blogger...