Showing posts with label tutorial. Show all posts

Monday, June 23, 2025

Another Mini Circle Quilt

 Hi Quilty Friends!  Y'all had to know when you first saw this scallop quilt stand a few months ago that I would eventually make a mini quilt with my blog logo.  

Over the years my logo has been updated a couple of times, but the original logo was my favorite. 


I played around a bit with the design and how I would make the applique letters.  My thought was the bigger the letters the easier they would be to make.  Nope!


Plan B: print the letters of my logo onto the fabric with my inkjet printer, then applique the cherries. A quick dig in my spare parts applique tackle box produced everything I needed for the applique.  The pieces were different sizes but that's okay.


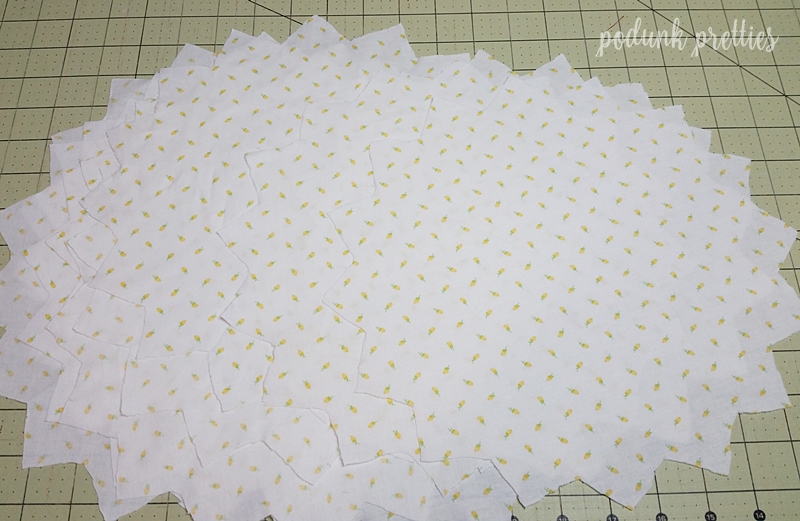
Next, I needed to make the background fabric larger because I printed "podunk pretties" from my home printer.  The printer only uses a standard sheet of paper, 8.5 x 11, and my circle needs to be 10 inches.  So, I added a 2.5" strip to each side.


Within no time the quilt sandwich was made and was ready to quilt.


I even quilted around every letter to try to make it look appliqued.


It took all week to get this little gal finished.  The binding was added Sunday afternoon.  Well worth all the trouble!  I love it!


The first circle quilt I made can be found here with information to create your own Mini Dresden quilt.


And the other one, click here for the free pattern.


Pin It

Friday, June 13, 2025

Love Blooms 2.0 and a Lazy Tutorial

Remember the scraps I pulled a few days ago?  And do you remember the finished quilt the day before?  All I can say is I have absolutely no will power when it comes to the dresden block and
HOW CUTE IT THIS?!!


This may seem like an impulse project but it's really not. It too is a UFO because the black scallop quilt stand was purchased in December at my local quilt shop called Back Door Quilts.  If you would like to purchase one of these quilt stands you can find it here on their website along with several circle wool applique patterns.  

Since I'm allergic to wool and the applique patterns aren't my style, I decided to design a few patterns of my own.  Stay tuned for at least three more in the upcoming months. Don't get me wrong the patterns for sale in the shop are cute just not my kind of cute.  Below is an example of two of the patterns in the shop, cute!


By the way if you purchase this stand you will need adhesive magnets to make the mini quilt stick to the scallop.  I'm using two-sided tape for now.  I didn't see the magnets on their website but I called the shop and they said they have them in stock.  So, you could call them to place the order if they haven't added the magnets to the website.  I'm in no way affiliated with this shop other than it's a great place to shop!


I love this project and the Love Blooms quilt so much I decided to share both with you.  This won't be a real tutorial.  We'll call it a lazy tutorial.  You will need basic quilting knowledge.  I'm giving measurements and cutting information only.  If you don't know how to make a dresden quilt block or make applique, there is a gazillion tutorials for both via a Google search.  I made one for raw edge applique a few years ago and it has over 100,000 views!  You can watch it by clicking here.

 All the measurements for the tutorial below are in inches. The yardage is estimated by the EQ8 program, and I round up for UH OH's. Use a quarter inch seam allowance. Press however you like.  I press to the dark when possible.

The ruler I used was EZ Quilting Jelly Roll Ruler Mini Dresden.  I don't know if any other ruler will work.  I purchased mine at Joann's a couple years ago but it can also be purchased many places online.   Here's a link to one on Amazon.  I'm sure if you search you can find it cheaper.  


For the center of the Dresden, I used Heat and Bond Lite to make raw edge applique.  You could easily make it turned edge if you like.  The choice is yours.  Below is a picture of the FREE PDF with the applique templates. Before printing make sure your printer is set to "actual size" before printing.  After printing, measure the 1" square to make sure it printed correctly.  This PDF can be used for both the Circle Love Blooms 2.0quilt and the full Love Blooms quilt.  


 Love Blooms 2.0 Circle Quilt 

(1) 12 x 12 Background fabric
(1) 12 x 12 Backing fabric
(20) fabrics for the Dresden blades.  If using scraps, they must be at least 2.5 x 2
(1) 4 x 4 white for the center of Dresden.
(2) 2 x 2 prints for the hearts 
The binding NEEDS to be cut on the bias.  37 x 2.5

After quilting your mini quilt you will need to trim it to a 10 inch circle.  I used a bowl from the kitchen.  Then bind it using your favorite method.  Mine was 100% machine binding technique.  Sew to the back first then stitch it down on the front.


Love Blooms Quilt Basic Instructions


Cutting Instructions for Dresden Blocks

PDF Template Download (same link as above)

(5) 10 x 10 Background fabric
(100) fabrics for the Dresden blades.  If using scraps, they must be at least 2.5 x 2
(5) 4 x 4 white for the center of Dresden.
 (1) red 5 x 5 and (1) pink (5 x 5) or super scrappy (10) 2 x 2 for the hearts

After stitching the Dresden to the background fabric, trim to 9.5 x 9.5


Cutting for the pieced blocks

White/background estimated by EQ8  2yds.
(4) 9.5 x 5.5
(4) 5.5 x 5.5 corners of quilt
(16) 2.5 x 3.5
(24) 3.5 x 3.5
(104) 1.5 x 1.5
(64) 1.5 x 2.5

Binding

(4) 2.25 x WOF- I used 2.5 strips

Make (4) of the blocks below. 


Make (8) of the bocks below


Assemble the blocks as shown below. Finishes at 37 x 37.


That's it for today! 


Pin It

Tuesday, August 18, 2020

~ Hunkering Down Quilt Finished ~ Free Pattern ~

 Every quilt has a story tell, some more interesting than others.  Until I started publishing patterns most of my quilts were made out of emotions.  It could be something as simple as a new baby in the family or as complicated as a terminal illness.  Honestly I like the quilts constructed with emotions much better.  They not only are made with love but they become more precious to me and the receiver due to the emotion that went into the design and every stitch.  


My Hunkering Down Quilt falls under quilts made from emotion only because of what is going on across the globe.  The real story behind this quilt is far more simple and happy.  But before we get into the quilt story lets take a look at the finished quilt.  Below is a closeup of the quilting.  With so much white space I had to quilt it to death.  It just wouldn't have looked as nice with something simple or an all over design.


The backing is pieced with the same yellow and white used on the front of the quilt.   A simple label was also made from the same fabrics and stitched to the quilt back before quilting.  This is my new favorite way of adding a label.  The simple design is quick and so is hand writing the information on the label.  And in order to remove this label a person would need to damage the rest of the quilt.  I like knowing my beauties will always have a little bit of history attached to them for future generations.


But a word of warning before you sew your label onto the backing.  Check your spelling, several times.  I read this a blue million times.  I even sent my best quilting buddy a picture of it so she could look it over for errors.  We both overlooked the misspelled Pademic Pandemic.   Oh well, nothing is perfect and it adds just a little more history to the quilt.


Speaking of history lets get back to the history this quilt on Podunk Pretties.  It's simple really.  Someone on Facebook was looking for the pattern for this quilt block.  She only shared a cropped image of the block.   I searched high and low looking for a quilt pattern or block. 


 No luck.  So I decided to draft it up in EQ8 and write a tutorial so this nice lady could make the quilt.  I had no intentions of making the quilt myself.  My single block made for the tutorial was going to be made into a pillow for my bed.  Well I fell in love with the block and the fabrics and YADA YADA YADA we have a quilt called Hunkering Down.  You can find the Hunkering Down Block tutorial here.


The story continues....Yesterday I shared my Hunkering down quilt on Facebook and Instagram.  A man shared my post on Facebook.  A man I didn't know, had never heard of, I found this odd so I had to check out his FB page.  His FB looked pretty normal, nothing suspicious....Like I know what I'm looking for....HAHA!  An internet detective I am not!    
 Look at his title for my quilt post.  HMMM....who is this fella and how is he connected to MY quilt.  Yes I'm stressing because I felt like he was saying this was his quilt.  And for that Jeremiah I owe you an apology, I'm Sorry. 


He will be the recipient of the quilt made by the  Nina Woodgate,  who posted the picture wanting help finding the pattern many weeks ago.
The great thing about yesterday's interaction with Jeremiah is he shared where the original quilt can be found.  My excitement immediately turned to worry of copyright infringement.  But as before there was no need to worry.  I'm not infringing on anyone's pattern.  Thank goodness.


So here she is in all her glory the original quilt called Summer Winds.  Summer Winds is the name of a quilt block pattern but not this one.  It was the quilt block they thought looked the closest to this one.   But I have the book they used as a reference and it is not the same block.  If you would like to see the entire article and quilt history, you can find it by clicking here.  


Shew!  we can finally get to the measurements for finishing your quilt. This is basic information.  Some math will be required on your part.  WARNING  Yardage calculations are done by the EQ8 program.  I rounded up the estimates to the nearest whole number.  The calculations are for the entire quilt top, blocks, borders, yellow binding.as shown in the image below.  If you want a white binding like my quilt add 1 more yard to the white.  Backing is separate and calculated using 42" wide fabric.  It is also calculated with overage for longarm quilting.  If you scroll down you will see the entire back of my quilt to give you an idea on how to piece your backing.  Mine is 2 colors because I ran out of yellow.

There are some uncommon cuts in the borders.  You can round these up or down to suit you.  I prefer exact measurements but it's your quilt do as you like.


White Fabric  7 yds.

A    (9) 12.5" squares
B    (3) 18 3/16" squares,  make two diagonal cuts from corner to corner on each(your cutting an X on           the square.
C    (2) 9 5/16" squares, cut from corner to corner ONE TIME
D    (2) 3.5" x 68 3/8"
E    (2) 3.5" x 74 3/8"
H    (2) 6.5" x 76 3/8"
I     (2) 6.5" x 89 3/8"

Yellow Fabric   3 yds.

F   (2) 1.5" x 74 3/8"
G   (2) 1.5" x 76 3/8"
 
Backing   8 1/2 yds.


Happy Stitching! 


Pin It

Wednesday, February 6, 2019

~ Making Mini Design Boards Tutorial ~

I'm a day late but it's done finally.  Due to my busy week and my forgetful mind I forgot to take pictures as well as the video.   In my spare time this week I'll try to figure out how to pull pictures from a video, if it's even possible.  It might be just as easy to make another design board.  Video editing is new to me so a lot goes into making these short videos.  Bare with me as I learn this new skill.  


#quiltingtutorial #quiltingtips #podunkpretties

Pin It

Thursday, July 6, 2017

Throwback Thursday ~ Old Technique revisited

While putting the recently finished Quilt Doodle Design 2017 BOM quilt blocks on the design wall this week I noticed some fabric shadowing in my blocks.  What's that?  It's when the darker fabrics show through the lighter fabrics on the front of the block.  Let's hang one on the window so we can get a better look.  You really can't see it at a distance.

So let's get up close and personal with my blocks.  The green arrow is pointing to the white seam allowance, which is good.  The red arrow is pointing to the colored fabric that extends past the normal seam allowance, which is bad.  The excess seam allowance should have been dealt with before attaching to the background fabric.  No need crying over spilled milk, all I can do is get inside the back and fix the problem.


   Most quilters these days think if you can't see it from a galloping horse then don't worry about it.  Honestly most of the time I think the same thing.  But I've put far to much time and effort into these appliqued blocks to let  the finished quilt be ruined with something that can easily be fixed in an afternoon.  There was a time back when I first started quilting that it was standard practice when doing applique to cut away the excess fabric on the back.  This would reduce the amount of fabric when hand quilting.  Once you had the back cut away you could fix any shadowing.  Most quilters no longer hand quilt so this technique has been eliminated.  And I personally think there's a little marketing going on here also.  You can buy products to sew or iron into your project in advance to help with shadowing, but it adds more bulk and cost.  And most designers just don't worry about how it looks, its all about selling more fabric and patterns and meeting tight deadlines.  Where do you think the galloping horse statement originated?  Now let me say, I altered this pattern which caused the shadowing.  In the original pattern the center was to be curved pieced and with proper seam allowance there would be no shadowing.  So the above statements do not apply to Cindy's wonderful free pattern.   With that being said let's open this baby up!


  I used my sharpest pointy scissors to poke a hole and start cutting.

  
Snip, snip, snip...it was not hard and went pretty quick.


Now that I'm in here there's two options.  Option one is to cut a large circle of fabric and slide it behind the seam allowance.  I'm using paper for demonstration purposes...I'm cheap!


It would be tucked up under the seam allowance and be carefully tacked into place.  


The second option and the option I chose is the old fashion way of dealing with shadowing.  Just cut away the excess.  I snipped a few of the stitches between two of the dresden blades to make it easier to start cutting away the excess.


This really is the fastest, easiest and cheapest way to deal with an unsightly little issue of shadowing.


TADA! Finished all twelve blocks while I watched the noon news.  


This will look so much better in the finished quilt.


 And I won't need to borrow the neighbors horse to look a my quilt and be happy with it.


The best thing about fixing the shadowing is now I have some pretty low volume scrap to add to the scrap bin.  A happy mistake indeed!


~ Lea Anne ~
Pin It
Related Posts Plugin for WordPress, Blogger...