Showing posts with label HST. Show all posts

Monday, April 15, 2013

Monday madness

Making a little progress in a couple different areas.  My design wall hasn't changed much because I took Saturday off from the Studio.  Basically I just sat around and watched TV and napped, with short little bouts of hand stitching.  
 Six blocks stitched and six to go!  Half way there!
 Today before I do any stitching I must get the inside of the closet painted.  Ross is bringing home the new shelf and rod today after work, so I gotta be quick!
And then its time to paint the ugly furniture
The top part of the hutch is sanded and  primed
Don't look to closely at the "Man Cave"  its a mess.  Pretty sure that I'm doing more than the speed limit in here....
Well I must run...the clock is ticking..tick-tock...tick-tock....Ross will be home soon!
Until next time "Quilt out of your comfort zone!"
Lea


Pin It

Wednesday, April 10, 2013

Scraplique

Between housework and putting up the trim in the spare bedroom I managed to get 2 scrappy blocks finished.  This technique of not really caring if it matches or not is great!  It makes me cringe to remember how many little pieces of fabric I threw away when I first started quilting. 
 Of course I chose a quick method of applique, fusible machine applique.  Makes thing just so easy!  And with Invisafil 100 wt thread the stitching doesn't take over the block.  

Now I save everything.  Probably pieces that I should toss out.  These will go in the baggy of bits and pieces.  Does a woodworker save sawdust?  Or a mechanic broken parts?  
I also wanted to share with you a free BOM pattern that I found via Pinterest.
Its in dutch and english.  If you get to looking around this site there's many free patterns.  Just go here and scroll down a little bit and you'll find a link to each part of the quilt.  This BOM just finished up this month.  Isn't it cute!?
Here's a picture I stole from the blog...Yummy!
Until next time "Quilt out of your Comfort Zone!"
Lea


Pin It

Monday, April 8, 2013

Design Wall

Hope everyone had a wonderful weekend!  My weekend was spent playing with all of my HST's.  I came up with a whimsical pattern that will include scrappy applique.  Its kinda a spin on Aussie quilting/ Kay Fasset/Piece-o-Cake.  Seems that style of quilting doesn't require a lot of matchy-matchy.  
 All of my sashing pieces are made.  Now for the corner blocks.  
 My very technical way of choosing HST's is to throw them all in a bag and shake. I started with over 700.  Not sure how many are left in the bag.   Another quilt,  maybe two!
I used quite a few in my Basket quilt that still needs a border and a name.  The middle seems so busy that I might just keep the border simple.  A small blue border with a larger yellow border to finish.  
I'm linking up with Judy over at Patchwork Times.  Jump on over and see what others are working on, tons of inspiration!
Until next time "Quilt out of your Comfort Zone!"
Lea


Pin It

Thursday, August 23, 2012

Piddling around....

I spent most of yesterday cleaning and rearranging the studio.  Today it was back to the sweat shop!  I found my HST project that had been laid aside...
...seeing these again inspired me to look through patterns and the internet to find new ways to use HST's.  Well from there I came up with a plan which involed more applique than HST's.
 
After all that work I needed a break.  Snapped a few photos of the flowers that are finally recovering from the horrible drought.


Until next time ...Quilt out of your comfort zone!

Lea Pin It

Saturday, May 26, 2012

Hst Paper Method

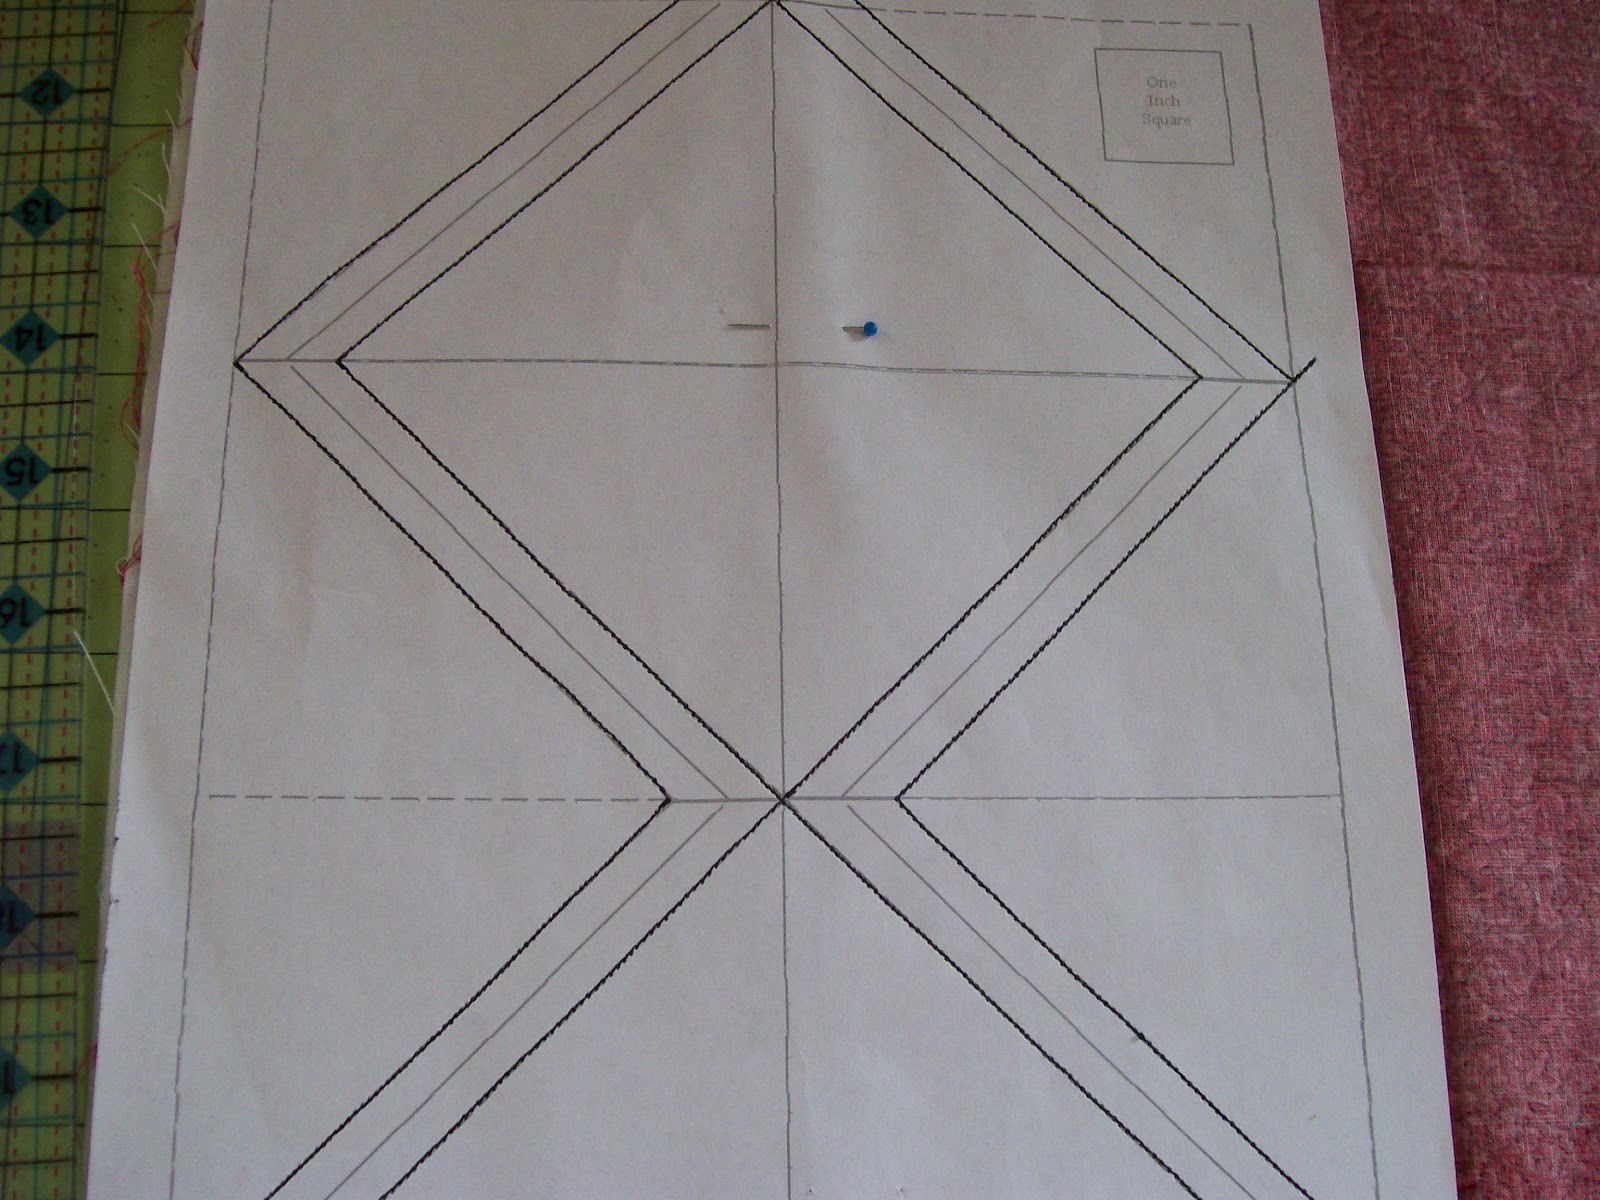
Normally I dont use paper piecing for making HST's.  But I found these papers online that can help me teach my newbies class to make them.  You can find them here to print.  Later in the week I'll be posting a a pdf pattern for Summer Stars quilt that I designed in EQ7.  Its beginner friendly and goes together rather quickly with HST papers.  Of course it can be made using whatever method you choose.  I made these today in about 10 minutes.

 Start by printing out paper and pinning it to 2 pieces of fabric that are right sides together
 Lower your stitch length to about 1.8, change your foot to an open toe and sew on the dashed diaginal lines.  When you get to a corner put your needle down, turn and keep sewing on the dashed line. 
It should look like so.....

Trim off the outer edges(solid lines)
 It should look simular to this
 Now dont cut on the diagonal yet.  Cut the 90 degree lines first!  And then you can make that angle cut.
 The one on the right is the one I cut on the diaganal first...OOPS
And look!  Super easy and fast! Another tip;  leave the papers on to press to the dark.  It gives a much nicer seam with no stretching of fabric.  tip 2; leave the papers on till your ready to piece the blocks.
Pin It

Wednesday, May 9, 2012

Playin Catchup

Procrastination is something I do well.  Letting this project get 3 months behind was an easy thing to do.  Over the weekend I decided to play the catchup game.  These fabrics were an impulse buy over a year ago.  Totally out of my comfort zone with the color and print.  Things are coming together quite nicely.  Now to figure out how I'll set them in a quilt when all 12 are finished.  An on point settting is jumping out at me just because it's more of a challenge(well for me it is..HEHE)


But now I'm on top of the procrastination problem, or so I think.  Thinking ahead I cut out several extra squares for the next few months!  Now lets see if they get sewn together on time.  Its a great little sew along that is really simple and easy to follow.  There's still time to join in if you interested you can find it here.  

Pin It
Related Posts Plugin for WordPress, Blogger...