Showing posts with label Pam Kitty. Show all posts

Saturday, February 16, 2019

~ 15 Minutes of Cleaning ~

It's that time again, time to pull out my two favorite little boxes of fabrics.  These two boxes of  fabric have produced some really cute projects over the years.  I'm not quite sure how but the amount of fabric in them seems to multiply.   So this morning I decided to do a 15 minute cleanup of the boxes before tackling anything else.


 Several pieces of odd and not so cute fabric were tucked into my cute mini stash, so those have been removed and this is what is left.  Looks like my 15 minute plan could take a tad bit longer.  That's okay, I can play with cute fabric all day.  


With the odd and not so cute fabrics removed I can now see there has been some progress.  These were stuffed to the brim about 3 years ago.  So if my calculations are correct it will only take about 9 more years to use up all these fabrics!....LOL!


Now it's time to sort through the smaller scraps from the boxes.  I know some of you see this as trash but I see it as pretty little applique and string quilt blocks.  If I can put a stitch in it, I keep it.  Well to tell the truth even if I can't, I still keep it for making rope rugs.


 Oh this heaven, so much color.....sigh.....cleanup has come to a screeching halt.  Yep it's playtime!  A little project to let the creative juices flow.  This is what quilting is all about.  I'm in my zone...this is going to be a fun day!


And so it begins with a little added piece of cherry fabric pulled from the large scraps bins.   What's a quilt without cherries in it somewhere? I mean really, did you think I could leave out the most important part, CHERRIES!   


The 15 minutes of cleaning turned into an hour, and I now have a bigger mess than when I started.  But it's a fun mess that will end with a cute little quilt.  Am I the only one that gets inspired when cleaning?


#15minutecleanup #lakehousedrygoods #podunkpretties

Pin It

Monday, September 3, 2018

~ Save the Bees ~ Block 2 ~ GIVEAWAY! ~

***GIVEAWAY CLOSED***
Happy Monday Sweet Bee Lovers!  I'm super excited to share my Block 2 of the Save the Bees BOM.  Once again my fabrics are from my scrap box of Lakehouse Drygoods.  


This month I thought I would try something a little different with the stitching.  It's not a drastic change but it is out of my comfort zone a little bit.  On block 1, I used gray thread to stitch down and outline the bee.  The rest of block 1 I tried to match the thread to the fabric.  

Block one

This months bee is also outlined in gray.


But this month I decided to use a darker thread for ALL the applique instead of being so matchy-matchy.  The thread I choose for the flower and leaves isn't quite as bold as the gray around the bee but it is darker and stands out a bit more than my usual style.


It really makes the leaves and stems stand out.  All of my stitches are machine stitched.  A tear away sticky stabilizer was used on the back to reduce puckering.  If you don't have stabilizer you can use newspaper, tissue paper or copy paper.  If you have a little quilt basting spray it helps to hold in place but not necessary.


Now for a word of caution.   Even though I know how to make half  rectangles, I still made a biggie mistake.  I had the music blaring, just singing and stitching not paying attention and as soon as I made that first cut it hit me...UGG...I stitched them wrong....BOO-HOO-HOO.  Well at least it was only one cut, I picked out the stitches on the rest. 


If your just finding out about this BOM and would like to join you can find all the information you need to get started over at Jacquelynne's blog by clicking here.  Your blocks can be share on social media using #SaveTheBeesQuilt and #SaveTheBeesBOM  You can also join and share them in the Jacquelynne's Facebook Group here.


The prize for September will be a copy of the Carpenter's Apprentice pattern courtesy of EvaPaige Quilt Designs and Clearly Perfect Slotted Trimmers courtesy of New Leaf Stitches.


Make sure you visit all the bloggers for block inspiration and to enter the giveaway on each blog.  That's right you have multiple chances to win this awesome giveaway!  GOOD LUCK!  Open to everyone from everywhere! Giveaway ends September 9th 10 A.M. EDT


To enter the giveaway on this blog.  All you need to do is click on the blue button at the end of this post  that says "Add Your Link".  It will look like this but smaller.
Just add your name and email address.  Leaving all other fields blank.   Your email not be visible to anyone but me.   
 Leaving a comment in the comments section of this post will not enter you in the giveaway but you can still comment!  

~ Lea Anne ~

Pin It

Wednesday, August 1, 2018

~ Love is in the Air ~

Yes it's true, my little ole heart is going pitter-pat.  Flying by the seat of my pants with this quilt design has let the creativity flow.  The design layout has changed several times, I think it might be finished evolving.   


It all started with this little 5.5" Dresden Block.   You would think by its tiny size that it was a pain to make, but really it wasn't. If you can make a normal 12" block you can make this.


Fussy cutting is fairly new to me.  In the past I would avoid it at all cost.  It just seemed so tedious.  Well what was I thinking?  The fussy cutting has taken the simple design from the cutesy little ...awe...   To a big WOW!  


As usual there's a few quilty rules being broken.  Fusible and turned edge applique techniques are used in this project.   I'm sure that makes some ruler maker cringe.   The Dresden's and all the circles are turned edge. Turning the edges of the circles is the only way to get them perfectly round...at least for ME to get them close to perfect.
There's a few more final touches to make before sharing the entire 24" block.  See you in a few days for the big reveal! 


Before leaving I want to give a big Hillbilly Hollar to Aunt Em's Soap.  This Mint soap has changed the look and feel of my skin.  It has the most amazing cent that you can't find at Walmart and it's gentle enough to use on my entire body.  Since I started using this a few months ago I no longer need to moisturize, the constant itchy skin is gone   It's priced higher than the yukky store bought stuff but it last so much longer, and I don't need to buy any products to repair the dry skin as with the other soaps. I think I'm actually saving money!  And to put the icing on the cake Em is a quilter and uses her tiny little scraps for packaging.  That's my kind of gal...use it up and re-purpose.  You can find Em's quilt an soap shop by clicking here.  Make sure you hop over to her quilt blog,  Em's Scrapbag, she always stitching up a scrappy beauty.


~  Lea Anne ~

Pin It

Monday, July 30, 2018

~ It's PKM Playtime ~

This past year has been  a whirlwind of deadlines, tech work, numbers crunching..yukky this and yukky that.  It's so nice to just play.  Nothing soothes my soul like a little PKM playtime.     


To once again feel that freedom of just sewing and design as I go.  Back in my element of flying by the seat of my pants feels so right.  When there's no pressure to get it done I can just enjoy the little things like how pretty these fabrics are as they sit in a pile waiting to be sewn together.


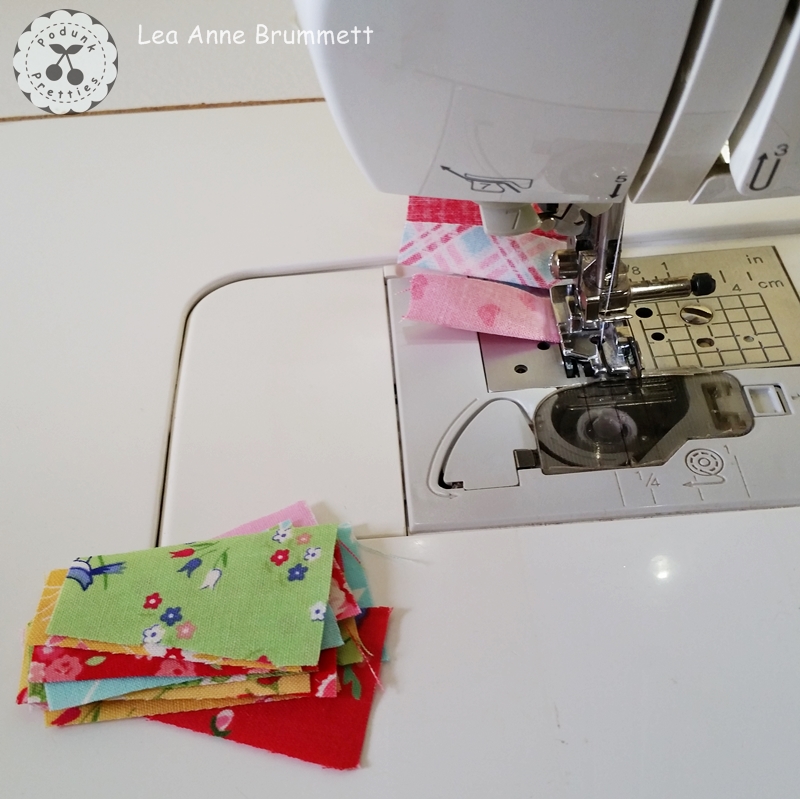
Or how much I love the look of the scrunched mess behind the presser foot.  
Dresden blocks are my go to blocks.  They have never let me down when I want  to stitch up something cute and unique.


I'm not sure exactly how this is going to finish.....And that makes me happy.  Just letting it take on a life of it's own.   *sigh*  Life is good.


Maybe I need a few more blocks?...Only time will tell!   So I'm curious about your quilting process.  Are you like me and just fly by the seat of your pants?
Do you like to have a design plan with drawings?
Do you buy patterns so you don't have to think about the quilt design?


Linking up at all these fabulous linky parties.  Hop on over to be inspired!


~  Lea Anne ~
Pin It

Monday, December 26, 2016

It's all Bonnie's fault!

Here it is Monday morning again.  This last week flew by so fast.  I've made little progress on my Bonnie Hunter En Provence mystery quilt.  Finally last night while doing laundry I managed to get some cutting done for clue #4.  I might have over cut the background fabrics and under cut for the the main color.   


It seems either me or Bonnie miscalculated the fabric needed to complete this quilt.  So a purchase was necessary before continuing this mystery quilt.  It was a hard decision to make, buy fabric or not buy fabric?  Oh what's a girl to do?  Really Mr. Podunk I didn't want pretty new fabric in my stash.  I'm sorry Bonnie but I had to throw you under the bus in order to justify my fabric purchase with Mr. Podunk, I hope you understand and will forgive me.   Yes, Bonnie made me do it, it was her fault.  It's all a big conspiracy to boost fabric sales....that's my story and I'm sticking to it...LOL!


And to make matters worse I could only get one yard of this adorable floral by Pam Kitty.  Oh now isn't that just awful?  I guess I'll just have to do some more shopping to find something else that will work in this quilt.  It's a shame, really Mr. Podunk.


We wouldn't want all this hard work and pretty fabric to become another UFO now would we?  Well I guess for now I can try to make to due and finish clue #4 and 5.  But who knows what could happen with then next clue or two.  Bonnie might make me do more shopping.  
         

If your curious about this Bonnie gal who is promoting fabric buying, you can find out all you need to know about this devious(wink wink) gal and her mystery quilt over at her blog Quiltville.  Once you get to her blog click on the En Provence Mystery tab at the top.  You'll find all the subliminal messages you need for fabric shopping.

~ Lea Anne ~
Pin It

Friday, July 8, 2016

Cottage Blooms Pattern

It took a little longer than expected to write the pattern but it's finally done.  Thank you to all who helped with the quilt name.  Each idea was written down and stared at for what seemed like hours until I settled on a combination of a couple different ideas.  So here she is "Cottage Blooms". 


This series of quilts has been so much fun and I'm looking forward to seeing your creations.  There's one more quilt planned maybe 2, it all depends on TIME.  That's what we all wish we had more of, right?  I won't delve into that subject today.  Let's just move onto a happier subject like free patterns.   Cottage Blooms is the 3rd quilt I've made during the Back Porch Blooms quilt along here on my blog.  It's a free quilt along with giveaways, free patterns, pattern ideas and linky parties.  I'm often am asked how I come up with quilt ideas.  The answer is inspiration, one  little idea and I build upon it.  So I thought it would be fun to encourage my readers to do the same.  I give you a block and some fun ideas and let you create your own quilt.  Of course not everyone wants to design a quilt and do a bunch of quilty math so I'm providing a few patterns along the way.


The first free pattern was a simple wall hanging using the inspiration block Back Porch Blooms.  The block itself measures unfinished 9.5 x 18.5.  The large size block is great for making a cute quilt fast.  


The second was Hello Spring.  The inspiration for this one was my followers.  You gals really are the best!  Your suggestions and ideas for the block sparked a wave of new designs.


As much as I love this series and would love to make all the ideas, I just can't.  But I can share with you a few of my favorites and the measurements for making them.


The Ring Around the Posy is another one that was hard not to make.  It's a fun size, 49.5 square that would be great a baby quilt, large table topper or a cute large wall hanging.  You can find it and all the others in my tutorials tab at the top of my blog or by clicking on the Back Porch Blooms image in the sidebar.


Alrighty with all that out of the way we can move onto the Cottage Blooms quilt pattern.  


There's a few things you need to know before making.  
  1. Cottage Bloom pattern is for the borders and sashing.
  2. You will also need to print or save the Back Porch Blooms block instructions
  3. And the On Point Butterfly Block, this can be printed or saved by using the Print Friendly. PRINT FRIENDLY IS NO LONGER AVAILABLE ON MY BLOG BUT THE TUTORIAL IS STILL AVAILABLE TO READ AND USE ONLINE.
  4. Cutting list for the entire quilt is in the Cottage Blooms pattern.
  5. And the most important thing you need to know is Read all the instructions for the Cottage Bloom quilt pattern first.  


Don't forget this coming Tuesday, July 12th will be the next Back Porch Blooms Linky Party.  You'll be able to link up until July 18.  This linky party is for Back Porch Bloom quilt projects only, all other link ups will be deleted.  By linking up you'll be entered to win this bundle of half yard cuts of Indian Summer by Bentartex.  Winner will be announced on July 19, 2016.


I'm looking forward to seeing your creations!

~ Lea Anne ~
Pin It

Tuesday, July 5, 2016

Back Porch Blooms ~ Another Cutie

Hello sweet quilty friends!  I've got another super cute quilt to share with you. This is the third quilt in my "Back Porch Blooms" series of free quilts.   For some reason I'm coming up blank when trying to name this one, so if you've any suggestions let me know.


Tomorrow I'll start writing the pattern for the sashing and borders.   If you'd like to get a head start making the "Back Porch Blooms" blocks(flower and pots) you can find the tutorial here.


The corner Butterfly blocks are also a freebie here on my blog and can be found here.  TIP: The tutorial is for a 12 inch block.  You can make them 12 inch and trim them down to size later or you can make the 6 inch Butterfly and wait for new smaller on point instructions later this week.  My blog is a print friendly blog which means you can  print my tutorials in pdf just by clicking on a specific post and then clicking print friendly image at the bottom that page.  Print friendly allows you to remove any pictures or text that you don't want or need.


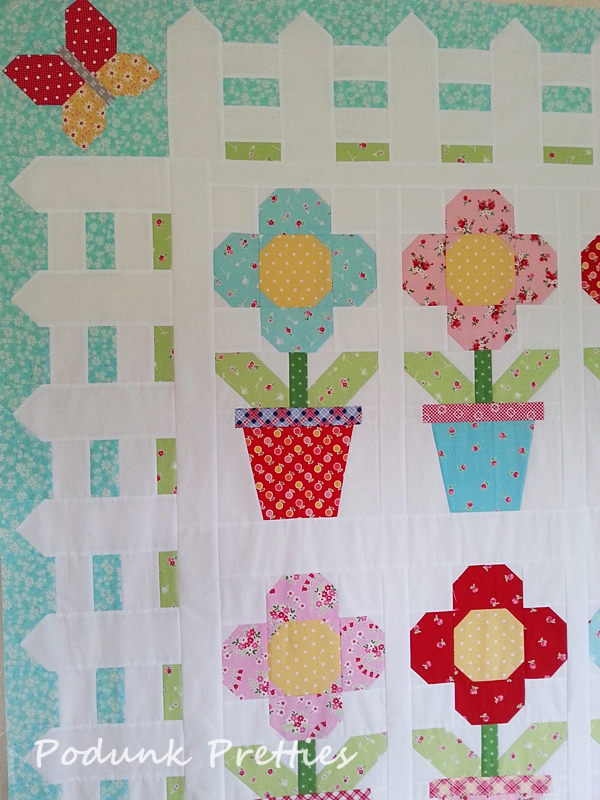
This quilt was designed after so many of you loved my quilt and chickens post.  The idea for a picket fence was in one of my first designs but it was a much smaller quilt.  It just occurred to me as I'm writing this post, you could replace the butterflies with baby chickens set on point...oh how cute would that be!?


Most of the prints in this quilt are Pam Kitty or Holly Holderman, Lakehouse fabrics.  The blue in the border is not.  It's a Bonnie and Camille print, I'm unsure which line of their fabric.


The border is actually made up of three blocks. The Butterflies and two different pickets and rails blocks.  Strip piecing made quick work of the fence borders.  


To see all the tutorials and posts about my "Back Porch Blooms" quilt block just click on this image in the sidebar.  Or you can find them in the tutorials tab at the top of this blog.


Don't forget there's a "Back Porch Bloom" linky party once a month.  You can link up your progress to be entered in a giveaway.   The only rule is you can only link up posts or pictures of your "Back Porch Blooms" project.   This month the prize is a bundle of half yard cuts of Indian Summer by Bentartex.   


So here's the plan.  Later this week I'll post the instructions for the fence quilt above.  Next Tuesday July 12- July18 you can link up any Back Porch Blooms projects.    Then the winner will be announced on July 19, 2016.  There will be at least one more linky party and giveaway next month so there's still plenty of time if you haven't started your blocks yet.  It doesn't need to be a finished project to link up.

Happy Stitching!
~ Lea Anne ~
Pin It
Related Posts Plugin for WordPress, Blogger...