
With each passing day spring is getting closer. We've really no reason to complain here in Podunk. Our winter has been very mild with about 4 inches of snow all season. The temperatures have been just as mild rarely getting below freezing. The only thing we've had to endure is mud, gray cloudy days and the lack of happy colors in our landscape. Unless you consider multiple shades of brown to be happy colors. In order to beat the winter blahs I try to keep things light and colorful in the studio. The last couple of weeks have been full of creating. New curtains, shelves and quilt displays have been just a few of the projects. Mr. Podunk has even offered to lend a hand by building a mini quilt display cabinet. Hopefully I can share it with you soon, I'm really anxious to get the studio completely finished and take you on a tour. But in the meantime how about a sneak peak at a couple quilt displays. The one below is my favorite. Maybe it's the quilt that makes this one so adorable. You can find the pattern for the basket block in my tutorials tab at the top of this blog.

The display is nothing more than a fan folded quilt with a large button and some twine. Hang it on a nail and TADA you've an adorable quilt display.

The next one is a little more work but still super cute.

Easy to make with things found in a quilters stash. Wanna make one? How about a quicky tutorial?

Things you'll need.
1. an embroidery hoop
2. (1)green fq(can use scrap fabric)
3. (1) red fat quarter for the flower(I used yardage so this is an estimate)
4. twine, yard, or thread to attach the button(not pictured)
5. (1) large button(I forgot the button in the picture so I drew one..haha)

You'll need a way to draw a 5 inch and 4.5 inch circle. A drawing compass would work just fine. Adjust it to half the size of your circles 2.5" and 2.25".

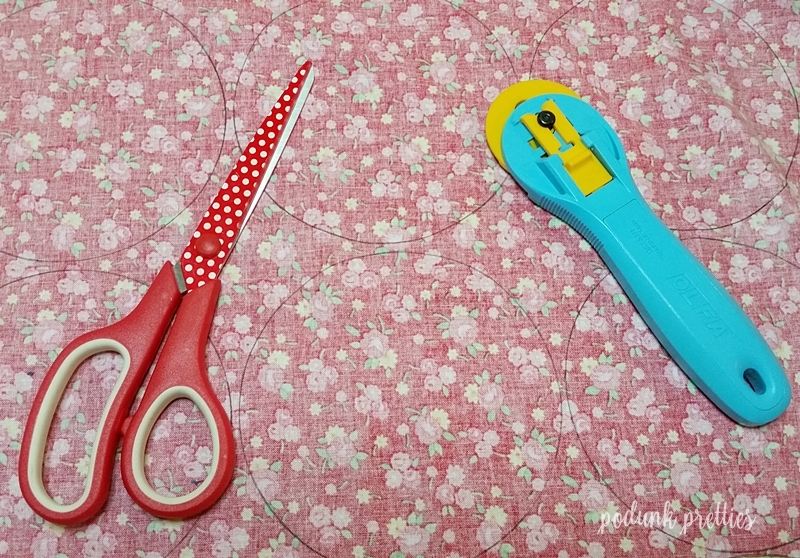
I used some longarm quilting rulers to draw mine. On the back of the red fabric draw (8) 5" circles(petals) for each flower you plan to make.

Cut out your circles. No need for perfection in the cutting the raw edge will not show or be important in this project. If your comfortable with rotary cutter it makes the process go much faster. WARNING the manufacturer of a rotary cutter would say not to do this but I live life on the wild side. So use it at your own risk.
After cutting out your circles press them in half once wrong sides together and set them aside.

1.Next draw a 4.5" circle on a piece of paper.
2. fold the paper in half
3. then fold in half again
4. then fold in half one more time.
You should end up with a little pie shape.

1. Okay quit dreaming of your favorite pie and unfold your circle until you have a half circle.
2. Using the folded lines as a guide, place a mark 1/4" away from each fold line on both sides of the fold line.
3. put a mark 1/4" away from the bottom edge of each side of the half circle.
4. Place the template on top of your folded circle, lining up the bottom straight edge and mark your fabric with dots at each marking. Repeat for the remaining fabric circles.

1.Starting at the marking in bottom corner bring your needle up through the fabric.
2. Continue stitching using the dots as your stitching points.(make sure you leave long tails on either side for pulling.
3. holding both tails, gather the fabric
4. tie the threads towards the bottom of the petal to secure the gather.
5. repeat this for each petal
6. Using a new strand of thread, string your petals together by going in one side and out the other
7. Now just pull them all together and tie a knot in the thread tails.

To attach the button
1. stitched the twine through the holes, tie the twine in a knot on the back of the button
2.using a separate piece of twine, go under the twine on the back of the button.
3. Push the twine tails through the center of your flower, pull taunt
4. tie the flowers to the embroidery hoop.

I forgot to picture the embroidery hoop covering. It's simple, just wrapping the 1" strips around the hoop.
1. cut (3 or 4) 1" strips from your fq. sew them end to end. Press open seams.
2. starting at the screw, glue one end of the 1" strip to the back of the hoop.
3. wrap fabric strip around the hoop until you get back to the screw
4. glue the end to the hoop.
One little flower looked so cute I had to make more!

Pin It

Really neat! Don't know if I have a compass, I'll have to have my hubby dig one out. Thanks for the tutorial!
ReplyDeleteCute ideas! I can't
ReplyDeleteI wait to take a tour of your studio.
love all of your ideas, but really love you details about making your flowers, Hugs sweetie
ReplyDeleteGreat ideas!
ReplyDeleteYou are so creative love the ideas to hang your quilt.
ReplyDeleteHugs
donna
Adorable!!!! Thank you for sharing them with us (lynnstck[at]yahoo.com)
ReplyDeleteWhat a great idea - thank you for sharing the tutorial!
ReplyDeleteSO cute! I want to try this!
ReplyDeleteHello from a fellow Hoosier, from SW Indiana. I found your blog today and now am a new Follower/Reader. I too quilt so it will be fun to visit your blog to read and catch up on past posts too.
ReplyDeletereally, really cute and you are right a need for cute with our mucky skies.
ReplyDeletewhat lovely ways to display quilts, so much better than having them all the spare bed like I do. We too have had a very mild winter but a big storm is forcast today, not snow or rain but gale force winds
ReplyDeleteVery cute displays. Thanks for sharing the "how to" for the second one.
ReplyDeleteCongrats on a beautiful finish! Definitely a quilt you'll enjoy when making next year's memories.
ReplyDeleteลาลีกา