Tuesday, March 31, 2015

A lot of Bunny Business Going On

Good Morning everybunny!  It's going to be another beautiful Spring day.  There's been so much going on around here I've not had time to post in a few days.

The weekend was spent stitching the bunnies down with invisible machine applique.  Well as invisible as I can get with my Singer sewing machine.  It won't let me make my stitches as narrow as I like.  But until my favorite machine gets out of the shop this is the best I can do.


Now that they're all secure, there's fabric to cut away from some of the backs due to shadowing.  


Not all the blocks will need the background fabric cut away but I thought since I had to do a few I might as well do them all.  The cut away pieces make some pretty good size scrap that can be cut into squares for another quilt.


See how the background fabric showing through on the one below?   
YUK!


And this one is super cute but it too has a shadow lurking behind him.
There's interfacing on the backs that of these blocks that also needs to be removed.


It's a good project for lazy weekends.  If you'd like to make some bunnies of your own you can find more information here on my original post.


These little cuties will be put on hold for awhile.  This weekend I started a new project that needs to be done quickly in between the Podunk Posy quilt and tutorials.  I'll fill you in on the details of the new quilt tomorrow.

~ Lea Anne ~
Pin It

Friday, March 27, 2015

Cutting and Cutting and Cutting...

You are not going to believe this...it's spitting snow outside!  I think planting SNOW PEAS yesterday was a bad idea.  And tonight it's going to get down into the teens.  Crazy weather!  Oh well it could be 100 degrees and humid.  Since it's just far to cold for this ole gal to do any planting I'm cutting up scraps for the Podunk Posy blocks.
Scrappy quilts are a lot of work if you're working from oddball shapes and sizes of fabric.  That ziplock baggie may not be big enough for the tiny scraps by the time I get done cutting.  Do you separate your scraps by size?  I sorta do, each color has a bin.  In each bin is a baggy for anything less than 2.5" wide.  It can be 10 inches long but if the width is less than 2.5" it goes in the bag.  Then I've a small stack in the drawer of small odd ball pieces 2.5" and larger.  In the back of the drawer is the foldable fat quarters and smaller.

It's a messy process, and I'm trying to be organized.  And that my friends is why you aren't getting a picture of my floor.  Even with that little bucket(pic above) for a table top trash can the scraps keep finding their way to the floor.  
Eleanor Burns ain't got nothin' on this fabric flying gal.  I beginning to think the only way to stop me from throw tidbits of fabric on the floor is to wear a dog shock color that's motion censored.  


Oh well it's not like Martha Stewart or Better Homes and Gardens are coming anytime soon.  Although we do have a lot in common.  Did you know Martha raises chickens?   Here's a video about her chickens.
Every time we pick up a chicken it Poo's, I don't see any Poo on Martha!


~ Lea Anne ~
Pin It

Thursday, March 26, 2015

Podunk Posy quilt tutorial # 2

I want to thank all of you for being so understanding of my crunch for time.  With spring finally here there's tons of outside work to be done.  And with spring weather you get out there while you can.  If you take a nap the weather could change.  This morning I planted Snow Peas in the rain.  No need to water that seed when mother nature can do it for me!  Now I can do what I love the most, share my love of quilting with you.  So let's just get right to business.

My fickleness has emerged once more.  After spending so much time looking at this layout it seems to be ...CHAOS.  

this quilt finishes at 72" square

  By adding two small inner borders it gives the eye a place to rest.  However it also adds one more Podunk Posy block to each side of the quilt.   So I'll be giving instructions to finish both ways.  But not today!  

this quilt finishes at 78" square

Today we'll be working on the center panel.  


It's made up of 16 very simple 12" blocks. TIP each block starts with a white square in the left top corner.


Now I know most of you could put this together with your eyes closed, but I always want to make things as clear as possible for the new quilters.  
Since this quilt is scrappy I can't give you yardage requirements for the prints,  just make the most out of all your scraps!  And the white well there's 4 different options for the finish so I rounded up, you might have some left over.  Better to have to much than not enough.

Fabric yardage for entire quilt
6 yds of white or background fabric
3/4 of a yrd for the inner green border (if you want inner borders)
 1 yd of green binding  fabric

What you will need for the center panel.
(17) strips of 2.5" x WOF strips from white yardage subcut into
(288) 2.5 white squares 

(288) print squares

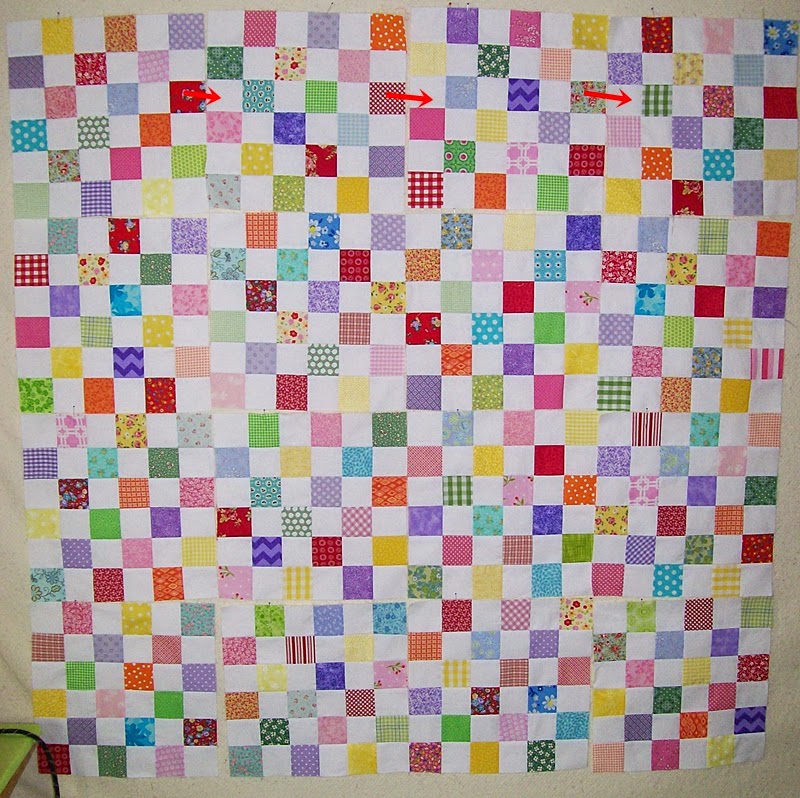
A design wall or large floor space is great for laying out these scrappy blocks before piecing.  Just to make sure you like where your scrappy prints fall. 
You can find more information about placing on the design wall here.
Once your happy with your design wall layout you can start piecing one block at a time.
Each block measures 12.5" unfinished and 12" finished.


Flip the second row onto the first row, right sides together of course.  I won't mention that again, I'm assuming every one knows that we always sew with right sides together.
  

Starting from the top of your block grab the first pair and stitch down the right side using a quarter inch seam allowance.  Stop your needle one stitch off the fabric.  Then butt the next pair right up against the needle and continue stitching.  Continue this method until the first row is finished.


DO NOT CUT THESE APART.  Press towards the print fabrics. (I finger press) Continue to add each row in the same manner.

  
You'll end up with something that looks like this.


That one little stitch holds your seams together with no need to pin.  However I pin anyway.  This method also keeps your block in the correct placement order.


To show you that it really does work with no pinning I made the first block with no pins.  After that I couldn't help myself.... I'm a pin-o-holic.


After you've sewn all the columns together you'll need to go in and clip that tiny one stitch.


Clipping the stitch will allow you to pop those corners open as pictured below.  These will need to be carefully pressed open with an iron.


Here's what the back looks like when finished.


And the front.
Okay only 15 more to go.  You could make all 16 in an afternoon.


Once the blocks are complete take a chocolate break, you deserve it and then just start stitching them together in rows.


Because we popped open the seams every thing will match up perfectly when sewing the blocks together.  Pin at each seam and stitch, or live on the wild side with no pins and hope for the best. 


Pop open those seams again and press.  


Once you have 4 rows of 4 blocks rows stitched, and the seams popped and pressed,   Grab another piece or two of chocolate and sew the rows together.


WooHoo!  We did it! Snip, pop and press your last 3 seams.  Your center panel should measure 48 1/2" square.  And you should just about ready for a couple more chocolates.

  
As always if you find an error in the instructions or they are lacking clarity, feel free to email me.

~ Lea Anne ~
Pin It

Wednesday, March 25, 2015

Hi-Ho Hi-Ho, It's off to sew I go!

Oh Happy Day!  What a beautiful rainy day!  Oh yes it's rainy and gloomy and I'm LOVING IT because I'm stitching my little ole heart out today.  It's the first day this week I've had all day to just quilt.  With the warmer weather there's plenty of outside work to be done and little time left for quilting.   So today it's just me and my Happy Place.
  
Several of you are still waiting on the butterfly block.  It's coming, promise.  A little warning...the butterfly itself is 6 inches, framing makes it 12 inches.    After the center tutorial a new tutorial will be posted each week until all the options are finished.  I've also found another bonus mystery corner block that I'll throw in last.  It's from another blog, and with her permission I'll be adding it as a corner option, but first I need to set it on point.


The center blocks tutorial will be posted by this Friday.  If I can put the pedal to the metal without getting a citation from the quilt police it'll be ready by midnight tonight.  So send me some good quilty vibes to keep the quilt police and gremlins away from my studio.  However if you know of a free(and preferably handsome) gardener they are welcome at my place anytime!


Look at these lovelies made by QuiltnNan over at the Quiltingboard.  Hop on over and give her a little quilty love.  She has some great ideas on adding a little spring time pizzazz to these blocks.  Thanks QuiltnNan for sharing your photo's.  It's always nice to know that others enjoy my patterns and the instructions make sense to all of you!  Bloggers love feedback, negative or positive when it comes to pattern writing.


Well gotta run there's lot's to get done before the sun starts shining again.

~ Lea Anne ~
Pin It

Saturday, March 21, 2015

Hoppin down the bunny trail

I couldn't help myself.  My design wall is full, there's tutorials to write and here I am starting a new quilt.  Excuses?   Sure, but we've heard them all so why bother repeating.  So let's just get back to the bunny block.  It's not my design...well it's been redesigned by me.  The original is even better.


Julie over at Crafty quilter  designed this cutie wall hanging.  And it's a FREEBIE pattern, so you hop on over and take a look.  For my quilt I reduced the the  background, enlarged the inner frame, and omitted the tulips.  I still need to add the tail, I'm wondering if I could make it puffier.   Maybe a trapunto tail?


Here's my plan laid out on the floor.  Not sure I'm loving the blue plaid background but its cut so it's staying.  Well I better get hopping if I wanna get this done!


~ Lea Anne ~
Pin It

Thursday, March 19, 2015

Throwback Thursday

This week has flown by with very little sewing.  I'm busy, busy, busy but getting very little accomplished.  You ever have those weeks?  In between my running around chasing my tail, shopping and chores I ran across an old picture of me and my brother.   Look at Greg's hair.  Wonder why mom gave him an old man comb over?   A sign of things to come?  He was almost bald on top by the age of 30.  At around 40 he shaved his head completely bald.


During the Momma and me thrift shopping this week....  Looky what I found for $5.  A 1963 Sunbeam Iron.  Works like like new.  All original parts.  This one is a little smaller than the other two you see in the background.  And it doesn't have steam which is great.  Sometimes those steam holes flip the edges of my fabric when pressing.  I never use steam anyway.


I love the name....IRONMASTER


The plate has seen better days.  Looks like someone tried to iron the wrinkles out of a gravel pit.  To be over 50 yrs old she looks pretty good.  And I tell you what, once you use one of these old irons you'll never buy a new one again.  You don't need steam because she's hotter than the devils pitchfork!   When I first starting using vintage irons I scorched a few things.  But with every mishap you learn something new.  Did you know peroxide will take out scorching marks?  Here a great tip page I found for removing scorching from fabric.


Do you have or use vintage sewing tools and notions?  I use irons and collect anything that's old and sewing related.  This is one of my new to me favorites.  The graphics on the packaging are too cute.  It's not in real good shape and some pieces are missing.  My SIL found it when cleaning out her dads house.


I love this sales pitch on the packaging.


Things sure have changed fast in the last 50 years.   Some for the better and some for the worse.  

  ~ Lea Anne ~
Pin It

Wednesday, March 18, 2015

Setting up my assembly line

Every quilter has their own ways of doing things that makes the quilting process most efficient for them.  What may work for you may not work for me and 
vice versa.  But it's always nice to see how others do things so we can tweak our methods if needed.  So here's my system for this quilt, maybe you can find an idea or two that would work for you.  And even better you might have some advice to make my system better.  
Before cutting fabric for this quilt the first decision was should I strip piece or piece by piece.  Since most of my scraps are to small for strip piecing the decision was obvious ...the dreaded piece by piece.  However with a pattern this simple it really is going along quickly.  One block took 5 minutes to piece.  Putting each individual piece on the wall took FOREVER.  Making sure two of the same prints or color didn't touch or get to close to one another.  Cutting extra print pieces was very helpful with this process,  I could just grab a spare square and replace it.


The next decision was can I piece more than one block at a time.  For me that's a big ole fat NO.  Again the simple block is too simple and it would be to easy for my easily distracted brain to mix things up and then let the ripping begin.  


So my plan is to remove 4 blocks(one row) at a time from the design wall, immediately putting each block on it's own design board that has been label 1,2,3,or 4 with my little homemade number pins.  To keep the direction of the block correct  while piecing I put another pin sticking up in the top row of each block.  You can see it in the picture above.  This is very helpful once I start pressing.  It's also nice if those pins have glass heads so the iron doesn't melt them.  Well worth the extra money.  After years of melting pin heads I decided it was cheaper to buy the glass head.  Now I know what your thinking...why not just put the numbered pin directly in the block.   Pressing would melt my flower head pin.  


The boards are stacked by the sewing machine and ready to go.  My tiny block pressing table is on the other side of the sewing machine, you can see it in the first picture on this post. It's a sewing assembly line!


Even though I'm piecing using the Eleanor Burns no pin method, I want perfect matches every time so I'm pinning anyway. This no pin method also keeps my blocks in the correct layout .  Here's a tutorial I made for the no pin method.


If you're following along on my Podunk Posy quilt and want to make one of your own, this center section has (288) 2.5" scrappy print squares and (288) 2.5" white squares.  16 blocks total on a 4x4 grid.  You can start cutting in advance! I'll post a quicky tutorial for these blocks and middle section as soon as I get them all pieced.  

See you soon!

~ Lea Anne ~

Pin It

Tuesday, March 17, 2015

Chicken farmer

Like my new boots? They were needed because of last weekends mishap.  I call them my chicken sh!# boots.  Sadly the Rural King didn't have boots with chickens on them only cows.  Let's hope the cow print doesn't give Mr. Podunk any ideas.


We decided to leave the coop stuck in the middle of the backyard until the ground dries out.  The ground is so soupy it wants to suck the shoe right off your foot.  Good news is it doesn't smell bad, which means the finger system wasn't broken.


Since it's stuck  for awhile we might as well go ahead and put some chickens in there!  This is a new adventure for the both of us.  Neither of us were raised on farms but we were both raised in the sticks.  I can remember my gramps having chickens but I didn't help care for them.   We've spent hours just watching these ugly birds.  They can be quite comical and have personalities all there own.  I see now why they call it the plucking order.  We've started giving  them names.  Big Red for the obvious, she's bigger and red.  And then there's Chicken Sh!# because she hides when we come around.  Big Dog because where she goes they all follow.  The last little hen has no name and no personality yet that we can see.  She's also quite smaller than the rest.  So I'm sure her name will include those factors.

\

This whole chicken fiasco has taken over our lives.  So I thought I might as well make a chicken quilt. After some searching, looking for a chicken quilt pattern.  I found some free patterns I thought I'd share  Fat Cat Patterns has several free applique blocks, here's a couple and I love them but they look like more work than I want to put into my quilt.

This cute and easy block tutorial is also free over at Sew Inspired Blog.  But it just seems to simple.  She needs some feet, eyes and a wing, don't you think?  Hmm...I guess I'll need to draft one of my own that is just right.


For now I've another quilt and several tutorials to write so this one will have to wait.  Oh and lets not forget the Spiderman quilt that I NEED to make next.

Pin It
Related Posts Plugin for WordPress, Blogger...