Friday, February 28, 2014

Little lady

It's a friday finish!  Not a big finish but it still counts, right?  I'm sure most of you know about the Spell it with fabric blog hop, if not you should hop on over and check it out.  Free patterns and lots of giveaways.  Making a whole quilt just isn't in the stars for me right now, so I decided that one block would just have to do for now.  So I picked "L" for Lea Anne.  In the spirit of making it my own I wanted to add something to the block that started with the letter "L".  My creative brain wasn't working well, I came up with lizzards, lollipops, leaves, looney tunes, lipstick, laundry.  See what I mean?  So I was happy when this lovely little lady crossed my mind.  Much better than a lipstick wearing lizzard holding lollipops!
The "L" was made using scraps from the quilt behind the mini quilt.  Couldn't you just see the whole alpahabet  with cute little vintage images and scrappy letters?  What a fun baby quilt it would make.  Or in my case a cutie to hang on the wall.  
I had to alter the pattern a little bit for the little lady.  She's a freebie that I printed onto fabric using my printer and freezer paper.  You can find a tutorial here for printing on fabric.   The colors should have been brighter but I had my printer set to Economy...OOPS!  Oh well ink is too expensive to print again.  
With my Domestic machine I did a very simple stitch in the ditch and a little outlining for the quilting.
I also used a smaller binding, started out at 2 inches.  It's completely machine attached. And for the backing, a piece of red that really doesn't appeal to me.  So I made good use of it and I don't have to look at it.

~ Lea Anne~


Pin It

Monday, February 24, 2014

While the paint dries

Well I didn't reach my painting goal.  There's still one coat to put on the desk and two cabinets to paint.  Hopefully all will be done by the start of next week.  Crossing my fingers for sooner.  Even with all the mess I'm still playing with fabric.  I did managed to get the computer chair recovered, I'd show you but I'm thinking about adding a skirt to girly it up a bit more....we'll see.  For now I'm playing around with ideas for my sewing machine cover, it will keep me busy while the paint dries.  I cheated and used pre quilted fabric for the box shaped cover.  "The Plan" is to use washable glue to attach whatever design I choose.  That way if I tire of it It can easily be taken apart, wash out the glue and start over!  
OOOOH...Gingham Love
 This ones cute too!
 Its so hard to decide
 Vitage ribbon...not so sweet
 Can't go wrong with Cherries and Gingham.....Now to pick one, I like them all except the vintage ribbon.
 Well while I make my decision I can play with these little cuties.  Isn't funny the things you find when you start moving things around.  Hummmm...maybe I could make a panel out of these for the sewing machine cover....

~Lea Anne~


Pin It

Friday, February 21, 2014

No Sew Zone

I've not sewn a stitch in days.  Well let me correct that, I've not used my sewing machine days.  Today, I'm hand stitching some lovely fabric covered bottons.  
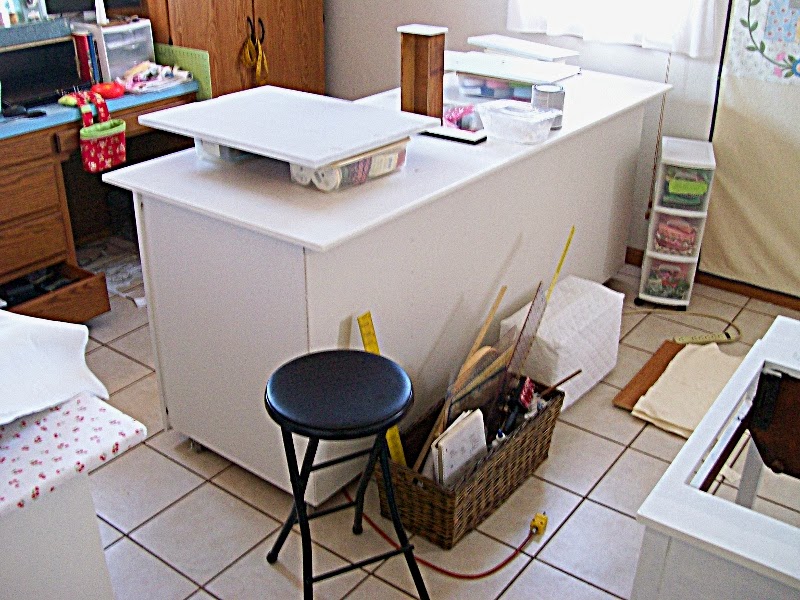
This all started when I made (2) tier curtains for the studio windows.  They are so white and pretty.  The dull brown furniture had to go!  One piece at a time.  The cutting table and ironing station are done.   Today I'm working on my sewing table and chair.  This weekend I hope to get my desk(not the blue top) and at least one cabinet painted.  Everything will be white and bright.  Oh I just notice that black stool....a little spray paint and fabric will fix it!  
See you in a few days!  Have a great weekend!

~Lea Anne~


Pin It

Monday, February 17, 2014

Little Pink Houses

"Oh ain't that America for you and me
Ain't that America something to see baby
Ain't that America home of the free
Little pink houses for you and me"

Some of you may recognize that song.  John Mellencamp song from my youth.  He's born and raised right here in Indiana, just a hop, skip, and a jump from me.  Well about 45 minutes away.  My boys think he's the greatest because they met him while shopping a few years ago.  Right there in the local mall with his kids, blending in with the local yocals.  
That song came to mind while taking these pictures.  They aren't pink, and they aren't little but they do resemble houses.  Construction stopped when I ran out of heat and bond light fusible.  Those red arrows are pointing to an ugly spot.
I used a cheap muslin behind a cheap gingham and the result....I'll be remaking them.  Hopefully reheating the pieces will help loosen fusible.  

 Well would you look at those darn leaves...UGGG!  And I was concerned that the blue crazy dot flowers were to whimsy for this quilt.  Seems that was the least of my concerns.  FIDDLESTICKS!
 Awwe....this ones my favorite.
Here's a quick EQ drawing of the finished quilt.

~ Lea Anne~


Pin It

Saturday, February 15, 2014

Bloggers Choice Fabric Bundle Giveaway

I've been so busy the last couple of days rearranging the studio that I almost forgot to tell you about a cute Blogger Choice Bundle giveaway over at Donna's Lavender Nest.   Donna and Pam Kitty have put together this cute little bundle.
Good luck to you!  And don't forget to check out Donna's cute little online shop.  So many fabrics that make me Purrrrrr......

~ Lea Anne~
Pin It

Thursday, February 13, 2014

Drafting scallops tutorial

Sometimes pen and paper is the best and easiest way to design and draft.  I'm sure there's a computer program that could do this for me in a snap.  Or maybe some mathematical equation that looks like an alien wrote it, and it may very well be able to be done in EQ7, but darned if I can figure it out.  So here's what I'll be making.  The outer pink scallop on the Dresden.  You can find templates for it here .  But any Dresden any size will work with this method.
Now run to the kitchen and grab the freezer paper.  Have you notice that on the box is a picture for applique?  
Make sure your piece of freezer paper is 6 or 7 inches larger than your Dresden.  Iron it shiny side down to your ironing surface.  I you don't have a large ironing surface that's OK.  All you need is a large piece of any fabric, iron the freezer paper onto it, don't worry no residue will be left behind.  You can also totally skip this step if you can find another way to make the freezer paper lay flat.
See nice and flat, I leave it stuck in place until I'm finished drawing.  
Center your pressed Dresden on the sheet of freezer paper.  Secure with pins.  My ironing surface is padded so I just poked them down like a pin cushion.
At each seam make a mark that is touching the edge of the fabric.
I put another mark at the top, making a "T"  
Now just connect the dots!  The long line shown below needs to extend 2-3 inches past the mark.   And then the outer dots are connected in a circle.
All connected
Line up a ruler on 1/4 inch line and draw another line inside the first one.  This will make your seam allowance.
At this point it should look like this
Time to make that scallop.  The space between the spokes is 2 inches.  I'm using a Perfect Circle Template, but anything round will work.  Spice jars, can of mushrooms are a couple that might work.  I'm setting the center hole on the template just above the drawn line, ensuring uniform scallops.  If you are using a can or jar you'll need to make some marks on it to keep it uniform.  Or you could measure up on the spokes the height that you want your scallop, then make another ring around your drawing.
If there are gaps its OK, I promise no one will know.
Now lets smooth out that bump.  Using the same template make a "swag" between each bump.
And there you have it!  
Cut the template on the inner circle.  
Here's my original scallop.  I used 3 layers of freezer paper, this gave me a nice stiff base for turning my outside edges under with the iron.  
All that's left to do is pin like crazy and stitch!

~Lea Anne~


Pin It

Wednesday, February 12, 2014

Whip it up!

It's a W.I.P. Wednesday!  This is what's been whipped up so far.   Maybe a few more tulips are in order.  Of course the windows need sashings and the door needs a knob, hand stitches and a button is the plan, but who knows!
Doesn't it remind you of a Barbie Townhouse?
When I was a little girl Santa failed and brought me this instead.  Barbie can't fit in there!  Geesh!  
You know I don't understand the Barbie thing these days.  The worry over little girls wanting to look like her.  I mean really how many well adjusted girls really want to look like that?  I never did, who wants too look like a doll?  As a child Marsha Brady was my Idol.  Now that's a little more realistic.  I'm older now and just wish I had Alice here to do all the dirty work.
Well lets get back to the real world.  One more picture of some cute springy flowers.  Each block will have a different flower shape and possibly a different fabric for the house.   4 Blocks total.  Any suggestions on a name for this quilt?

~Lea Anne~


Pin It

Tuesday, February 11, 2014

Applique Shadow fix Tutorial

Yesterday while making a test block I ran into a little problem.  Shadowing.  Shadowing is when the background fabric shows through the applique piece.  There are some hard core quilters that would just cut away the background fabric after the applique stitched in place.  Sorry I'm not hardcore.  I'm about as soft and mushy as they come. They sell a soft fusible product just for this issue.  But I'm all about making the best of what I have.  And although the gray fabric will be used as a window, I just don't want the roses shining through the window.  
 So here's my fix.  Double pane windows!  No matter what shape you are making this technique will work.   Since I'm doing raw edge fusible applique I made 2 of the same shape leaving a little extra on the outside of the shape and windowing(cutting out the centers). Fuse them in place.
 It's hard to see in the picture below but I've cut the one on the right just a smidgen smaller on the outside.  The finished shape is the same size, but the extra outside edge is thinner.
 Remove the paper on the one that you trimmed smaller.  Leaving the paper on the other.
 Layer the 2 pieces together putting the one with the paper still attached on the bottom. Do your best to make sure the one on top is centered. 
 Press, fusing them together.
 Cut on the line to make your finished shape.  
 Here's my window
 No more peaking in my window, no shadows, no ghosts.  Its ready to be fused in place and stitched.  
Oh I used Heat and Bond Light Fusible.  Super cheap with a Joann's 50% off coupon!  Buy it by the roll.  

~Lea Anne~


Pin It
Related Posts Plugin for WordPress, Blogger...