Monday, May 22, 2023

Quilt Ideas For Half Square Triangles

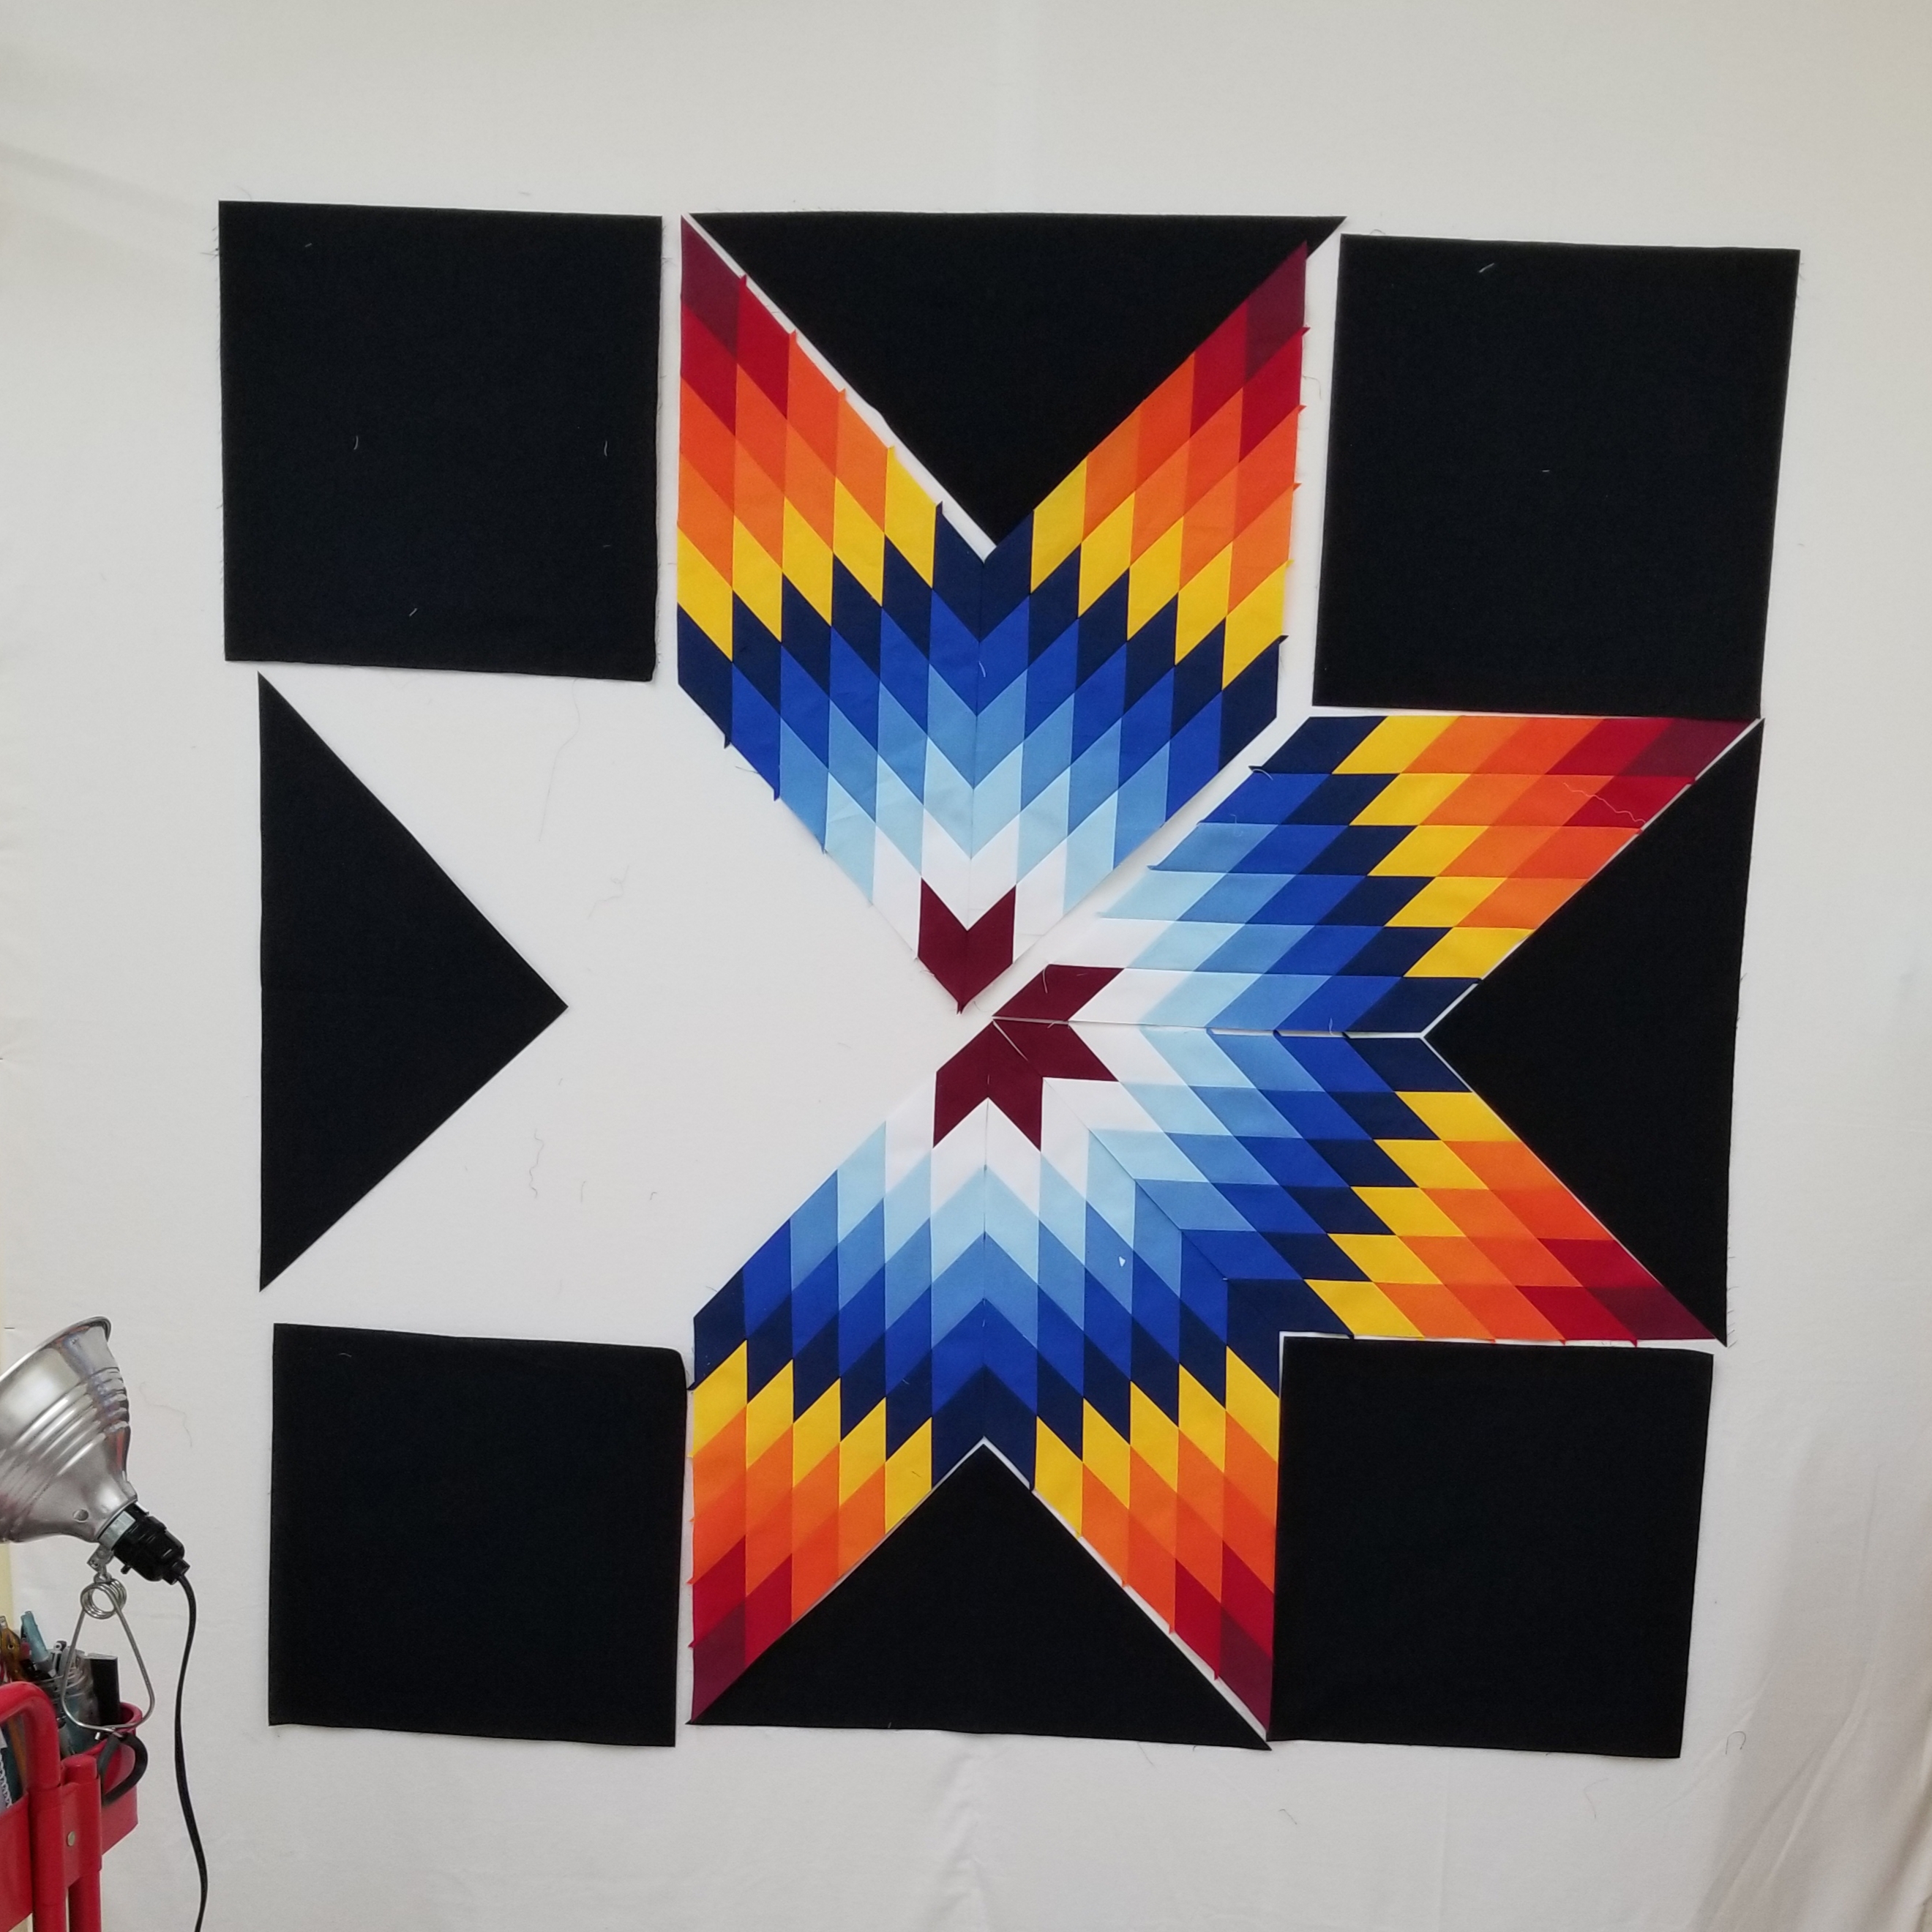
 Hi Quilty Friends!  I'm still working my tail off in the yard and garden but my heart is quilting.  Dreaming of future projects and of course finishing the current Lone Star quilt.  But the THOUSANDS of half square triangles are front and center of my quilty brain.


As I troll through the internet at the end of the day I'm always on the lookout for quilt blocks and patterns with lots of HST's or Flying Geese blocks.  Because we all know two HST's make one flying goose block.


And of course any block or quilt would be even cuter when its scrappy.


So I started a Pinterest Board where I can save ideas for future reference.  I've saved 167 ideas.  One or two of them have duplicate saves because I'm old and forgetful.  If you would like to take a look at my HST Pinterest Board you can find it by clicking here.  I'm not sure if you need to have a Pinterest Account to take a look but give it a try.


The problem will be deciding on which quilts to make.  Bonnie Hunter has several quilt patterns using both flying geese and HST's.  I also have all her books and they all have patterns using both HST's and flying geese.  The Rivanna quilt is one of  her recent patterns that can be found in her shop.  It would put a big dent in my HST stash.


The Triangle Chaos quilt below is another that really speaks to me.  You can find more information about it at Handmade Myrth.


And the last one would be great to use up multiple sizes of HST's.  It has no name.  You can read more about it over at That Man Quilts.  


These are just a few quilts I find interesting today.  By the time I actually start using up the HST's I could change my mind.  It's fun looking for ideas and seeing quilters creative ideas.  Who knows, I might design my own quilts for all these HST's.  Well except for I will definitely be making he OMIGOSH quilt.   I've admired the pattern for years.  This quit measures 70 x 88.  Those are some tiny pieces!  Are you up to the challenge?


Until next time...

I hope you find time to stitch up something sweet!


Pin It

Sunday, May 21, 2023

I Stumbled Upon A FREE Fibonacci Spiral Quilt

Hello Quilty Friends!  I have no business playing in the fabric stash.  There's way too much to do but what the heck.  I haven't been able to play in the Studio for days.  I deserve a few minutes of fabric petting before the day begins.


The Fibonacci Spiral Quilt calls for 10 Fat Quarters.  So I pulled a whole slew of Pioneer Woman Fat Quarters.  Then I started whittling them down to what I thought would work best in this quilt.  The first ones to be cut are the solids because I'm not a fan of solids mixed in with prints.


Next to be cut from the grouping was the larger prints.  Two cheater prints and two large florals.  The quilt pattern has some smaller pieces and the large prints will get lost in the small cuts.  But one could say that might be a good thing and make the quilt look scrappier.  For now they are a no go for me.


Next I pulled out the ones I felt were too dark, too large, the wrong colors or I just didn't like.


I was left with these 10 fat quarters.  The large floral needs to go.


It was replaced with this medium floral.  How do I decide on fabrics?  Well as mentioned above, scale is important.  So is color.  Think about if the fabrics end up side by side in the quilt, are they going to muddle together or stand out from each other.  What if two of the light background fabrics end up side by side?  Will they blend or be noticeably different?  I'm considering pulling out the red gingham.  What do yo think? What would you change?  I'm not completely happy with this group of fabrics but for now, play time is over.  There's plants to be planted, a dog needing walked and yard to mow.


So let's talk about the FREE pattern.  It's called the Fibonacci Spiral.  What in the world is a Fibonacci Spiral?  I have seen this before but didn't know what it was called.  I'm sure we learned about it school but it didn't stick in my brain.  Let's just tell it like it is, I'm a simple person and geometry isn't my thing.  I understand basic math and quilt math, is that geometry?  Yes, I'm really that clueless!  So anyway below is the spiral.  A bunch of squares with arcs in them.  Looks like a quilt pattern to me and I could do the math to make this quilt block in no time but someone has already done the math for us! 


The quilt pattern reminds me of a Yellow Brick Road Quilt or Turning Twenty Quilt.  The pattern is well written and easy to follow.  This would also be a great scrap buster quilt.  There's only four sizes of squares.


Here's two samples made by the designer Michelle of Bit's and Pieces Quilting.    Great for a quick gift or charity quilt.

The FREE pattern is a YouTube tutorial. In the video description Michelle  shares a link to her blog where you can find the Free PDF printable in the patterns tab on her blog. 
  Click here to go to the YouTube Video,  She is fairly new at making YT videos and is doing a great.  Hop over and give her some quilty love!

Until next time...

I hope you find time to stitch up something sweet!


A video from my back porch I posted on FB a couple of days ago.

Pin It

Friday, May 19, 2023

Outside Work and Quilting

 Hey Quilty Friends!  It's a busy time of year here in Podunk. 

I've not stepped foot in the Studio in over a week.  So the Lone Star did not get finished by my self imposed dealine.


The quickest and easiest way to catch you up on events is by video.  So click the video below.  Thanks so much for stopping by.  I hope to be back in the studio soon!


Until next time...

I hope you find time to stitch up something sweet!


Pin It

Tuesday, May 16, 2023

Blog Hop ~ Rose Colored Glasses

 Hello Quilty Friends!  Today I'll be sharing with you several different quilts I've made over the years using pinks and rose.   Plus I'll be sharing my most recent finished from a couple weeks ago.   I love pink! What little girl doesn't?  Yes, there's still a little girl hiding inside of me that loves to play with color.

This first quilt is called Turnabout Tulips, designed by me.

All the that white space needed a little extra quilting to make her extra special.  This is one I kept for myself.  All of the other rose and pinks quilts I've made have been gifted.

I used to make at least one pink quilt a year and donate it to someone I knew battling breast cancer.   It all started with the quilt below.  The pattern came from the Quilters Cache Website.  If I remember correctly, I changed the pattern a little bit.  It was gifted to one of my mom's co-workers way back in 2009.   Back in those days I wasn't good about remembering to take pictures of my quilts when finished so I didn't get a picture of it quilted.

The next one was drafted in EQ8 after seeing a picture of the quilt online.  I called it "Spinning Into the Pink".  It was gifted to my moms friend who battled cancer 3 times and won!  

Mom was a hair dresser.  When her friends hair started to fall out she asked mom to use clippers to shave it off.   Mom had no clippers but she knew I had a pair I used to cut my two sons hair.  So mom asked me if I would be willing to shave off her friends hair.  I was nervous but agreed.  It was not at all what I expect.  I expected to see a sickly, crying and depressed woman.  But she was quite the opposite.  We formed a bond and I became her official head shaver with each battle. 

This last breast cancer quilt was made was for my sister in law.  She too has been battling cancer for many years and doing very well.  For this quilt I wanted to keep it simple but add a touch of  Rose applique for the WOW factor.  This may seam a little silly but I did a little research on colors.  Supposedly colors can have healing powers.  So I pulled colors from my stash that were thought have the greatest and best effect on breast cancer patients.  We just never know what can or will make a difference.  I like to think my quilt worked some magic.


The final quilt is not a breast cancer quilt.  It is my latest finish for me.  A simple gingham quilt.  


The scraps from the quilt top are used to make a scrappy backing.


The quilting is quick and easy.


I didn't go to any big efforts to make a label since it may not survive months, weeks or years of weather.


The plan has been to make a different colored gingham quilt every month.  So far this year I've made four.


And I  have another one cut and partially pieced.


As with most quilters, I have more ideas than time so my plan has been derailed just a tad.  But after I finish my latest project, it'll be full steam ahead on my 2023 goal of finishing UFO's and making a Gingham Porch quilt each month.   The pattern I'm using for the gingham quilt is a free pattern and can be found here.


Thank you stopping by my little spot in Podunk during the Rose Colored Glasses Blog Hop!  You're welcome to stop by anytime.   You might want to bring a cup of something to sip on when you visit because I can be a little chatty.  I also want to thank Carol over at Just Let Me Quilt for hosting this blog hop.  


For more Rosey ideas and blog hopping fun, visit the blogs below.  


Until next time...

I hope you find time to stitch up something sweet!


Pin It

Friday, May 12, 2023

Pretty Pin Cushion Yuk! ~ Free Pin Cushion Pattern

 Hello Quilty Friends!  Today I want to share with you my favorite pin cushion and how I've let her become filthy...shame on me.


She's been dusted a few times over the years but she is in need of a good bath.  Can it be done? Well we're going to find out today.

Before moving onto the cleaning here's the free pin cushion pattern that inspired mine.  I did not use the dresden template provided in the pattern and I also made mine a little larger around.


Now back to my dirty girl.  Time to remove all the pins.  Oh this is shameful.  How could I let her get so dirty?


Lets start out by knocking off all the dust with a brush.


It looks much better but what you can't see in this picture is how dingy she has become.


Looks like soap and water are going to be needed.  This can be scary when it comes to red fabrics.  Did I prewash these fabrics?  I don't remember.  Oh well, lets give it a try with a little bit of this mild soap watered down and then lightly scrub with the brush.


After scrubbing I rinsed it really well under running water.  Wrapped it in a towel to squeeze out the excess water, let is set for about 3 hours to see if it was going to bleed.  All was good so I took it back to the studio placed it on a cookie cooling rack with a fan pointed on it, and left it to dry overnight.


The next morning I woke up to a disaster.


I was afraid to do this next method first because I didn't want to soak and distort the shape.

Plan  B
  The Blue Dawn dish soap and color catchers have never let me down.  After letting her soak in the hot water and soap for about 12 hours I gave her a good squishing and then rinsed her really well by dunking and squishing.  Then I put her in the washing machine on spin cycle only to remove as much water as possible.


This is what the soapy wash water looked like after squishing....EWW!


And those color catchers did their job. 


Now to let her set overnight.... again.  Crossing fingers and praying.


The next morning she is dry and bleed free!  YAH!


The bottom looks great too!


Happy Dance!  She looks like new .  A little lopsided, even after a lot of trying to reshape.  I can live with the lop sided as long as she's not bleeding.


She's back home and looking good.  Thank goodness for Dawn dish soap color catchers.


Until next time...

I hope you find time to stitch up something sweet!


Pin It
Related Posts Plugin for WordPress, Blogger...