Saturday, January 28, 2017

Five Fat Quarter Fun~ FREE patterns

 As you all know I'm all about thrifty quilting.  Today I've another great freebie to share with you.  Amanda over at Jedi Craft Girl and Amber over at Gigi's Thimble have teamed up for a new series of FREE patterns called Five Fat Quarter Fun.
The title says it all.  Each project will use 5 FQ and a little yardage to complete.  The latest pattern is called Cabin Fever.  You can read more and find the link for your free pattern by clicking here.  Don't forget to look for their past project, it's a cutie too.


I started cutting my Wal-mart FQ Bundle yesterday evening.


Within just minutes I had my first block.  They should call this the Fast Five Fat Quarter Fun.


Since I get up before the chickens I'm making great progress.  I think I'll have a quilt top by noon.  

  
It won't take long to finish up the last 8 blocks.  


Here's a sneak peak at the next Five Fat Quarter Fun Pattern from Gigis Thimble instagram feed.  Oh I see a lot of sweet stuff going on here!  


 ~ Lea Anne ~
Pin It

Friday, January 27, 2017

Quilt Doodle Designs Mystery 1&2 ~ No curved piecing Tutorial

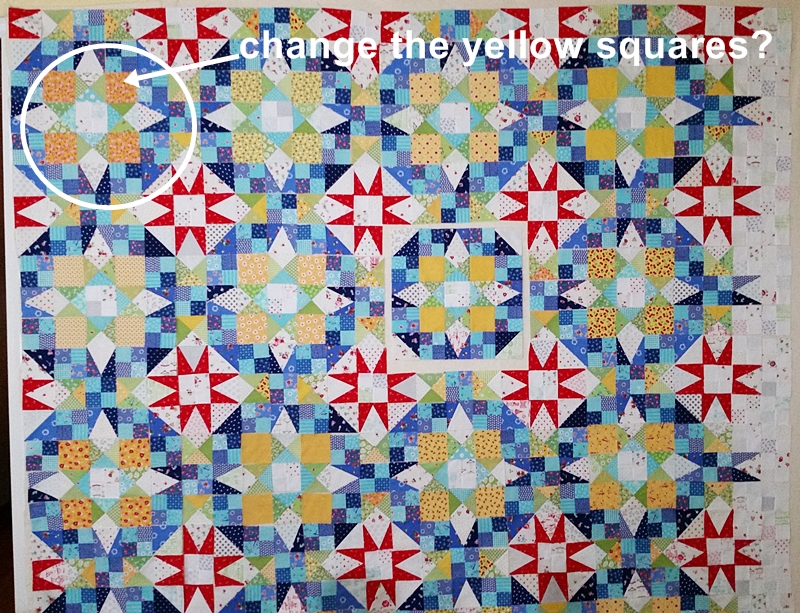
Hello quilting friends!  I've got something to share with you today that is so stinkin cute and easy.  Blocks one and two of the Quilt Doodle Designs Mystery BOM 2017 are almost complete.  All I need to do is decide on a background fabric.


Since this mystery is spread out over several months I've plenty of time to find the Pur-fect fabric to put behind the dresden blocks.  


Before starting the tutorial let's talk about the pattern.  It's a free BOM from Quilt Doodle Designs.  But don't take the word free for granted, these two blocks are only free for one month, and that month is just about over.  Once Cindy posts the new blocks for February these two will no longer be free but on sale in her Crafty and Etsy Shops.  So click right here to be taken to the free PDF downloads.   Maybe you're not interested in making this quilt.  Well don't let that stop you from browsing the huge selection of cute reasonably priced patterns for sale, and I saw some free ones too!  


Designing and writing quilt patterns is very time consuming.  So I want to thank Cindy for the sharing her talent with us at no cost and allowing me to share my alteration of her pattern with you.

 No Curved Piecing Tutorial

In the original pattern this center circle is pieced. (Click here to see Cindy's tutorial for piecing the center.)  I'm not a fan of curved piecing, it's a skill I've yet to master.  Today I'll share with you how to use the templates provided in the free pattern to make an inexpensive applique template for the center circle.


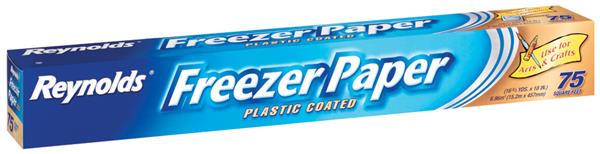
The first thing you'll need is Freezer paper.  Notice on the left hand side of the box.  An advertisement for use in arts and crafts.  Now if your freezer paper doesn't say it can be used for arts and crafts, its still okay to use.   


You'll also need some type of starch.  I use Sta Flo concentrate because it's cheap.  But any type of starch or sizing will work.


We've got our supplies, let's make an applique template.   I also made my pig and kitty applique using the scraps of freezer paper leftover from the center circle.

1. Cut a piece of freezer paper about 16 inches wide. 
2.  Next we need to cut it into 4 sections.  I did this by folding it in half and then in half again.  
3.  Using my square up ruler to cut away the folds.  This will give you 4 equal sizes.  
4. From this point on we will be working with the shiny side down.


Pre-shrinking the freezer paper is necessary to keep your templates from shrinking as you use them.  
1. With shiny side down spray each piece of paper with water. 
2. Then with a medium heat iron(wool setting), iron each piece separately to your ironing surface.  Yes they are going to stick to your ironing table.  Don't worry, there will be no residue left behind when you remove them.  Sometimes this shrinking process causes the paper to wrinkle.  No worries here either.  Just peel it off, don't spray with water, iron them separately again.  I've never been able to get them completely without wrinkles.   
3. Next peel up two of the papers.  Lay one of them on top of the one still stuck to the table.  Iron it. Repeat with the third piece. 
4.  You have 3 layers ironed together.  Allow them to cool before removing.


1.Next cut out the template provided in the pattern.  Cut outside the outer circle.
 2.Glue this circle to the non shiny side of the layered freezer paper.  I used quilt basting spray but any glue will work.  
3. Then carefully cut on the seam allowance line.  You now have a usable applique template.  
4. Iron the template shiny side to the wrong side of your circle fabric.  Cut 1/4 inch away from the template.  You might need to iron with the fabric on top.  Just make sure it's shiny side to the wrong side of your fabric.
5. Using a paint brush apply starch to the seam allowance.  
6. Then iron the seam allowance over onto the template.


1.Remove the fabric from the template and finger press in half and then in half again.  As you can see in the picture below I only pressed the very edges.  Use these pressing marks to line up with 4 seams on your dresden.  This will center the circle onto the dresden.  
2. flip over your circle to the back and add a few dots of  Roxanne's basting glue to temporally hold it in place.  
3. Turn it back over and line up your marks with 4 of the seams.  
4. Press with a medium iron to dry the glue  Elmer's washable school glue is a good substitute if you don't want to use Roxanne's .  Pinning it in place will work also.


See wasn't that easy?  In past projects I've used one template as much as 20 times and it still sticks.  Freezer paper applique is cheap and one roll will last a long time.   Saving money in one area of quilting allows me to spend more in other areas like thread and fabric.   To stitch my circle in place I used Invisifil 100wt thread.  It's a little more expensive but lasts forever.  This super fine thread melts into the fabric and is barely noticeable.


Just because it's fine doesn't mean it's not durable.  When I bought my first cone of thread I gave it the pull to break test.  OUCH!  This is some tough stuff. It nearly cut my finger.


Just look at those close up results.  


For the pig, kitty and embroidery I used Aurifil 50 wt.


It doesn't melt in quite as nicely but it was just the look I was after.  The embroidery work was done on my sewing machine with those fancy stitches we pay for and never use.


To stitch down my little critters I used a tiny blanket stitch and went very 
S-L-O-W.  Not much room for error!


But the results are Marvelous.


Well that's it, I hope this inspires some creative stitching.  

~ Lea Anne ~


Pin It

Wednesday, January 25, 2017

Cleaning, Playing and Working

 During a mini burst of energy yesterday I decided the studio need a quick cleanup.  It didn't take long to get side tracked when emptying my scrap bucket that sits on the cutting table.  Quilters have the prettiest trash, don't we?  There must be something to do with them.  Out of the trash they came.  Now what can to do with them?....HMM...an epiphany! And within just a few minutes these adorable little cloths pins were made.  


During the studio clean up the decision was made to take the En Provence off the design wall for a few days.  To be quite honest I'm tired of the mess it has created.  For all you Bonnie lovers, it's still in plain view, folded up nice and neat and sitting on my desk.  I WILL FINISH THIS THING IF IT KILLS ME!  But for now there's other things that need to be done.  At the beginning of the month I decided to take some time off from designing quilts in order work out of my comfort zone.  This years plan is to do a few BOM's and quilt-a-longs. 


The first Free BOM on the list is  Quilt Doodle Designs 2017 Traditional Mystery.  As you can see it's a Dresden quilt pattern and I love Dresden's.  The mystery in this quilt is what will be appliqued in the Dresden's. By the looks of the quilt design I'm thinking there might be a tad more applique throughout the quilt.  The great thing about this mystery quilt is you can work ahead by making all the Dresden blocks. Then just add the free center applique at the start of each month.  If your interested in joining in or collecting the free patterns click here and here.  Now let me warn you the pattern is only free for the month it is released.  When the new clue comes out the previous months pattern is no longer free.  So get now, it's only free for another week.


Now that the studio is somewhat clean I can start making Dresden's.  This Dresden block calls for 16 blades.  The Dresden ruler I own  makes 20 blades per block.  By using the template provided I made my own ruler from Plexi-glass.  I've discussed this several time here on my blog.  You can read more about making your own templates here, here, here and here.


Okay lets pick the fabrics.  This is one of favorite things about quilting...Petting the fabric!  I've been waiting for just the right project for Lori Holt's Calico Days FQ Bundle. This line is so sweet, the little cherry prints are my favorite.


While this line of fabric is absolutely stunning on it's own I wanted a few more prints just so it could be scrappier.  Can you spy the 8 fabric additions that aren't Lori Holt?  If not that means I chose well.  


Let the pressing and cutting begin!  


One Dresden down, 11 more to go.  Cindy's pattern suggests we do some curved piecing to add the center.  Well you know me and curved piecing don't get along.  Appliqueing the center circle to the block is the method I'll be using.  I contacted Cindy asking permission to share my technique for changing her pattern.  She graciously gave me permission to share my technique and tutorial with you.  So as soon as I can get a tutorial ready I'll show you how not to do curved piecing.


See you soon!

~ Lea Anne ~
Pin It

Wednesday, January 18, 2017

Spring on Bleeker Street ~ Freebie

Good Day quilting buddies!  Today I want to share another free pattern and quilt along with you.  This one is called Spring on Bleeker Street.  Designed by  Wendy Sheppard.  Click here to get all the details on the sew along and download the free pattern on her blog Ivory Spring.  


As soon as I saw this quilt I thought how cute it would look hanging in my Studio.    It has a little of everything, piecing, embroidery and applique.  For those of you that are looking to expand your quilting knowledge this year and get out of your comfort zone this would be the perfect project.  Wendy will be sharing tips and tricks along the way.  I've been following Wendy's blog for years after seeing her quilt patterns in several quilting magazines.  This is when and where I learned to do fusible applique that actually turns out beautifully.  You can find her tutorials for fusible applique on the right hand side of her blog along with several other tutorials, just scroll down past the many FREE patterns. (over 100 free patterns! Squeal!  Jackpot!)    

And if you would like to see the whole Spring on Bleeker Street quilt finished with some awesome up close eye candy click here.  I hope to see some of you joining in this free sew along.  See you there!

~ Lea Anne ~


Pin It

Monday, January 16, 2017

Scrappy Makes me Happy

Happy Monday quilting buds!  There's been a lot of design wall action going on in Podunk this past weekend. 


The Bonnie Hunter Mystery quilt "En Provence" has taken over the studio.  If your interested in making one you can find all the FREE quilt clues by clicking here.  Bonnie also has a Facebook page that anyone can join and post pictures of their quilts.  Not just the mystery quilt but any quilt.  Its a fun group with a lot of amazing quilting inspiration.  You can find the Facebook Quiltville Open Studio by clicking here.  Of course you need a Facebook account to join this group.  I highly recommend joining.


En Provence has been quite the new adventure for me.  It's my first and probably my last mystery.  Oh I'll still save the clues to new quilt mysteries I find on the internet, but I'll wait for the reveal before making the first fabric cut.  I found this to fun but stressful.  Bonnie is a wonderful designer so the issue isn't with her pattern but more with me and how I like to quilt.  I need to see the quilt in order to choose fabrics.  That's pretty obvious by the looks of my quilt.


 I'm not saying I don't love this quilt because I do.  Scrappy makes me happy! Below is the first block I've stitched together.  Only 15 more to go!  Should you make this quilt I suggest you press all seams open, I did not.  There's a lot of bulky seams if you follow the pressing instructions in the pattern.  Quilting it is going to be the next big challenge.  But that's what this quilt was all about for me, getting out of my comfort zone.  The best way to handle bulky seams is to avoid quilting over them.  So I'm already playing around with a few quilting designs.  


The quilt is huge 87 x 87 but I'm considering adding to the border.  Below shows the border as written in the pattern.  I may add a thin strip of border followed by more more round of 4 patches....we'll see.


My design wall is completely full and I've still not laid out the top and left border.  Can you see the one lonely pieced block near the middle?  As the block and rows go together it'll make more room for the last two borders to be added to the design wall.   Standing back and looking at a quilt helps you to see the real quilt.  Taking a picture does an even better job.  The yellow in the white circle may need to be replace.  What do you think?  I can also see I've clustered light yellows and dark yellows together.  The picture also shows that even though my blues didn't work out as well as would have liked they still show a flow in the pattern.  Well I wanted a challenge, and I got it....geesh!


While I seem to be complaining a lot about this quilt.  The journey has been interesting.  Getting out of my comfort zone is always a learning experience.  That's what I want to do, GROW as a quilter.  Maybe I will do the next Bonnie mystery quilt at the end of this year just to see what I've learned from this one.  The year is still young and there's plenty of time for more learning before the next one is started.  

~ Lea Anne ~

For those of you that have been following me for a long time the next section of this post is for you.  It's an update on my Mom.  As you know I've spent the last several years helping and taking care of both my parents during their health issues.  Mainly Mom.  Mom's fight with cancer ended last Saturday January 7th.  She died at home, with me and dad.  There were several family members who also helped us along the way. I can't thank them enough for their help and support. I also want to thank each and everyone of you for your support and prayers.  Mom often told the doctors the reason she was able to fight the hard fight was due to all of my bloggers from around the world praying for her.
If you would like to read her obituary click the link below.

Pin It

Sunday, January 15, 2017

FYI - Another Free BOM

Oh  my goodness friends I've another great Free BOM to share with you today.  I'm a longtime fan of Esther Aliu's quilt patterns.  They're always stunning.  So when she posted her new BOM my heart started pounding.  Take a look at this years FREE BOM called Diamond Hill.  To find out more information and download the first months clue head on over to Esthers Blog.  Don't wait to long it's only free for a limited time.


And you really should take a look at her Facebook page where you'll find a short video of a few different color ways....OMG!...Stunning!


I can't wait to start digging through my stash and making a plan for this fabulous freebie quilt pattern.  So, who's as excited as I am about Diamond Hill?  Hope to see a few of you sharing your progress over the next few months.

Pin It

Saturday, January 14, 2017

My multi template tool - DIY

Hello quilty friends!  So glad you stopped by Podunk for a visit.  Grab a cuppa whatever and pull up a chair while I show you what I've been up to the last few weeks.   I've been participating in the Bonnie Hunter Enprovence Mystery quilt.  With each clue given I found a need to square up the units.  So the tool you see below slowly evolved.  I've shared in the past how to make your own rotary cutting tools from sheets of Acrylic(or as I like to call it Plexi-glass).  It can be purchased at your local home improvement store. (I wait until it's on sale as it can be quite pricey)  Just make sure you get the kind that can be scored with a razor knife and snapped into shape.  TIP:  score your lines on the template with your razor knife and use a fine tip sharpie to fill in those lines, the black markings will last almost forever.  The red arrow below shows a score mark before using the sharpie to fill it in.  


The first clue in the mystery was the red Tri Recs units, I used the tri recs tool, later came the blue ones. Sewing with a scant quarter inch so so there would be a little wiggle room for squaring up the unit.  Then I needed a quick way to square them up, so the 3.5" template was made and I drew a line 1/4" away from the top of the template.  


And then came the oodles of 4 patches.  Might as well keep sewing with the scant 1/4 inch.  The four patch lines were added to the template.


I was so glad when I realized that all the units were going to be 3.5, I could just keep on adding lines to my template.  Again I followed Bonnie's directions for making the HST's, but my handy DIY tool made squaring up the HST's a breeze!  


The Quarter square triangle(QST's) can be made in several ways.  But I wanted to work with the strips and scraps, so I had to do it the way Bonnie suggested.  No time for shopping, and I didn't want to order another ruler that I may only use once.  So I had to pull out my thinking cap.  And after a epiphany I started cutting for the many QST's.


So how did I do it?  I used my EQ7 program to draw a 3.5 " QST, then printed the template, cut it out and taped it to my 3.5" square.  I scored my line and TADA!


Here's the shape on the template.


And here it is in action, ready to be cut.  How's that for thrifty?!  Whoohoo!


Still stitching together using the scant quarter inch so I can trim to perfection.


And the last unit in the quilt was the yellow 3.5" patches.


I used the one DIY template to square up every unit in this quilt.  So after making all my units and using a couple other rulers I started thinking, is there a way to make the triangle in a square block with the Tri Recs tool?  I'm sure you could use the DIY Plexi glass method if you had the paper templates for your pattern.  The little notch at the top might give you some trouble.  So anyone gonna give it a try?


Well all my units are complete and I'm ready to start placing them on the design wall.  See you in a couple days with a sneak peak!

~ Lea Anne ~
Pin It
Related Posts Plugin for WordPress, Blogger...