Sunday, February 28, 2016

Design Wall Daisies

Top of the morning quilty friends!  Hope you each had a wonderful weekend filled full of whatever makes you giggle.   I didn't get to stick to my weekend plan of quilting on the frame.  As soon as I touched my quilting machine ...she broke.  Oh well what can you do but whine to Mr. Podunk, ask him to fix it and move on.  This was the perfect opportunity to work on a UFO.  There's plenty to choose from in various stages of completion.  But the one below caught my eye.
A cute little stack of 50 or more mini dresdens.


If you've been hanging around my blog for awhile you probably remember my Daisy quilt.  Not sure why this one became a UFO because I LOVE IT.  It might have been the applique.  Due to the little dresdens being randomly placed on the quilt top over seams it's a little bit of a pain to machine stitch them to the quilt.   It was a even trickier to glue baste them in place as the quilt hung on the wall.


 All basted and ready to stitch.


 Awe now look at that, so springy and cute.  Why did I ever stop working on this?


~ Lea Anne ~
Pin It

Podunk Pickins #22

This week has flown by and I've accomplished very little in the Studio.  It's been one of those weeks that I seem to just run around chasing my tail and never really doing anything that's worth sharing on the blog.  
So now comes the issue of how will I chose one person to feature for Podunk Pickin's.  To be fair I decided to let the Random Number Generator do the work.  

It chose Kath@HillsideHouse.  She shared an amazing project designed by Erin Russek called Mimi Bloomers.  Hop on over to Kath's blog to see her outstanding handwork.  After doing a little research I found that all the  monthly blocks are still available for free download on Erin blog, click here.  However the center block needs to be purchased here.


Pin It

Wednesday, February 24, 2016

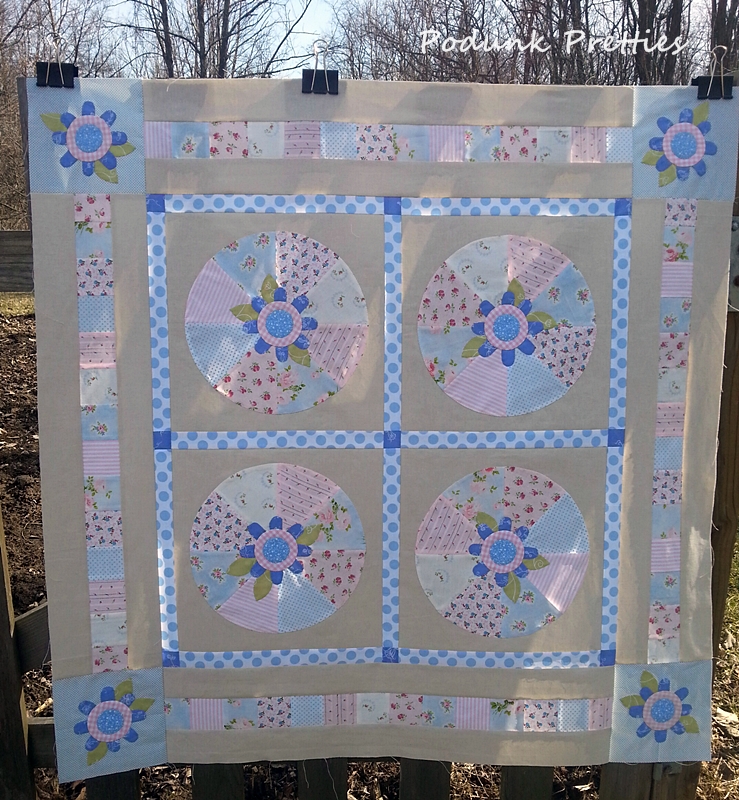
Secret revealed! Happy Garden Wheel Quilt Pattern

Here it is, isn't she a cutie?  I must say that I absolutely love this pattern.   It's not very often that I make a quilt designed by someone else, but when I saw this adorable pattern designed by Beverly I knew it was a must make.


Beverly and her daughter Gina have teamed up, and are creating some really cute ideas.  Most of you might remember Beverly's old blog and online store, 44th Street Fabrics.  She recently moved and renamed her blog Blossom and Bev.  Her daughter Gina also has a blog, Dishy Art,  I can't imagine how much fun it must be to work as a mother daughter quilting team.  This is their first quilt pattern as a team it's called "Happy Garden Wheel".    Beverly worked her colorful magic on the quilt designed by Gina.  You can find the pattern here on Craftsy.  This is a fast and  easy to follow  pattern with gorgeous photo instructions.


I've been following Beverly's blog for years.  Her sense of color and fabrics are amazing.  She loves bright and happy quilts...just like me.  Well you gals know me, and you know I can't stick with a pattern exactly, so I had to make mine different.  Why not start with working out of my color comfort zone.  The Shabby Chic style really appeals to my girly side, so that's what I was shooting for with these fabrics.  I've notice a lot of linens on a few quilting blogs lately so why not add that to the mix as my background fabric.  As you can see below I even threw in a couple fabrics that are not 100% cotton.  All pre-washed of course.


I also chose to use a different applique method than suggested in the pattern.  No reason other than personal preference.  All of my applique was made using freezer paper and invisible machine applique with Superior Threads Mono-Poly thread.  The pattern calls for raw edge and fusible interfacing.  


Now it's time to decide how to quilt it.  Oh that's going to take a few hours of doing the quilt stare.   This little cutie deserves something extra special, don't you think?


 ~ Lea Anne ~

Pin It

Monday, February 22, 2016

Secret Sewing project and a few fabric tips

Just wanted to pop in and give my quilty buddies a sneak peak at what I've been working on over the weekend.  It was top secret until yesterday.  Well I'm having so much fun keeping it a big secret... I'll keep the secret a little longer, until it's 100% complete.  Since the pattern is a secret let's talk a little about the fabrics in this adorable little quilt.


As you all know I'm no fabric snob.  Any fabric that I can stitch, can and will make it into a quilt.  We all love the designer line of fabrics but in my humble opinion adding "other" fabrics to the mix can extend your stash and give you a one of a kind quilt.  Here's a list of the fabrics used in the quilt above.  A couple  in the list below are not shown in the picture due to the secret not being revealed.
  •  pink and white stripe -baby bed sheet thrift shop purchase
  • white with blue dots- vintage swiss dots from my moms stash, they're fuzzy dots!
  • pink and white gingham- linen baby bed dust ruffle, thrift shop purchase
  • the flower petals- A.E. Nathan fabric-bought at Wal-mart about 10 yrs ago
  • the blue floral print at the top of picture and pink floral at bottom of picture are also Wal-mart prints from way back when.
  • the blue print in the center of the flower applique is a Joann's fabric.
  • the green leaves is a from Jam's and Jellies by Jill Finley, Henry Glass Fabrics
  • Fabrics that you can't see...another print from Jam's and Jellies 
  • and the background will be a linen purchased at Joann's fabrics this past weekend using my 60% off coupon....WOOHOO!
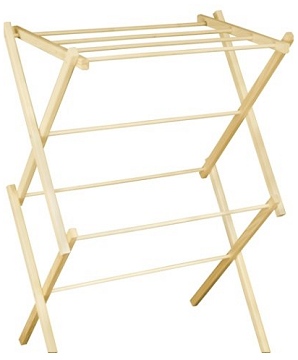
The big secret for using a mishmash of fabrics is WASHING before using.  Yes even those precuts,  jelly rolls included.  Using pinking shears I pink the edges of yardage and the precuts I do nothing.  By all means DON'T throw them in the washing machine.  Soak them in sink or bucket of warm soapy water for about an hour then gently swoosh them around by hand to get out any sizing.  NEVER wring out the fabric.  Drain the sink and repeat the process, rinsing out the soap.  To remove the excess water, fold the larger pieces of wet fabric and press between two towels.  Smaller pieces such as charms don't need to be folded.   After removing out the excess water I spray the fabrics with starch.  The starch  helps hold the fabric together in the dryer.  But before they go in the dryer they hang on a wooden drying rack until almost dry.  Turning on the dryer and getting it nice and hot before tossing in your fabric is a good idea.   Then put fabric in a laundry bag and toss in  the dryer for about 10 minutes, this will shrink the fabric.  You should have very little fraying.
After the fabric is dry, let the pressing begin!  Pressing not ironing, no steam.  If you have a stubborn crease, spritz the fabric lightly with water because they already have starch.  Unless you want it really stiff then by all means starch it.  This may seem time consuming but really it's not that bad and the results are worth every minute.  The quilt below was made with a jelly roll, layer cake, and yardage.  All preshrunk using this method.


~ Lea Anne ~

Pin It

Related Posts Plugin for WordPress, Blogger...