I've been a little quiet on social media in the last couple of weeks. There's just not enough hours in the day to get everything done. So social media takes a backseat, especially blogging. Instagram and Facebook are a quicker option so I post there more often but still not everyday. You can find links to both in the sidebar of my blog. I'm pretty sure you don't need an account on either to look at them but don't hold me to that. Let me know if it won't let you see them without an account. I might be able to tweak some settings.
So what have I been up to? Spring cleaning, dog training and playing with pretty fabric! When I first saw the Notting Hill fabric by Amy Smart I knew it was a must have bundle. Amy's fabrics play well in my color pallet of bright and happy. Just look at these gorgeous prints. The large florals are OOOH-LA-LA!
The quilt pattern I will use for this bundle was designed a few years ago I just needed the right line of fabric. Now to find the right background fabric. Normally plain ole white is my go to but I thought I'd live a little outside my comfort zone and choose a low volume print. The powers that be were not happy with my choice. But I'm not going to let them keep me from my plan. Two things happened....
#1..There was a burn in the fabric.
#2...I under calculated how much I would need and I could not find more of the red dot print.
In my stash is a full bolt of plain ole white but I really wanted to use a low volume Riley Blake. So I went to my favorite online shop, Stitches and Giggles 4 U. I can always find what I need at this shop and the shipping is fast.
While I waited for the fabric to arrive I made a couple of test blocks from my scraps.
Then I starched and cut out my blocks so I would be ready when the fabric arrived. During this time I also cleaned out my quilting tools drawer. In this drawer I found a set of churn dash block pattern labels I made years ago. How fun! I had forgotten I made these, might as well put them to use.
Oh my goodness how cute are these blocks? Florals and plaid....SOOO YUMMY!
Amy knows what I love.
I would love a bolt of each of the large florals....Gorgeous!
It didn't take long to put my quilt top together when working with such pretty fabrics. I'll be showing a few more sneak peaks over the next couple of weeks while I wait for the patterns to arrive from the printers.
Did you know I'm an April Fool's baby? Yep that's right. My birthday day is April 1. So I decided to have a my biggest sale of the year to celebrate my birthday.
40% OFF
No joke! This is a great time to stock up. I may have other sales throughout the year but none this large.
Hello Quilting Friends! Yes, removing stains from quilt blocks is a piece of cake. Almost weekly in the quilting social media world I see a quilter who is at their wits end trying to remove a stain from a quilt. Quilters being kind and generous people for the most part offer up their best advice. More often than not the advice requires a deep pocket...$$$$. Well I'm here to tell you specialty products aren't always the best. Ever heard of Occam's Razor? In laymen's terms it means the simplest solution is usually the best solution.
Marketing experts do an amazing job convincing us of our need for their products. Not just in the quilting field but in every field of our purchasing.
But today we're going to focus on products for stains on quilts. In the past I've used 3 different products claiming to safely and effectively remove stains from my quilts. Stains like yellowing, blood, grease and bleeding dyes. All have failed me in one way or another. They either didn't work or worked so well they ruined my fabric. All were expensive.
I'm not mentioning brands because it's political. I don't want to ruffle any feathers, you understand, right? Do what you like, spend what you want. I'm here to tell you what has worked better for me and is cheap. It all boils down money and effectiveness. If I can get the same or better results at less cost it makes sense. Why pay $500 for a hammer when Lowe's sells the same hammer for $25? I'm sure most of you remember this being uncovered in our government back in the 80's. But lets not go down the slippery slope of politics.
In a previous post (HERE) I shared my yellowed UFO blocks and the start of a test for removing the yellowing. Well it worked and for just pennies. No bleeding or fading of the fabrics. In the image below you can see the test block on top is whiter than the one on the bottom.
This method of cleaning them was an idea from Kelly Kline on live Facebook video. Kelly specializes in quilting vintage quilt tops and linens. In the video she had some discolored vintage linens soaking in ammonia to remove mold. The finished product was much whiter. She then laid them out in the sun to dry and bleach them out even more. The old wives tale of this whitening fabrics must be true because Kelly does it all the time with great success. I was willing to go that far to fix these blocks but luckily I only needed to do the first part of soaking the blocks.
So it was time to soak all the blocks in a 7 to 1 mixture. That's 7 parts hot water to 1 part ammonia. Then I added 1 tsp on Dawn blue dish soap. Dawn was my idea. Both of these smell horrid. I think Dawn dish soap smells like a sour dish cloth but I keep it on hand for tough jobs like stain removal from clothing. It works better than any stain removing laundry product I've used in the past. Just a little dab and a little elbow grease and like magic stains are gone.
Anyway back to my blocks. The magical stain removing mixture was mixed up in a Rubbermaid container. Then I folded each block in half, layering them in individually. Gave them a little squishing action. By squishing I mean pushing the blocks down into the mixture, pushing them from side to side just enough to make sure the mixture was touching every part of all the blocks. Being aggressive with the squishing would cause fraying so I was very gentle. The blocks were left to soak overnight.
The next day I was shocked by the results. Look at the water! Sure the Lemon scented ammonia made a slight yellow tint to the water but this is brown....EWW.
The yukky water was poured off and the rinsing process began.
Here I've removed them from the plastic container and added about two inches of water. Gave them a very gentle squish up and down in the water. Then I drained the tub and repeated the process 2 more times.
To neutralize and remove smell of the ammonia I added some white vinegar to the 3rd tub of water. How much? I just dumped it in, maybe 2 cups of white vinegar. And again with the light squish to make sure the vinegar had saturated every fiber. The tub was emptied and filled again to remove the vinegar. Of course there was more squishing.
When the water had drained from the tub the blocks were rolled up and squished several times. Then I carefully unrolled them.
One at a time they were removed. I would hold them up for just a little bit to allow some of the water to drip out.
The blocks were gently placed in a stack on top of two old towels that had been folded in half separately. Another folded towel was placed on top. Then I rolled them into a jelly roll, leaving one towel unrolled. It was just there to help absorb any excess water. Once rolled it was time for another gentle squish to help remove the water. Excessive squish/squeeze will cause excessive wrinkles so be careful. The jelly roll was left to work it's magic while I cooked super.
About 2 hours later I transferred the jelly roll into the Studio. My pretty blocks look as good as new but they need to hang to dry. If I were to iron these right now with them wet it would shrink the blocks. And if I were to toss them in the dryer....oh what a mess that would be.
Thankfully quilt frame makes a great clothesline. They should be dry by morning.
By the way here was very little fraying, if any.
A few days later I finally took the blocks of the makeshift clothesline and gave them a press with no steam. They are as good as new and it was as easy as pie.
And the best thing, it was cheaper than water pie! Water Pie? Yes ma'am there is a water pie recipe from the depression error. It might be recipe we need to keep on hand. I found this awhile back when looking for a recipe of some sort. Check it out, Water Pie, Paula Deen approved. It was her first time making the pie suggested by one of her followers.
(in my best Paula Deen southern accent) ......
Thanks Y'all for stoppin' by my little ole spot in Podunk! HA!HA!HA!
Squaring up quilt blocks is not something I typically need to do. But with applique blocks it's the best way to ensure your blocks will finish at the correct size. Even the best of quilters can have some shrinking of background fabric during the applique process. So as a general rule applique background fabric is cut 1-3 inches larger than the finished size of the block then trimmed to the correct size after the applique is stitched in place. Most the time the trimming down is fairly simple process. Just press the block and square up to the correct size. This cute little dresden with yo-yo's will take a little extra effort.
I have the correct size square up ruler but it's not going to work.
The problem is the yo-yo's. They will not allow the ruler to make contact with the cutting mat. In the image below the ruler is sitting on top of the dresden block and I can slide a pair of scissors between the ruler and the block.
Did it stop me from trying to square up a block? No. And as you probably already guessed the ruler slid, causing me to cut the block a little wonky and too small. Thankfully the error is not huge and I can still use the block. It's nothing that a little pinning and "easing in" can't hide.
The June Taylor 12.5" Get Squared Ruler would work great for squaring up this block. The fussy cutting 6.5" window would have nested perfectly around the yo-yo's. Sadly I only own the 9.5" version. I could order it and wait for it to arrive. Or make the drive into town and hope that Joann's really has it in stock. The website says its in stock but I've been fooled by that nonsense one to many times.
Plan B: Use a smaller cutting mat, cut one side at a time and rotate the mat after each cut. I have a rotating mat that is the same size as this blue Westcott mat but I want to use this blue mat because it's a prettier color and I rarely use it. I can rotate it without shifting the block. By the way, I love this little $6 mat I purchased at WalMart. This normally sets beside me at the sewing machine. It's used for trimming and squaring up quilt block units. She's holding up much better than my rotating mat that cost $30. So if you see one at WalMart it's a great bargain mat.
This is one time I wish my applique had caused some shrinking to the background fabric. I can't trim the block if I can't see the lines on the mat.
I can faintly see the numbers through the fabric. Maybe they would be easier to see with a ruler on top of the block. HAHA! No you silly girl. I wish I had a medium sized cutting mat. A medium mat could also be rotated to make the cutting easier. Unfortunately all I have is this small mat and the 24 x 36 mat.
Plan C: I made a 12.5" square on my large cutting mat with painters tape. Marked a centering line on each side of the square.
Next I folded and creased a center mark on all four sides of the block. On this block I've used a water soluble marker to make it easier for you to see.
To square up the block I can use the lines on the ruler and the lines on the mat extending out past the tape. The tape is a little outside the cutting line I need to use to make the cut.
This was a little bit harder than a rotating mat but it works. Where there's a will there's a way.
Let's see if measures up okay.
Looks pretty good! Yah! It's smooth sailing from here. All I need to do is trim up the rest of these and then I can sew together the quilt top. Woohoo! Another UFO soon to be completed. Now to start thinking about the quilting design. The yo-yo's are going to add a little extra challenge to that part of the process too. Oh well, that's part of the fun, don't you think?
Well I've pulled out and dusted off the die cutter and decided to jump on board the scrap saver system. What's the point of having all those scraps if you don't use them. And what's the point of having a die cutter if you don't use it. So lets do this! Woohoo! I'm super excited to get this journey started. I'll be using the Bonnie Hunter scrap system. As we all know she is the Scrap Queen. So we might as well follower her lead.
My scraps are sorted by colors and age. I know what your thinking, AGE? Yes, I have a larger older and less loved bunch of scraps. These go back to my early years of quilting when my pallet of choice was much darker. Then I have my smaller "new" scrap stash of bright fabrics.
To start off this scrap cutting journey I need to deal with the old fabrics first. With this being a new to me way of dealing with scraps the chances of errors are pretty good. Errors on old ugly fabric don't hurt as bad as errors on pretty new loved fabrics.
Now which color do I start with first? Hmmm.... Let's start with the green scrap bins. It's getting close to St' Patrick's day so why not make this festive little activity.
Years of saving scraps can't be sorted and cut in one day or one week. Keeping my expectations real, I decided to pull out what I think will be 2 or 3 hours worth of work. That seems like a reasonable plan. If it works out well I could make this a weekly activity. So here's what I pulled from the first bin. Finding a few 2.5" strips felt like I won the jackpot. No cutting required, YAH! I'm off to a good start. Now to start pressing the pile of fabrics to be cut.
In my research about using die cutters I read you will get better results if you starch the fabrics. I also read that this really expensive new product is the best. I'll let you know what I think about this new to me product on Friday with a new Nifty Notions review.
As I dug through the second bin of green I found this bag of low volume whites hiding in the bottom. This was a happy surprise. I might be able to combine the two green bins to make one since the low volume white needs to find it's way to the neutral bin.
Then I found tons of string fabric. Should I toss it in the scraps for dog bins or save them for making rugs? UGG, this is getting hard. I'm a fabric hoarder. The hoarder in me says deal with at another time. So for now they will stay right here.
I didn't make a very big dent in my green stash bins. Sigh...this scrap saver system could take months to complete.
After starching and ironing things moved along much quicker. The Sizzix can cut through 10 layers of fabric at a time. ZIP! ZIP! ZIP! Lickety split!
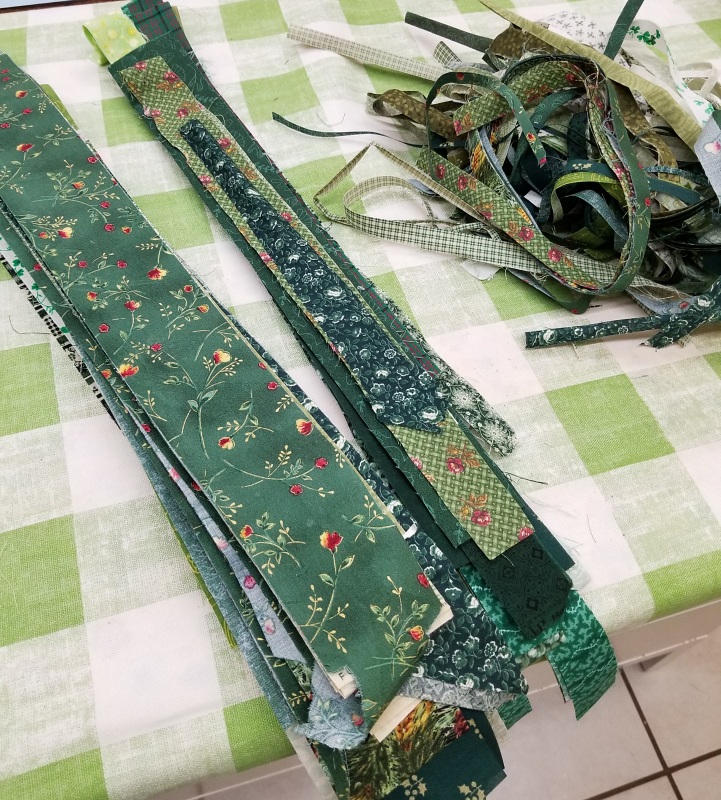
Here's the results of my first scrap saver system cutting session. Several 2.5" strips, some strings for string blocks and a pile of scraps for the dog bed stuffing stash. It took a little longer than planned, about 4 hours. Hopefully this will get easier and faster.
The problem. Cutting fabric = Sewing fabrics. It's only natural. I cut fabric, I make a quilt, it's instinct. The wheels start turning for a quick log cabin quilt or maybe a scrappy trip around the world. Or I could whip out a really quick rail fence quilt! Oh dear lord what have I done? Do I start another project or do I continue with the scrap saver plan?