Saturday, December 21, 2024

Back Door Quilts ~ Fabric Haul ~ 2 Bucks A Block Quilt

Hi Quilty Friends!  Earlier in the week me and my friend Judy went on a little shopping trip to our local quilt shop, Back Door Quilts.  I had a list of needed items...Thimblepads, iron cleaner and Superior Threads Mono-poly thread.  The rest was impulse purchases that we will call Merry Christmas to me!


When I saw the new Cory Yoder line called Cali & Co I couldn't resist the 3 low volume prints.


I grabbed a few more low volume fat quarters because you can never have too many.  The top two prints are Lori Holt prints.  The third print is by Christopher Thompson, and the last print in the stack is by J. Wecker Frisch.


A couple more low volume prints with no information on the selvage.  And a half yard of a beautiful real red print from the Smitten line of fabric by Bonnie and Camille.  A good red print is hard to find these days, so I snatch this one up with no hesitation.  Most so called reds are not red.  They are tomato soup, cranberry or raspberry.  The blue print is by Edyta Sitar and was just too pretty to leave behind.


The shop was having a sale on Christmas and Halloween fabrics, I had no plan on buying either.  As you all know I'm not a big fan of novelty prints.  Sometimes I need to break my own rules.  This Sugar Coated Northcott print was just too darn cute.  It would make an adorable accent on tea towel or maybe a set of potholders for next Christmas.


The last impulse buy was this Scalloped Metal quilt stand.  I've had my eye on it for a year or two.  It's the same shape as my blog logo and it was also my business logo.


The small quilts are held onto the metal stand with magnets.  The quilt designs are cute and made with wool.  I'm allergic to wool clothing so I don't plan on taking the chance of using quilting wool.  I might eventually make the two below with raw edge applique and quilting cotton but for now I'm excited to try my hand at designing at least one of my own.


Now for the other reason we went to the quilt shop.  We wanted to see the new 2 bucks a block quilt for 2025.  It's made with Lori Holt prints.  Judy and I both loved the quilt and decided to sign up for a year's worth of quilty fun. We will pick up our first blocks sometime next month.  


Pin It

Friday, December 20, 2024

What's In The Box ~ Part 2 ~ Grandmothers Flower Garden

Hi Friends!  Do you ever have a day when you just don't feel like sewing?  It's rare for me, but it does happen, and it happened yesterday.  I didn't feel like doing much of anything but watch TV and go down many quilty rabbit holes.  Late in the afternoon, I decided I should at least take a look in the UFO box for a Part 2 of "What's In The Box" blog post.


I went through this box and organized it on Wednesday evening.  Organizing was nothing more than making sure every project was in a bag.  I didn't open projects already in a bag.  So, as I go through these bags over the next few days, I might find a few surprises hiding inside.  They were put back in the box in no particular order and shared in no particular order.

Today's UFO is three different bags of Grandmothers Flower Garden Blocks and one Sunflower block.


Let's start off with the hand pieced Sunflower. How it got here is a mystery but it sure is cute. The first thought that came to mind for using it was a simple pillow.


The same story for the next two bags of blocks.  I don't remember anything about them.  All are hand pieced and older fabrics.


These are in bag two.  


Bag three. I made these blocks many years ago but when?  After searching my blog for any talk of Grandmothers Flower Garden blocks, I found ZERO posts.  A good guess would be 12 to 16 yrs ago.  I remember working on these while on camping trips and long road trips.  Oh well, they are old and that's good enough.


In the bag is more fabric and cardboard templates for making more blocks. To be on the safe side I'll leave the these stored with the blocks.  Being fickle is something I do really well, so it's a good idea to keep them out of my stash and ready to be used for more blocks.


If all of the blocks from the 3 bags were the same size, they could easily be put into one quilt.  But life likes to throw challenges my way.  Each set is a different size. Oh, I'm certain there's a way to put them all in one quilt but do I want the hassle?  Again, only time will tell.  I love them all and plan to use them, I just don't have a plan.


Over the years I've pulled out my bag of blocks and played with ideas for setting them as applique on a large piece of background fabric.  


A Medallion style quilt, then add some applique around the outside in the blank areas to make it more interesting.


After taking the pictures above, editing and writing this blog post for today it was time to get back to being lazy.  I started looking for ideas online. After about an HOUR, I stumble across a quilt made by Lori Holt.  It was late and I needed to get to bed. So, I opted to cancel the 4 am scheduled post so I could add the following. 

In this quilt Lori's flowers are appliqued to a background fabric then snowballed and set with colorful sashing.  I like it!  Maybe this is an option but on a much larger scale.  Her style of applique would be the quickest way to finish my project.  I don't really like her style other than it's fast.  Since I borrowed her quilt image, I'm not going to tell you or show you her applique technique.  You can find the tutorial by clicking here.


If I choose to go this route, all the blocks from the three bags could be used in one quilt.  It wouldn't be the prettiest quilt, but it would be finished and have a story to tell.  What do you think? 


Pin It

Thursday, December 19, 2024

What's In The Box ~ Part 1 ~ Mariners Compass

 Hi Friends!  Please tell me I'm not the only one with a huge box of forgotten unfinished projects.  It's so easy to forget them when you can't see them.  Should we take them out of hiding?  Come on in and join me with the first of many of posts about "What's In The Box".


 The sewing room plan for yesterday was to tidy things up a bit before starting to sew. That's what I was doing, sweeping under the quilt frame. While moving things out from under the quilt frame I became distracted by the containers of UFO's.  The two marked with stars are partially quilted quilts. I didn't like the custom quilting on them, so they have been stored away until I feel like taking out the stitches. Those can be dealt with at another time.  Honestly who likes ripping out quilting, not me.   The tote marked with an arrow is full of UFO's.  It's time to sort through them and make a few decisions.


The first thing to do is sort them and find a better storage solution.  Ideally, each project should have its own storage bin.  Preferably a clear container, labeled with the project name.  My plan is to slowly sort through them over the last few days of this year.  Hopefully by the start of the new year I can have them organized and stored for easy access.  Maybe if they are staring me in the face, I'll be more inclined to finish them.

Let's take a peek at the first one out of the box.  It was folded and laying right on top.  A Mariner's Compass.


This was started way back in 2012.  The foundation paper is parchment paper.  This was drafted by me with a pencil and a ruler.  Wow, I don't think I would have the patience for such a project these days.  You can see the original blog posts here.  You'll also get to see the canoe he made from 1/4" wide strips of wood, it took 3 yrs to make.


The Compass turned out beautifully, but it became a UFO because I couldn't decide on the method for adding a background fabric in order to make it square.


The plan was to add these blocks around the squared Compass.  The blocks are from a block of the month program by our local quilt guild. 12 blocks total. 


Because I still dread trying to square up the compass block, I think the quickest way to finish this project would be to quilt the Mariners Compass as is and call it a table topper.  Then the 12 blocks would be made into a quilt. What do you think?  I'm open to ideas!

See you soon with "What's In The Box ~ Part 2"


Pin It

Wednesday, December 18, 2024

Old Town Part 4 ~ Finished!

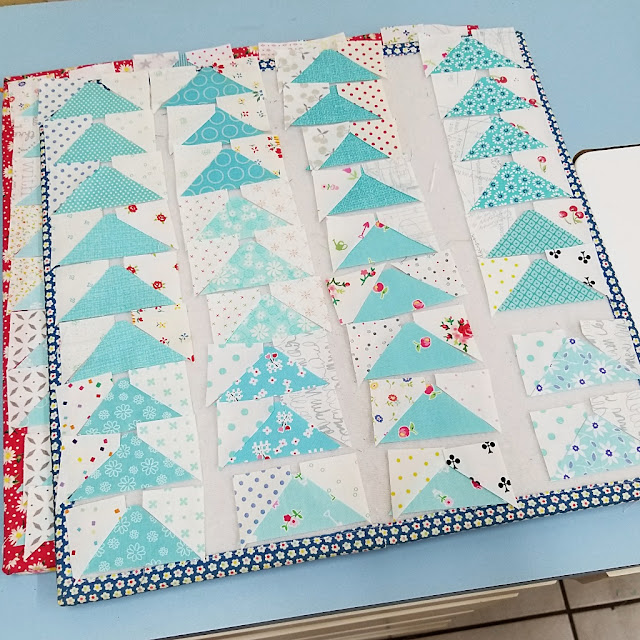
 Hello Quilting Friends!  Come on in and join me in a little celebratory finishing dance!  Had it not been for all your well wishes and prayers for speedy wrist healing, I don't think I would have been able to accomplish these half square triangles this week. It means the world to me to have such a great community, thank you!


They still need the dog ears trimmed off but as far as I'm concerned, they are done.  The trimming should only take about 30 minutes, give or take.

Working a little at a time and taking rest breaks as often as needed worked out perfectly.  The only real issue I ran into yesterday was cutting apart the chain piecing.  The Blade Saver Thread Cutter is one of my favorite gadgets.  However, it was not wrist friendly.  It only took about three cuts for the pain to intensify in my wrist.  I gave my wrist a rest for about 30 minutes, then finished cutting the threads with scissors.


Today's plan after trimming the dog ears.
1. Tidy up the sewing room.


2. Stitch the border applique on the Bumpkin Baskets quilt.


Pin It

Tuesday, December 17, 2024

Challenge Accepted Quilitng

 ðŸŽµShe's making a list checking twice and checking it twice, she's gonna get done no matter the price.  Lea Annes gonna get it done.  🎵She planned the whole day wisely, she knows what is at stake, she's gonna have a fun time, so let's grab that layer cake.🎵


🎵Oh, the fabrics are cut, their waiting on me, to get off the couch and turn off TV.  Lea Anne's gonna get it done.🎵


Yesterday was unproductive, not due to the TV, it was the only word I could think of to rhyme with "me".  It was one of those days of getting things done everywhere but in the sewing room.  Today is a fresh start.  I plan dedicate all my quilting time to finishing Part 4 of the Old Town Bonnie Hunter Mystery. 

 Bonnie's mystery clues typically appear on Fridays, but she hinted in her latest clue how she occasionally releases a surprise clue whenever the mood strikes her.  Oh, that sneaky gal.  Is she going to toss in another clue or is she just toying with my mind!...HAHA!  Whatever her intentions, she's lit a fire under my hiney, and I like it.  Challenge accepted!


#oldtownquilt

Pin It

Monday, December 16, 2024

Little by Little ~ Old Town Mystery Part 4

 Hi Quilty Friends!  Today's quilting update is small, but there's still progress. The fabric for part four of the Old Town Mystery quilt is finally ready for cutting. My scrap bins lacked pieces large enough for the necessary matching sets, so I resorted to cutting some strips from my yardage stash. Naturally, most of these strips came from my cherished Lakehouse Drygoods collection, which always sets my heart aflutter.


I managed to cut four matching sets of half square triangles with Bonnie's Essential Triangle ruler, which was the most my injured wrist and hand could handle. A little progress is better than none. After all, Rome wasn't built in a day! Quilting is not only therapeutic for the mind but can also be physical therapy for hand and wrist injuries.


The cutting of strips and triangles was a slow process. I alternated between the cutting table and the sewing machine, where I managed to stitch down five sets of applique arcs and flowers.


My day involved more than just sewing. I also had to pressure can dog food and take breaks to rest my hand and wrist.


I also freeze and dehydrate dog food. It's worth the time and expense to keep her as healthy and happy as possible with her health issues.  It is also more affordable and healthier than high-quality commercial, or veterinarian prescribed dog food.


Today will likely be similar to yesterday, moving from one project to another. I plan to begin the day by sewing up the half-square triangles and then I'll go wherever the wind carries me.


Pin It
Sunday, December 15, 2024

Switching Projects ~ Baskets Of Fun

 Hi-diddly-O! Quilting Friends!  My recent injuries from tripping over the dog will not keep from sewing.  I may not be able to cut fabric but I'm pretty sure I can still manage a few stitches on the sewing machine.  So, I pulled my Bumpkin Baskets quilt out of the WIP's cart. 


All that's left to do on the Bumpkin Baskets quilt is to stitch the border applique into place using the invisible machine applique method.  The appliqued pieces were glue basted in place months ago using Elmers washable school glue in a Roxanne's basting glue bottle.  The Elmers is cheaper and works just as well as Roxanne's glue. It was also easier to find locally when I ran out of Roxanne's Basting Glue.


Invisible machine applique can be stitched with any thread that matches your fabric or with invisible thread.  I prefer Superior Threads Mono-poly.  It's a clear monofilament thread that can hide in almost all fabric.  They also sell a brown Mono-Poly to use with darker fabrics.  Typically, a walking foot is my go-to for machine applique, but it's a no-go today. Attaching it requires a screwdriver twist, and my sprained wrist just gave me a big thumbs down!


The reading glasses are helpful when working with invisible thread.  Especially if your machine is like mine and refuses to thread the needle with the automatic threader.  Painting the end of the thread with a black sharpie marker helps when manually threading the needle.  I sometimes use the camera on my phone to find the thread, I can zoom in on the thread.  It shows up pretty good in the picture below, but I couldn't see it when taking the picture, it must be the angle of the light.


Making the smallest stitch possible is also what helps make the stich invisible.  I prefer a very narrow blanket stitch.  In the picture below, the left image shows the needle in the background fabric.  On the right the needle is in the applique. TINY stitch!   


This quilt is my own design, no pattern is available, but you can get an idea of how I made baskets and border at the following links.

The first link shows my inspiration for the basket block.

The second link is the basket block redesigned and used in a small quilt.

Well, I've rambled on long enough.  It's time to get this quilt top finished and ready for the quilt frame.  Oh, I won't be quilted anytime soon.  That will need to wait until sometime next year.


Pin It
Related Posts Plugin for WordPress, Blogger...