Tuesday, December 31, 2024

Old Town Mystery ~ Part 7 ~ Finished

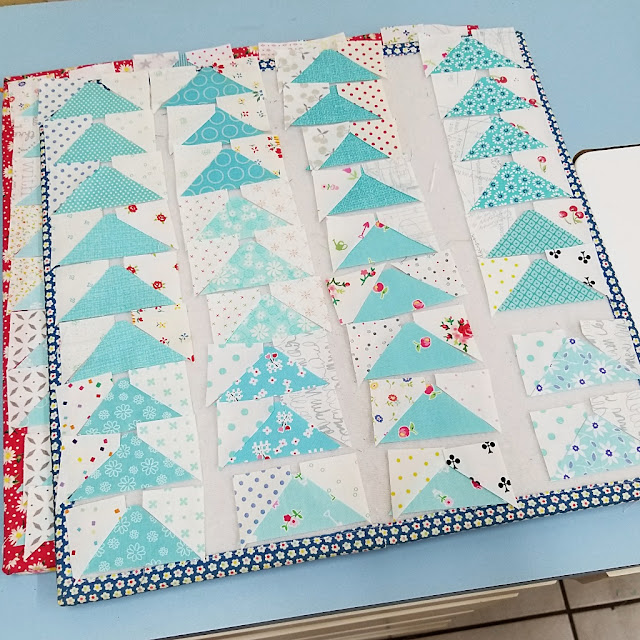
 Hi Friends!  I did it.  I finished these itty-bitty units!  Let me tell you, they gave me trouble right from the start.  If it could go wrong, it did.  Miscuts, miscounting, wrong seam allowance and pressing in the wrong direction.  But I kept my cool, worked through the many issues and here we are with a pretty stack of what looks to be perfect units ready for the next clue in this mystery quilt.


 I'm not one of those quilters that will take apart blocks if the seams were pressed in the wrong direction.  Pressing the seams in the wrong direction on the hourglass units made nesting the seams with the flying geese very challenging.  I pinned the seams and hoped for the best.  I was shocked how many looked perfect. Sure there's a few that were not so pretty but they won't be so noticeable when the quilt is finished.  Quilting it will also be a challenge, but I've done it before, it'll work out fine and no one will ever know.
 

I'm hoping Bonnie does a rapid fire finish this week.  That means we would get more than one clue this week and the quilt is revealed.  I'm ready to see all the units come together!

UPDATE...Bonnie dropped Part 8 early this morning, 12-31-2024!!! Yippee!!!  More flying geese but this time bigger!


Pin It

Monday, December 30, 2024

Old Town Quiltville Mystery ~ Part 7

 Hello Quilty Friends!  This week's Old Town Mystery clue is teeny tiny little flying geese blocks.  Aren't they adorable?

With the flying geese block being so small, I thought for sure I would be able to use the aqua scraps produced in clue 5 to make this week's clue.  Nope!  They were a smidgen too small.


So once again, a gazillion triangles were cut from strips of fabric using the Bonnie Hunter Essential Triangle ruler.   The impatient quilter in me dislikes how long it takes to cut all the pieces.  But I like being able to use up smaller scraps of fabric so it's worth a little extra time.


The small flying geese will be added to half of the hourglass (quarter square triangle) blocks made in clue 3.  It makes an interesting little unit. Since we are only using half of the QST's from clue 3, I'm wondering if in the next clue we'll be making more tiny little flying geese to add to the remaining QST's from clue 3?? Only time will tell!


Pin It

Saturday, December 28, 2024

What's In The Box ~ Part 4

 Hi Friends!  Today we'll be taking a look at two projects from the UFO box.  One embroidery project and one applique block of the month project.


Let's start off with the embroidery project started back in 2014. It took some digging to find information on my blog for this project.  Here's the link to the one blog post found.


All of these embroidery patterns were found on Pinterest and were free to use.


My handwork is not the best but it's also not the worst.


Here's a closeup.  So many french knots!  


Of all the embroidered blocks, this one is my favorite.


It's the gingham umbrella...too cute!  In the pattern the umbrella was embroidered, no fabric.  I added the gingham because as you all know I love gingham.


If I'm not mistaken all the blocks with added fabric are changes I made to the patterns.


By the way, your eyes are not deceiving you.  Some of the blocks have a white background fabric and others have a light grayish background.


Why the different background fabrics?  I haven't a clue.


It might have been a design choice at the time.


Or the only fabric on hand at the time.  We may never know.


I do remember not having any plan for how they would be used.  I was just having fun doing something a little different.


Many of you many may not know this.  Mom taught me how to embroider when I was in elementary school.  I didn't learn to quilt until I was 17 or 18 in Home Ec class.


My first finished quilt block was a fan block.  I swore to never make another quilt block.


 But I did make a quilt, just not with quilt blocks.  My first quilt was made in 1986 or 87.  A yellow gingham chicken scratch alphabet baby quilt.  Chicken scratch embroidery is what you see on the heart below.


Enough of walking down memory lane.  Take a look at this shoe.  Not the best choice of fabric.  


The closeup looks better but I still wish I had used a different fabric. 


As of today the embroidered blocks are going to the bottom of the must finish list.   Putting them all in one project still cramps my brain.   So, let's move onto the next UFO, it's easier on my brain, but it too will require some quilty brain design work.  

This BOM was purchased when a local quilt shop was going out of business.  The complete BOM was not available, so I bought what they had at a greatly reduced price.  Notice the one block set on point.  I'm pretty sure this was a medallion style quilt, the on point block being the center.


The fabrics were included with each pattern.  This is what made them such a great buy.


I made one block and lost interest.


Upon further inspection, I didn't even finish this one!  Why oh why did I not finish stitching down his ear?  Must have been that crazy.... SQUIRREL!


I did an online search for the remaining patterns to this BOM. No luck. This means I will need to do some designing.  To make a quilt from them I'll probably need to buy fabric since I have very little dark fabrics in my stash.  Sigh.. for now, it too will go to the bottom of the list to be finished. 


Pin It

Friday, December 27, 2024

Bow-Tie Quilt Top Assembly Issue

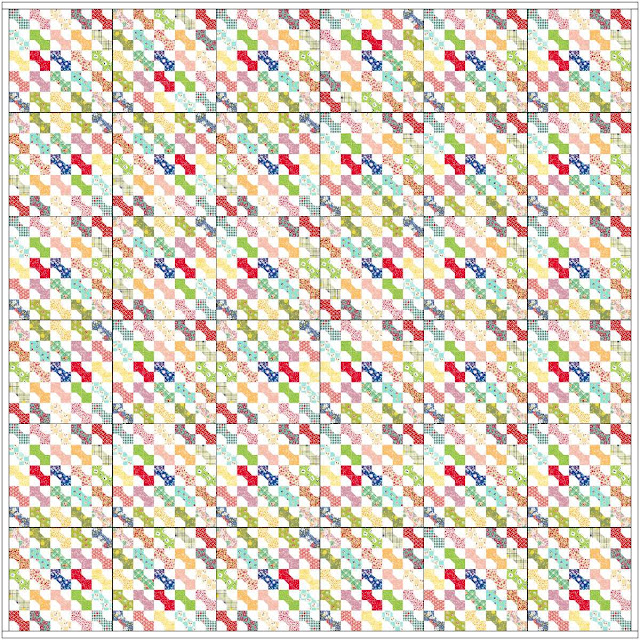
Hi Quilty Friends!  I couldn't wait any longer.  It's time to make those 900 Bow-Tie blocks into a quilt.  These blocks can be arranged in a few different ways.  I chose to let each little block speak for itself with this simple layout of all the blocks going in the same direction.  


The quilt is 30 blocks wide by 30 blocks down.  As you can see my design wall is not wide enough to accommodate all the unfinished blocks.  The width of the design wall will hold 24 unfinished blocks. 


The plan was to assemble this quilt in 25 patch blocks as shown below.


The new plan is to piece it in rows.  I've pieced the last three rows on the design wall. I'll do the same for all the rows.  Then the last six unfinished blocks can be added to the end of each row on the design wall.  This will allow me to see all the blocks laid out before stitching the rows to one another.  


Now that I have a good plan this quilt should come together in no time, YIPPEE!


Pin It

Thursday, December 26, 2024

Old Town Bonnie Hunter Mystery Quilt ~ Part 6

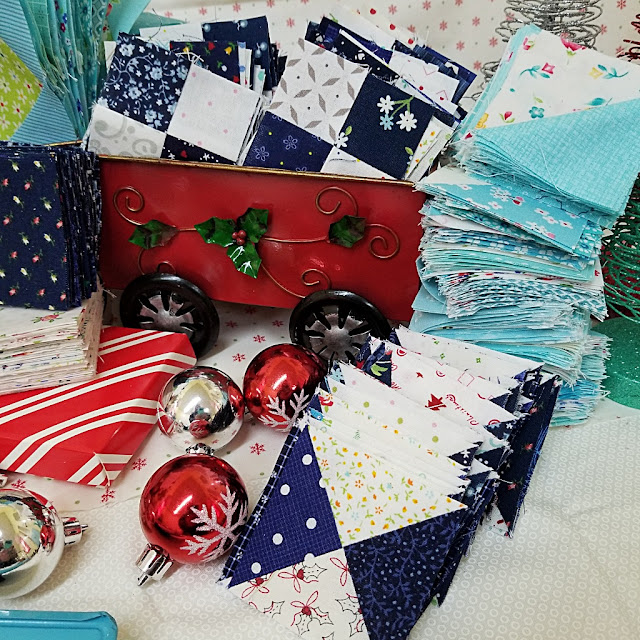
 Hello Quilty Friends!  Bonnie hit us with an extra clue this week.  The clue was sets of matching half square triangles (HST's).  After completing the HST's on Christmas morning, it was time to have a little fun and stage all the clues in my Christmas train.


I was like a child with a new toy.  Santa was ready to leave the station as his Foxy conductor shouted 
"All Aboard to Quiltville"

If you're not familiar with Bonnie, her blog is called Quiltville.  The FREE Old Town Mystery Quilt tab can be found near the top of her blog.


Below is the HST's for this week's surprise clue.  Of course, I had to use some of the newest low volume fabric acquisitions to this batch of HST's. Can you spy the new fabric?  Hint...flowers. 

 Remember the triangles I saved just in case they could be used in later clues?  I could have used some of the larger triangles in this clue.  But sorting through them for the ones that were usable was too tedious.  All new triangles were cut for this clue.


It's Christmas Day, only fun is allowed!  Tedious sorting...not fun.  Cutting new cute fabric...FUN! Trains and shiny ornaments...FUN!


I wish there was a place in my sewing room to display this for a few days but there isn't.  It was staged on my cutting table, enjoyed for a short while then disassembled.  BOOHOO.  Oh well it was fun for a while.  Maybe next Christmas.


Pin It

Monday, December 23, 2024

What's In The Box ~ Part 3

 Hi Quilty Friends!  Today's UFO is a beauty.  This one was started in 2014.  You can see the original blog post here.


Each of the 4 flags measures 34 x 20 with 13  raw edge appliqued stars.


The 5 huge flowers make me smile, who doesn't love flowers?!


All of the templates were neatly tucked in an envelope. Did I plan to make more?


The fabric is from my older fabric stash and have been prewashed but not starched.  Oh, how I dislike working with unstarched fabric.  Well, it's too late to starch now, don't you think?  
 

The red and blue fabrics were purchased at Joann's or Walmart.


The 3 fabrics below I know came from Walmart way back when they decided to get rid of fabric in the early 2000's.  When the fabric went on clearance, I bought as much as I could afford every week and grabbed as many of the free patterns as they would let me take.  Do you remember the monthly free quilt patterns at Walmart?  They also had free crochet patterns every month.


Well, back to my quilt.  The quilt I used as my inspiration was Patriotic Rose.  I planned to buy the pattern until I saw the quilt only finished at 74x74.  I wanted a queen sized quilt. So, I didn't buy the pattern and decided to make one similar and larger.  For my quilt, the stars on the flags were changed because I prefer the look of Betsy Ross flag with all 13 stars in a circle.  The flower was also changed to suit my taste. 


One thing puzzles me...What was my plan for the yellow fabric?  Maybe I thought the blue stars sprinkled around the quilt should be yellow?   I'm not sure if that was the plan but as of today, I like the blue stars and I love this quilt so...this UFO will be moved to the top of the must finish list.


See you soon with another What's In The Box UFO.  It will be one of the two on the top of the box.  Which one would you like to see next?  The red arrow or the orange arrow?


This post it being linked at the following linky party.  Hop over for quilty inspiration.


Pin It
Related Posts Plugin for WordPress, Blogger...