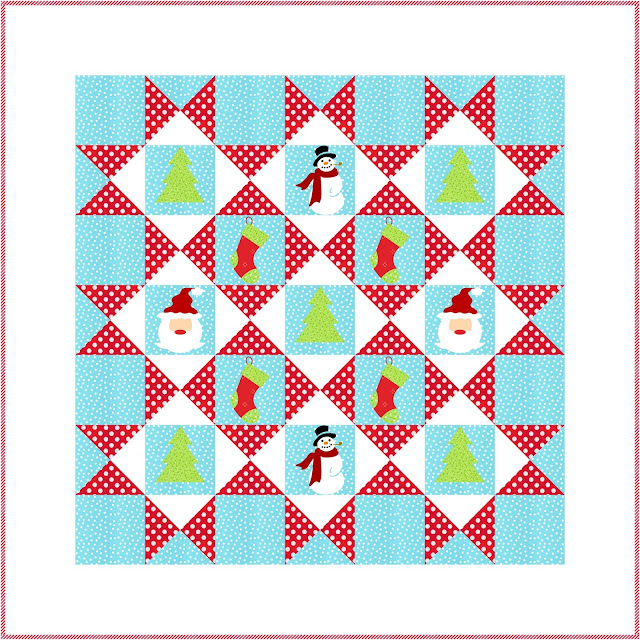
HELLO Happy Quilters! Friday at last! How many of you are like me and planning a private quilting retreat in your sewing room? I bet I'm not the only one with few Christmas sewing projects on the to-do list. For me these are the best retreats. I prepared for this 3 day quilting retreat by cooking ahead for Mr. Podunk. If he doesn't want to eat Taco Soup leftovers all weekend there's frozen pizza and cold cuts in the fridge. The only thing that could interrupt my pajama quilting retreat is unexpected company. But to be honest, we are so far out in Podunk no one drops by without calling. My private podunk retreat officially started late yesterday afternoon with this jolly little Santa designed by Carol over at Just Let Me Quilt. I chose this project first just because today is National St. Nicholas Day. Who knew there was such a thing?
You can read more about how to observe National St. Nicholas Day here.

Really it just doesn't get much cuter than this. The finished quilt is lap or large wall hanging size. You can get all the details on
Carols blog and at the
Thermoweb website. Pssst....it's a
FREE quilt pattern. Go get it even if you don't have time to make it right now. Save to your computer for next year. Maybe get a jump start on next Christmas...RIGHT!....LOL! Who does that?!
Before I could start the Christmas Joy quilt I needed to make my final pull for two other quilts from my bin of over pulled fabrics. Below is what's left after pulling out exactly what I needed to make the blocks for the other two quilts. Well all but the black fabric. Black is not a color I use often so I had to dig deep in the stash cabinets. Can you see the selvage on the black fabric? This little scrap is from my treasured discontinued, no longer in business, Lakehouse Drygoods stash.
The other two quilts on my list for the next month are my own designs. They will eventually be published patterns. For now I'm focusing on getting them pieced, quilted and ready for the grand children's Christmas visit. I'll have a little extra time to get them completed because we will be celebrating Christmas in early January on my daughters birthday.
Both of my designs are Christmas patterns. One is 100% pieced blocks and the other has just a tiny bit of applique. I'll be using Lori Holt's Gingerbread Man template. This template is a few years old, so it might be hard to find. And if you do find it, it comes in a set of several different Christmas templates. So when I write the pattern it will come with a similar gingerbread man paper template.
Now that all that is taken care of I can get down to business.
As you can see I cut the center out of each applique piece. Heat N Bond Lite isn't stiff. It's actually very light weight. The windowing makes it even lighter and it takes very little time to do.
The applique placement sheet printed out off center. I'm sure this was a printer error and not a pattern error. No worries, I simply folded the page in half, matching the outlines of the block. Then marked the center of each line. The same process was repeated on polka dot blue background fabric.
Using a light box to line up those markings on both the paper and the fabric. Then started adding the applique.
I knew this was going to happen....shadowing. Shadowing is when the darker fabrics show through the lighter fabrics on top. My solution for this is simple, just add another applique.
So I traced, cut and layered them the best I could. It's impossible to get them exactly the same when using scissors to cut your shapes. The fix is simple.
After removing the paper from the back of all applique pieces, layer the two exact same shapes together on an
applique pressing sheet. Then press with a medium heat iron. Allow them to cool for a minute or two. Carefully peel them off the pressing sheet.
Now I can trim these up to match. Trim carefully, taking off the tiny little pieces extending out past the top fabric.
There you have it! Trimmed and fused in place. Most of the shadowing is gone. There is still a little right under the nose but we'll just call it a mustache!
I'm really happy how Jolly Ole St. Nick turned out. After making all the applique blocks in this pattern I'll machine stitch around the applique with a tiny blanket stitch and matching thread.
#JustLetMeQuilt #ChristmasJoyQuilt #christmasquilt #christmasquiltblock #freequiltpattern #thermoweb #heatnbondlite #podunkpretties
Pin It


