Showing posts with label applique quilt blocks. Show all posts

Saturday, February 8, 2020

~ Home Again and Playing ~

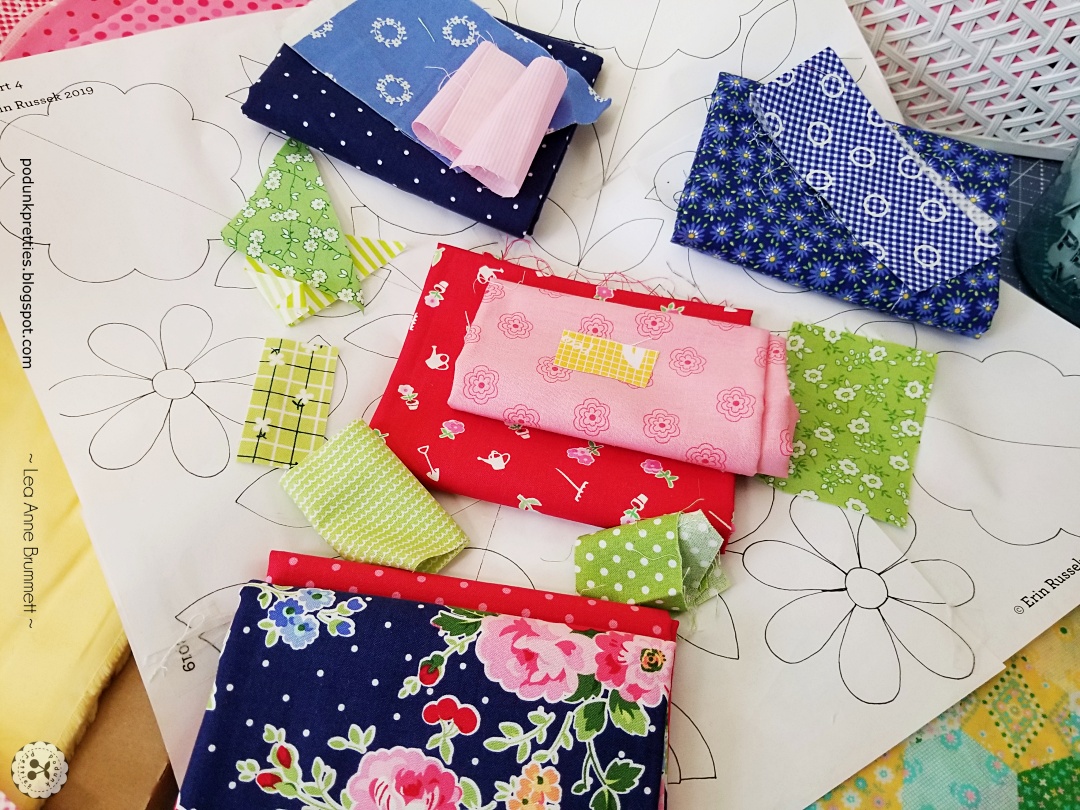
Howdy Sweet Quilting Friends!  Today I'm doing what I do best, making a HUGE fun mess.  Pulling fabric is the best part of quilting, don't you think?  I'm digging deep into the stash to find my most loved pieces of out of print Lakehouse Drygoods fabrics.  Some of these I forgot I owned.  My original plan for this quilt was to work only from the scrap bins.  But there just isn't enough variety of prints and scale of prints.  I'll use what I can from the scrap bins then supplement with the larger pieces.  In the picture below all but the solid yellow is Lakehouse Drygoods.  The solid will be the background fabric, well at least that's the plan as of right now.


The pattern I'm using is called Home Again by Erin Russek.  It's a free block of the month.  You can read more about on Erin's blog One Piece At a Time here and here.


Not all the fabrics in the scrap bins are Lakehouse prints.  There's a little of everything from Moda to Walmart fabrics.  


The birds are giving me a little trouble.  I can't decide on the perfect combination of prints.  A little more digging might be in order.  Before you know it I'll have every fabric out of the cabinet.  This is how most quilters work fabric magic.  For those of you who struggle to match fabric here's the secret...Play with your fabric a lot.  And then pull more fabric and play a little more.  Then if needed go shopping for more!

Maybe the fabrics in my little test bird is a better option for color?  Well I'm going to be here for a little while longer.


After I make a plan for the center Medallion block I can move onto the smaller blocks. Aren't they just the cutest!   See you in a few days with the results!


Just a little reminder that you can still gt 20% off you entire purchase at The Purple Hobbies website using the code PodunkPrettiesJan20  
Offer ends February 29, 2020.   Make sure when adding the code to your shopping cart that you click APPLY.  You can see my review of the BladeSaver Thread cutter here.  And the Third hand Binding Folder Clip here.


50% OFF Sweet Sixteen PDF pattern 
Pin It

Monday, January 20, 2020

~ Christmas Joy Quilt ~

Hello Happy Quilters!  I'm so excited to finally get my Christmas Joy Quilt off the frame.  This is a fairly small quilt and  pretty lightly quilted it should have taken no longer than 2 days to quilt.  However my ruler foot broke and then there was an issue with a back spinning bobbin.   The powers that be love to throw me a few curve balls with ever quilt.  


The quilt will be used by my grandchildren when they come to visit during the holiday season.  I wanted it to be soft and cuddly for them and have pretty quilting is for me.   I think I achieved both.


Sometimes it's hard to achieve the feathery look I love without making a stiff quilt.  The trick is to not follow some of the so called rules for custom quilting.  I'm pretty sure the longarm quilting police would curl their noses at the lack of background quilting in my applique blocks.


Now all that's left to do is add the polka dot binding.  Since I have about 11 months to finish the binding I'll take my time and hand stitch it to the back of the quilt.


The Christmas Joy Quilt pattern was designed by Carol Swift for the Thermoweb website. I made a few alterations to the pattern to make my own.  Click here for the original pattern.


Just a little reminder that you can still gt 20% off you entire purchase at The Purple Hobbies website using the code PodunkPrettiesJan20  
Offer ends February 29, 2020.   Make sure when adding the code to your shopping cart that you click APPLY.  You can see my review of the BladeSaver Thread cutter here.  And the Third hand Binding Folder Clip here.


50% OFF Sweet Sixteen PDF pattern
click image
expires 2-15-2020


#thermoweb #heatnbondlite #christmasjoyquilt


Pin It

Monday, December 2, 2019

~ Happy Little Things ~ Giveaway! ~

 *** GIVEAWAY CLOSED***
It's hard to believe the Happy Little Things block of the month is almost over.  If you are just hearing about Jacquelynne Steves and this block of the month you can find all the information on her blog, click here.


Jacquelynne's version of this quilt could be used as a lap quilt or wall hanging.  It can be done as applique, embroidery only in the center block or just a plain pieced block.  Fussy cutting your fabric fabric for the center of the blocks would also be super cute.


 Each year as featured bloggers of Jacquelynne's block of the month we are encouraged to make the quilt our own.  This is my 3rd year as a featured blogger.  I try to do something a little different each year.  You can see my versions of the last 2 years here and here.


My plan for this year was to make a two color quilt, red and white.  Sometimes a plan looks better in our minds than in reality.  But failure is not an option, starting over is also not an option.  So I had to find a way to make my very busy blocks work together or at least get along.  It's just like dealing with a 2 year old child throwing a temper tantrum.  Distraction.  Wave a cookie in his face and BAM...tantrum gone!  The same works for a quilt.  Find something to pull they eye away from the busy blocks.  I tossed around many ideas and I mean that literally.  Fabric was everywhere.  Creativity is a messy process.  After many hours of design changes  and fabric tossing the quilt morphed from an eye sore to a patriotic beauty.  


I was going to stop with the blue border but decided to take a chance on a scrappy border using the leftovers from the red fat quarters used in the blocks.  I love how it completes the scrappy look.


I think she is going to make a nice addition to my ever growing patriotic quilt collection.  The image below is only part of them.  


So let's get to the giveaway!  This months giveaway is a great little bundle sponsored by Thermoweb.    I love this company and all their products!

The rules for the giveaway
  1. Open to both US and International
  2. One prize per person per giveaway
  3. LEAVE A COMMENT ON THIS BLOG POST.    Click on the word comment at the end of this post. (not at the bottom of the page).  Make sure I have a way to contact you.  Leaving your email address is a good idea if your not sure.
  4. A winner will be chosen at the end of the day December 8th.
  5. If you are chosen  as the winner you will have 24 hrs to respond or another winner will be chosen.  

There are several chances to win, all you need to do hop over to each of the blogs below and follow the the rules for entering the giveaway on each blog.
Good luck to each of you!

Happy Quilting Melissa http://www.happyquiltingmelissa.com/
Podunk Pretties http://podunkpretties.blogspot.com/    YOU ARE HERE
The Crafty Quilter   https://thecraftyquilter.com/
Flamingo Toes   https://flamingotoes.com/
Allie-Oops Sweet Happy Life   http://allie-oopssweethappylife.blogspot.com/

A Quilting Life  https://www.aquiltinglife.com/

If you are making this quilt or plan to, make sure you hop over to the Facebook group for inspiration or to share your quilt.  When sharing your quilt on social media use the following tags 
#HappyLittleThingsBOM and #HappyLittleThingsQuilt


Pin It

Monday, August 6, 2018

~ Block One ~ Save the Bees ~ GIVEAWAY

***GIVEAWAY CLOSED***


 Yeah!  It's finally here!  The first block of the Save the Bee's Free Block of the month.  If your just hearing of this block of the month and would like to join in the fun, you can find all the details by CLICKING HERE.  After joining in the fun and getting your first free block you can share your creations in the Sew Quilty Friends Facebook Group.


As soon as I heard the theme of this years BOM I knew it was for me.  My husband is a beekeeper and I've said for years a bee quilt was on my bucket list of quilts to make.
Instead of  making the blocks into a quilt I decided to use the blocks to make wall hangings for the studio.  


In true Lea Anne style these blocks will be made with Lakehouse Drygoods fabrics.  Over the years I've collected a fairly large stash of the discontinued fabrics.  In the block 1 pattern it called for adding stitches to each petal.  By fussy cutting the hearts on the outer petals and the stripes on the inner petals I gave the petals the whimsical look without doing any stitching.   


In order to get my hearts to fit inside each petal the patter had to be altered just a tiny bit.  The image below shows how I made two templates from the original pattern.  The templates were made from 3 layers of freezer paper.  For more information about how to make freezer paper templates CLICK HERE


Normally I would use the freezer paper templates for turned edge applique.  But these blocks will be made using raw edge applique so the templates made tracing onto Heat N Bond Lite a little bit easier.  They also were used to trace the shape around the hearts before cutting them out of the fabric.


In the original pattern all the petals are not uniform.  So my flower head ended up a little larger than the pattern.  It's not noticeable until I layer the pattern on top of my block.  Below shows the difference in size.


For the half square triangles in the border of the block I decided to use some scrap flippy corners left over from another quilt.  You can see the quilt here.  The blue basket sets beside my sewing machine.  When making a quilt with Flippy corners I sew an extra diagonal line to make a bonus HST.  No scraps!  See how to make the bonus HST's here


They needed a little trimming down. 


A true quarter inch binding was made for the the binding.  I like the look of a smaller binding on a small quilt.  However I did have a bit of trouble getting it to the right size.  You can read about it here and download an print a free double fold binding chart.


The backing fabric is a scrap from a previous project.  


I love how this little wall hanging turned out using nothing but scraps! OOPS...the background fabric was a new fat quarter.


Another alteration to the pattern was using a striped fabric for the Bee body instead of  the little bitty applique or stitching the stripes.


All machine stitching, no hand work at all except for sewing the binding to the back of the quilt.


I think the whimsical flower is my favorite part of this block.  


So let's get to the fun stuff...The GIVEAWAYS!  Each blogger in the blog hop will be giving away a copy of The Splendid Sampler book courtesy of Martingale.

  Make sure you visit each featured blog for more chances to win.  The list bloggers below.

Podunk Pretties you are here

To enter for the giveaway here at Podunk Pretties follow the directions below.  Giveaway will end 8/12/2018

~ Lea Anne ~
Pin It

Thursday, July 6, 2017

Throwback Thursday ~ Old Technique revisited

While putting the recently finished Quilt Doodle Design 2017 BOM quilt blocks on the design wall this week I noticed some fabric shadowing in my blocks.  What's that?  It's when the darker fabrics show through the lighter fabrics on the front of the block.  Let's hang one on the window so we can get a better look.  You really can't see it at a distance.

So let's get up close and personal with my blocks.  The green arrow is pointing to the white seam allowance, which is good.  The red arrow is pointing to the colored fabric that extends past the normal seam allowance, which is bad.  The excess seam allowance should have been dealt with before attaching to the background fabric.  No need crying over spilled milk, all I can do is get inside the back and fix the problem.


   Most quilters these days think if you can't see it from a galloping horse then don't worry about it.  Honestly most of the time I think the same thing.  But I've put far to much time and effort into these appliqued blocks to let  the finished quilt be ruined with something that can easily be fixed in an afternoon.  There was a time back when I first started quilting that it was standard practice when doing applique to cut away the excess fabric on the back.  This would reduce the amount of fabric when hand quilting.  Once you had the back cut away you could fix any shadowing.  Most quilters no longer hand quilt so this technique has been eliminated.  And I personally think there's a little marketing going on here also.  You can buy products to sew or iron into your project in advance to help with shadowing, but it adds more bulk and cost.  And most designers just don't worry about how it looks, its all about selling more fabric and patterns and meeting tight deadlines.  Where do you think the galloping horse statement originated?  Now let me say, I altered this pattern which caused the shadowing.  In the original pattern the center was to be curved pieced and with proper seam allowance there would be no shadowing.  So the above statements do not apply to Cindy's wonderful free pattern.   With that being said let's open this baby up!


  I used my sharpest pointy scissors to poke a hole and start cutting.

  
Snip, snip, snip...it was not hard and went pretty quick.


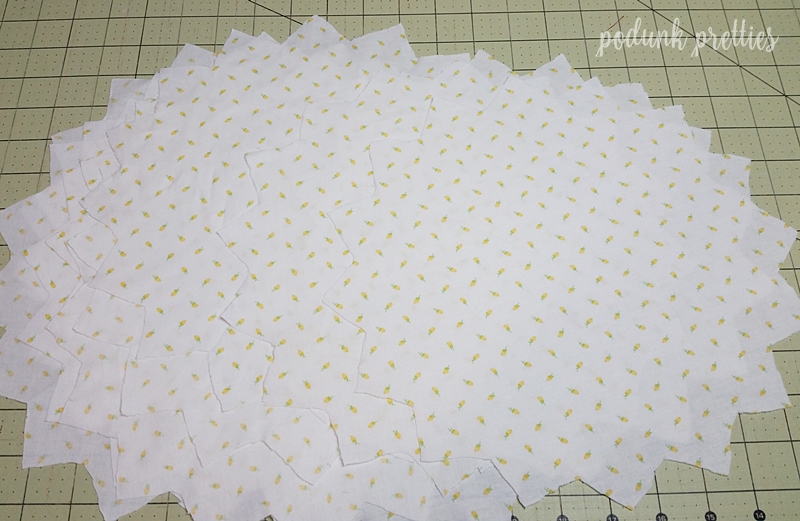
Now that I'm in here there's two options.  Option one is to cut a large circle of fabric and slide it behind the seam allowance.  I'm using paper for demonstration purposes...I'm cheap!


It would be tucked up under the seam allowance and be carefully tacked into place.  


The second option and the option I chose is the old fashion way of dealing with shadowing.  Just cut away the excess.  I snipped a few of the stitches between two of the dresden blades to make it easier to start cutting away the excess.


This really is the fastest, easiest and cheapest way to deal with an unsightly little issue of shadowing.


TADA! Finished all twelve blocks while I watched the noon news.  


This will look so much better in the finished quilt.


 And I won't need to borrow the neighbors horse to look a my quilt and be happy with it.


The best thing about fixing the shadowing is now I have some pretty low volume scrap to add to the scrap bin.  A happy mistake indeed!


~ Lea Anne ~
Pin It
Related Posts Plugin for WordPress, Blogger...