Friday, June 5, 2020

~ Nifty Notions #7 ~ Mini Stash 'n Store REVIEW ~


Today's Nifty Notion is a little item I received in a monthly quilting subscription box a few months ago.  The It's So Emma's Mini Stash 'n Store.


To be honest this is one of those things I would never buy since I tend to lean toward being cheap, practical and more of re-purpose kind of gal.  So it was quickly tucked away in a drawer.  Earlier this week while searching for another forgotten item I stumbled upon The Mini Stash 'n Store  and thought it was time put this little gal to work.  With quick grab of a few items for a photo shoot I was loving how well it held the notions.


Where will I use and what will it replace?   Here's my current little container beside my sewing machine, it holds everything I need and there's room for more.  This green container was a 50 cent thrift store find.  Functional, cute and cheap that's how I roll.


Now I don't have to tell you that all these items are not going to fit in to the Mini Stash 'n Store.  But lets give it a go anyway just for giggles.


To my surprise all but one item fit.  There's even enough room left for a few more items.


The Stash 'n Store seemed a little top heavy so I pushed it a little farther back on the table so it would be supported by the basket.


Sigh....And then this happened when trying to remove the tweezers.  Ugg...This isn't a good fit for the Stash 'n Store.


My next thought was " It can't fall on the floor if it's inside the basket".  I've just the place that she might be of use.  Below is a basket at the end of my cutting table.  At the end of the basket is a coffee mug filled with a little bit of everything. Yes, there are multiples of several items and that is intentional.  If I lose a pen or pencil while designing and taking notes, I just grab another until I clear off the table and expose the other or others.


I think I could make all of this fit in all the little holes of the Stash 'n Store but with each additional item it would over load it and make the items to hard to remove.  It would also make it harder to put the item back in the Stash 'n Store.  I would need to dramatically reduce the amount of items to make the Mini Stash 'n Store work in my basket.  Well that's not going to happen.  Anyway, I really love the yellow coffee mug.  It's another thrift store find for about 50 cents.


Maybe a larger Stash store would better but honestly I think it would take up far more space than my yellow mug and not be as efficient, effective and convenient.   Then I thought maybe this Stash 'n Store is more for looks, a display piece instead of being functional.   It would be really cute in a more modern sewing room on a shelf with some cute little notions that are rarely used sticking out of it.
 I suppose it could be nice to set on the end table when I'm doing hand sewing.  It could hold a small pair of scissors, needles(maybe) and a small spool of thread(not likely).  Nah, it's just not functional in my world.  I like my little bowl with a lid that can be tossed in the end table drawer when not in use. 

As I removed the items from the Stash 'n Store the darn thing came apart!  Is this a design flaw or does it need to come apart for some unknown reason?  Now that it's apart maybe a piece of lead in the bottom would help make it a little more stable.  It's easier and cheaper to stick with my cute little thrift store finds.  This little gal is going to a new home this week.  Maybe my best quilting buddy, Bev, will find it more useful than I.  If not she can pass it along to someone else.


REVIEW RESULTS

1.Cost
 At about $8 each it seems a little over priced to me since it doesn't really do much.  But remember I'm cheap.  

2. Ease of use
Yes it was easy to use.  Just stick whatever will fit in it and hope you can get it out without picking up the whole thing.

 3. Efficiency
No, I feel like this item made reaching for a tool more difficult.
It held the items well, almost to well.  Some items came out fine and others would stick and I would need to use both hands to remove them from the Stash 'n Store.  

Now in defense of this product and any product reviewed here on this blog or anywhere, please take the time to google the product and read other reviews.  This is just one person opinion.  I've many notions and quilting items in my Studio that other quilters find to be inferior but I love them.   

If you would like to see more product reviews here on my blog just click the image below or in the sidebar of this blog to be taken to all Nifty Notions reviews.


Just a little reminder that you can still gt 20% off you entire purchase at The Purple Hobbies website using the code PodunkPrettiesJan20 at checkout.  


Pin It

Tuesday, May 26, 2020

~ Where did I get this? ~

Hi-diddly-o! Quilting Friends!  Do you ever find fabric in your stash that you don't remember buying?   Sounds crazy right?  Well I found this cute little bundle of Sugar Sack 2 by Whistlers Studio hiding deep in my stash early this morning.  I don't know when or where it was purchased but I'm so glad I found it.  Now what will I make?  That's another mystery!


The plan to have these Hunkering Down blocks on the wall by bedtime last night didn't happen.  I was close to my goal.  About another 30-60 minutes sewing should do the trick. 


I'm speed piecing these blocks using the webbing technique.  If you don't know how to web piece a block you can read more about it here.  It's a great way to save time and match up the seams without pinning.  


Before finishing the blocks this morning I decided to take a little walk outside while it's still cool.  And look what's blooming...Peonies!  Such a beautiful flower.  It's too bad that these can't be cut and brought inside.  I made that mistake in my youth.  Little did I know they are full of ants!  This flower can not bloom without them.  The little ants help pull open the petals and keep the flower clean.  You can't see them in the picture below but trust me they are there.


In the same flower bed is this Iris.  I call it "Toilet Water Iris" because it is the ugliest color of flower I've ever seen.  The picture makes it look better than it is in real life.  It has a muddy water color to the petals and the yellow isn't quite that yellow.  Maybe I should add something to the soil to make them change colors like with Hydrangeas.  Do any of you know if an Iris's color can be altered?


Pin It

Monday, May 25, 2020

~ Spice Up The Hunker Down ~

Howdy!  Quilting Friends!  Today in Podunk will be spent piecing my Hunkering Down quilt blocks.  The Hunkering Down quilt block is a FREE tutorial available here on my blog.  It's a FREE to download and print.  You can find it by clicking here.


This is where I stopped last night around midnight. The plan is to find a good Netflix series and then let the stitching begin.  I hoping to have them finished and on the design wall by bedtime.  There's a few other things like laundry and feeding Mr. Podunk that I'll be working into piece-athon.


As I make these blocks I need to decide the layout for the finished quilt.  Putting them on point has already been decided.  In my opinion on point quilts have a little more eye appeal.  The quilt below is very tradition.  Some would even say modern.  But since I'm older and have seen this style for YEARS I'll call it traditional.  It's beautiful and would look lovely added to the stacked quilt decor in the spare bedroom.


As a quilt pattern designer my mind is always in design mode.  I rarely know how a quilt will finish until it's done.  So the decision needs to be made.  Do I go super simple and traditional?  Or do I kick it up a notch with applique?  The applique below is still very traditional but adds a little WOW factor to the overall design.  I also thought the yellow inner border added a little more to the traditional look.


The next question would be, IF I decide to do the applique should I add gingham to the center of the flower or stay with the theme of  a two fabric quilt?  Y'all know me and you know I love me some gingham, but maybe it would be better without?  It really all boils down to how much time I want to spend on the this quilt.    


A pop of color is also another idea being tossed around in my brain.  The spare bedroom in the spring is yellow and blue.  How cute would this be on the bed with my lacy white pillow shams and yellow gingham shams?  Then remind myself this is only meant to be a folded and stacked decor quilt.  But it will be big enough for the bed.  Sigh...it's a real battle inside my brain!  HAHA!


Only time will tell what will be.  And it will never be if I don't get my rear in gear and back in the Studio.  Feel free to leave me a comment below letting me know what you think about my design options.


Pin It

Saturday, May 23, 2020

~ Home Again Blocks ~

Hello Quilting Friends!  Its been a while since my last blog post but I've been busy working on several different projects.  Before I share my current project I want to let you know that I post almost daily on Instagram and Facebook because it's quick and easy.  
So back to what has been keeping me busy and excited.  Erin Russek has once again designed the cutest FREE BOM called Home Again.   She gives you 16 blocks free in two different sizes.  There will be several options for finishing the quilt.  The block below is the large center medallion that must be purchased at a reasonable price.  You can get all the details about the free blocks and where to purchase the center block on her website HERE.


The fabric in my blocks is mostly discontinued Lakehouse Drygoods fabrics.  But there are a few others prints from various manufacturers.  The background fabric is from the Sugarhouse Park collection by Amy Smart for Riley Blake.


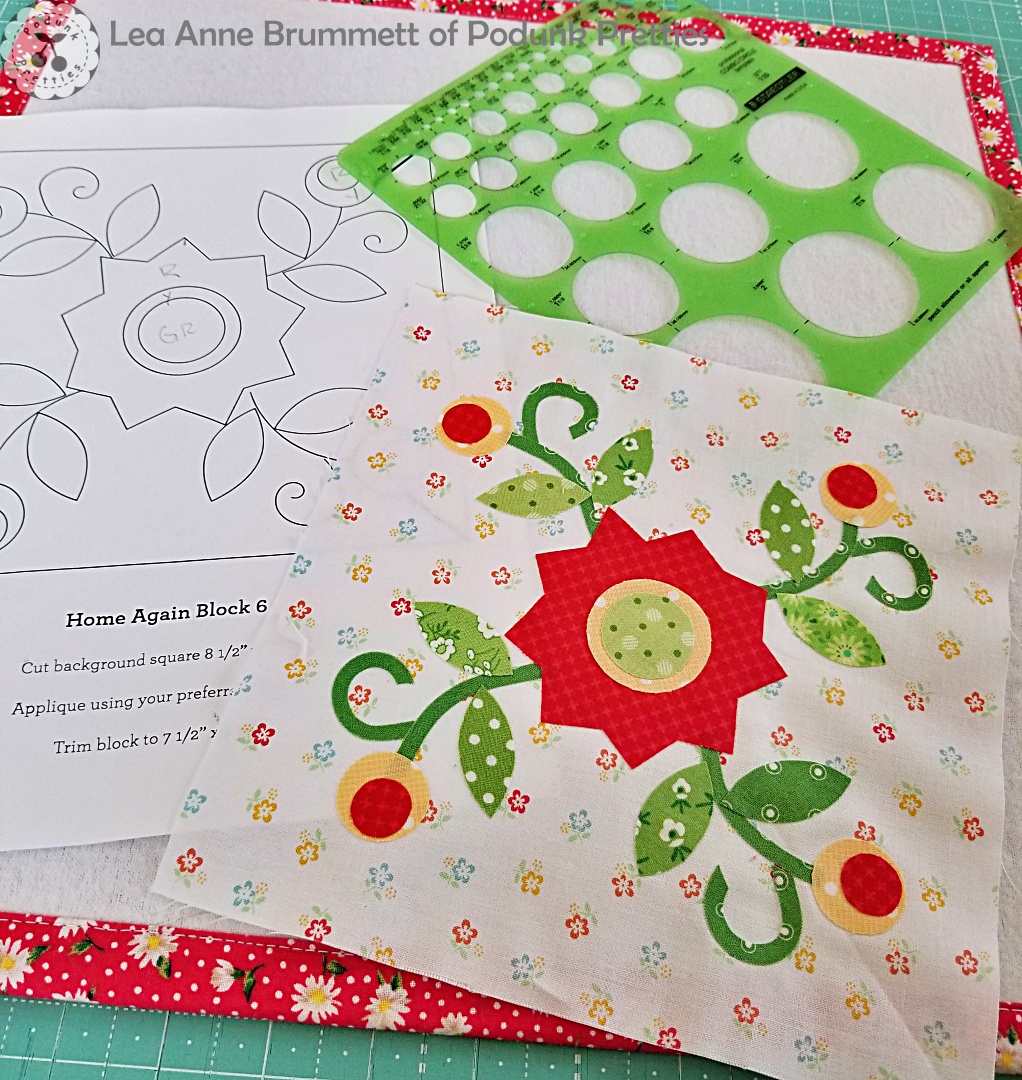
To keep things quick and easy the applique is done using raw edge fusible applique method.  Heat N Bond Lite is my go to for this method.  It's the only product I've found that does what it claims it can do.


A technique called "windowing" helps to reduce the stiffness of fusible applique.  You can see and example of this technique I used on another quilt HERE.  


Cutting out applique shapes can sometimes be tricky so I shared a few tips in a video.  Click here to watch the video.


The green Rapidesign circle template is what I use to trace the circle shapes to the Heat N Bond Lite.  I purchased mine at Office Depot but they can be found at any craft store such as Joann's or Hobby Lobby.


And the reason why I keep showing scissors in almost every picture is because a good pair of scissors makes all the difference when cutting raw edge applique.  I love my Kay Buckley scissors.  I have them in several sizes.  And cutting paper with them does not dull them like other scissors.  You can purchased them HERE.


You might also notice I've made a slight change to the stems in some of the blocks.  The pattern calls for embroidery stitching.  UGG...As you know I'm not a big fan of handwork.  So in true Lea Anne style I changed things up a bit.  Later next week I'll share how I made my stems.


These little birds is what really sold me on this pattern.  I'm a sucker for birds, especially bluebirds.  They are so cute!


All of my blocks still need to be stitch into place.  I'm leaning towards using Superior Thread MicroQuilter 100 wt. 7002.  But this isn't set in stone. I'm also considering matching the thread color to the applique.  Only time will tell.


Well that's all of them so far.  Hopefully I can find time this weekend to make block 13 that was released yesterday.  Another cutie!  The image below is Erin's Block.


Oh! I forgot to mention the BOM is now a block of the week due to our stay at home orders.  Erin decided to speed things up since so many of us are hunkering down at home.  

See you soon!


Pin It
Related Posts Plugin for WordPress, Blogger...