Showing posts with label BOM quilt. Show all posts

Wednesday, February 25, 2026

Quilt Guild BOM UFO

Obviously I'm having trouble getting back into the swing of blogging.  So let's try this restart once again.  

These 12 blocks have been waiting to become a quilt for 13-15 years.  The problem with UFO's is there's a reason why they became one in the first place.  More often than not it's because I simply don't like the quilt for a wide range of reasons.  This one has many, but for the sake of staying positive I'll spare you my thoughts and tell you it made me happy to find the perfect fabrics in my older stash to finally make these blocks into a finished quilt top.


TADA!  She's ready to quilt.  Not too bad, huh?  I'm quite pleased with how it turned out.  It'll make a great couch quilt or quilt ladder display piece.


The backing fabric was also hiding in my stash, it's flannel.  It used to be a small design wall.  I'm not a fan of working with flannel but I'm in a use what you have mood.  Luckily there was enough of the light blue inner border to make both the binding and label.   February is on the label but the chances of me getting it quilted in the next few days is a big fat zero.


So in a box she goes until I get the current quilt off the frame. 


See you soon!


Pin It

Wednesday, July 30, 2025

Lori Holt Fabric 2 Bucks A Block

 It's time to play catch up.  I'm six months behind on this Lori Holt fabric block of the month from my local quilt shop, Back Door Quilts.  


This block of the month is extra challenging for me since it requires Thangles.  The challenge is all in my head.  Silly reasons like...#1 the cost of Thangles...$7 is not going to break the bank. 


#2  Ripping off the paper...which takes almost no time.


Since I like working with starched fabric it took me a little longer to prep my precut fabrics.


But the magic happened after pinning the papers onto the fabric.  Within 15 minutes they were sewn, cut, papers removed and ready to be sewn into blocks.   WHOA!  That is quick.  I've never timed it before.  So now all I can really complain about is the cost which isn't much for 450 HST's.
  

Piecing the blocks took about 24 hours...HAHA!  I was in no hurry and had several interruptions.  My main goal for the week is getting the quilt on the frame quilted.  So, these blocks are just an added bonus.


There was some leftover fabric.  


I'm assuming it will be used for the sashing and cornerstones of the quilt top.  Below is the quilt shop sample quilt.  My quilt will be bigger because I'm making two blocks a month instead of one.  The yellow squares show are the blocks I've finished.


And here are my finished blocks.  The plan is to catch up before the last block is released in December.  This should be easier now that I've embraced the Thangles.


Pin It

Monday, December 3, 2018

~ Save the Bees BOM #5 ~ 2 GIVEAWAYS! ~

***Giveaway Closed***
This month it's all about finishing your Save the Bee's BOM.  After watching so many creative quilters come up with some amazing block ideas, I can't wait to see how everyone will finish their quilts.   Watching these inspiring quilters post their creations in the Facebook group Sew Quilty Friends is one of my favorite things to at the end of my day. That's what I love about Jacquelynne's yearly BOM, she encourages everyone to be creative. Follow her pattern exactly or by all means dress it up however you like, there's no rules!   Every month a block is published with several different options, a pieced or applique quilt block, an embroidery block or a plain block using our favorite fabric.  You're really getting several quilts with one BOM.   Don't forget to visit Jacquelynne's blog today to see her creative ideas for finishing up the BOM.


This year instead of making a large quilt my blocks each month were turned into mini quilts that will added to the mini quilt wall in my studio or new office.  With each block I tried to think outside the box by adding unique little touches to make them my own.  Block 1 I stuck exactly to the pattern as written but I did tons of fussy cutting to give the block a whimsy feel.


Block 2 was also made exactly as written.  Normally when I do applique I like for my thread to blend into a project.  With this block I decide go a little thread crazy and use a thread that was a few shades darker.  This makes the applique really pop out off the quilt. 


Block 3....Well.......I just jumped off the rails and did my own thing when I stumble across a cute panel print quite by accident.  The colors blended well with the previous blocks and it looks like I spent hours paper piecing hexies.  


Block 4......Since I jumped way off track last month, why not just get a little crazy, go wild and have fun designing my Baby Buzzy.   Baby Buzzy is FREE for you to use in your quilt.  You can find the templates and a description on how I made my Baby Buzzy mini quilt by clicking here.  Or you can download the templates in my Craftsy shop.


During this BOM I also designed a cute little pin cushion.  The pattern is FREE in my Craftsy shop.  You can read more about the pin cushion here.


For more chances to win, visit each of the blog listed below!  Each blog has there own set of rules for entering so read them carefully!

Podunk Pretties  - you are here

This month there's two giveaways.  One for U.S residents and one for International residents.  Both giveaways are being sponsored by Sarah J. Maxwell and Studio 37.  The U.S. winner will receive  a Fat quarter bundle of Pretty Little Posies and International winner will receive a bundle of printed patterns.


1.  One prize per person per month- you can't win on my blog and on another blog in the same month.
2.  You must enter by the end of the day December 9th.
3.  Winner will be chosen at Random, and must reply to the email within 24 hrs or a new winner will be chosen....NO EXCEPTIONS
4.  To enter on this blog you must do one or all of the following.  The more you complete the more chances you have to win.  Each is counted as one entry.

      - Like my Facebook page....click here = 1 giveaway entry
      - Follow my Facebook page = 1 giveaway entry
      - leave a comment below. + 1 giveaway entry....you don't need to go to Facebook to be entered.  In the same comment let me know if you did either or both of the previous entries on Facebook. Make sure I have a way to contact you by email, If you're unsure just leave your email in the comments.  After the giveaway has ended and the winner has been contacted I will erase all comments on this giveaway blog post.


I'd like to thank all you for visiting my blog over the last few months. I've enjoyed each comment and watching your creative minds make some amazing blocks.  I hope the end of this BOM does not mean this is the end of our time together.  Hopefully this was the start of many new friendships for years to come.  You're Welcome in Podunk anytime!  I'm looking forward to our visits and sharing our love of quilting together.  


#SaveTheBeesQuilt #SaveTheBeesBom #JacquelynneSteves #quiltalong #beequilt #podunkpretties

Pin It

Monday, January 15, 2018

~ I Love Home Grand Prize Giveaway! ~

Just wanted to pop in for a quick reminder about the huge Grand Prize Giveaway for the I Love Home Quilt Block of Month hosted by Jacquelynne Steves.  Valued at $200 it's worth taking the time to pop over to Jacquelynnes blog to enter.  


The quilt along is over but you can still get the pattern free for the next few days.  After January 31, 2018 they will NO LONGER be free.  This is the LAST CHANCE to get them FREE! You can find all the information for the free quilt pattern by clicking here.  


  As a featured blogger in this quilt along we were given the freedom to do what ever we wanted with the blocks.  Below is my Finished quilt.  You can see more of the details I added to my quilt by clicking here.


There were so many creative bloggers and quilters with some unique ideas.  You can find tons of  I Love Home quilt inspiration for your blocks by visiting the  Facebook group called Sew Quilty Friends and the Pinterest group.


Leaving a comment on this blog post WILL NOT will not enter you in the giveaway.

~  Lea Anne ~
Pin It

Monday, July 3, 2017

Two fun Mystery Blocks

Happy Monday Sweet Quilting Friends!  Did you get in some quality sewing time this weekend?  I love it when I can spend an entire day in my Studio.  It recharges me for whatever lies ahead for a few days.  This weekend I made the July blocks for the Quilt Doodle Designs Mystery BOM 2017.  While I've enjoyed making all the blocks so far, these two are my favorite.(I think I say that every month)


 The theme for the Quilt Doodle BOM is Grandma's House.  So each block brings back so many good memories of both of my Grannies and the simple pleasures of years ago.  


A few changes were made to the pattern again.  The main reason for changing most of the patterns is.... the pattern calls for raw edge applique which is much easier to make.  Since I'm doing turned edge applique I sometimes need to alter the pattern to make the process of making the block a little easier on me.  Take for instance the fence.  The original pattern calls for a few more pickets and the fence also covered the front door, it was all one big applique piece.  My fence has fewer pickets and 10 small pieces.   


After  making all the tiny pickets I was searching for ways to simplify the rest of the block. The window applique template was cut and ready to use when an epiphany hit.   As you can see below the fancy stitches on my machine are finally being used.  A simple scallop stitch to dress up my double stitched windows.  And since the entire door is exposed a doorknob was added by using another sewing machine fancy stitch. 


 The next change was the smoke stack.  Both my grandparents heated their homes with wood, so adding a little puff of smoke seemed like a good way to make this block a little more personal, it also added a touch of whimsy, don't you think?


The Singer sewing machine block really opened up a flood gate of memories.  The Podunk Pretties Studio has many old machines.  Not just any old machines but machines that belong to my mom, both grannies, and a great aunt.  There's been several machines passed down to me over the years.  Not all could stay, some have been donated and re-gifted.  My aunts, cousins, and a best friends machines have also passed through my studio.  And allof them have been Singers.  So when I saw the Singer logo on the applique...adorable!  Again some modifications were made to suit my applique technique.  The original pattern has 6 applique pieces, mine has 3.


The Singer Logo was a challenge to do by machine.  It probably would have been quicker by hand or embroidery machine, but I was at the sewing machine so I went with it.  The little buttons are part of the original pattern.  My button color choices aren't sitting well with me.  Might need dig a little deeper in the button stash.


Can you believe it, I'm almost caught up on this mystery?  All that's left to do is stitch the dresdens to the background fabric.  The plan is to get that done today, but it's so sunny outside and there's blackberries to pick.  See that is why I get behind.  Oh well whatever happens...happens.  Are you doing the Quilt Doodle Mystery?  If not, it's not to late to join in the fun.  You can get all the information about these two blocks and the previous months by clicking right here.


Pin It

Friday, January 27, 2017

Quilt Doodle Designs Mystery 1&2 ~ No curved piecing Tutorial

Hello quilting friends!  I've got something to share with you today that is so stinkin cute and easy.  Blocks one and two of the Quilt Doodle Designs Mystery BOM 2017 are almost complete.  All I need to do is decide on a background fabric.


Since this mystery is spread out over several months I've plenty of time to find the Pur-fect fabric to put behind the dresden blocks.  


Before starting the tutorial let's talk about the pattern.  It's a free BOM from Quilt Doodle Designs.  But don't take the word free for granted, these two blocks are only free for one month, and that month is just about over.  Once Cindy posts the new blocks for February these two will no longer be free but on sale in her Crafty and Etsy Shops.  So click right here to be taken to the free PDF downloads.   Maybe you're not interested in making this quilt.  Well don't let that stop you from browsing the huge selection of cute reasonably priced patterns for sale, and I saw some free ones too!  


Designing and writing quilt patterns is very time consuming.  So I want to thank Cindy for the sharing her talent with us at no cost and allowing me to share my alteration of her pattern with you.

 No Curved Piecing Tutorial

In the original pattern this center circle is pieced. (Click here to see Cindy's tutorial for piecing the center.)  I'm not a fan of curved piecing, it's a skill I've yet to master.  Today I'll share with you how to use the templates provided in the free pattern to make an inexpensive applique template for the center circle.


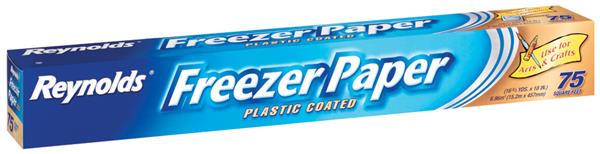
The first thing you'll need is Freezer paper.  Notice on the left hand side of the box.  An advertisement for use in arts and crafts.  Now if your freezer paper doesn't say it can be used for arts and crafts, its still okay to use.   


You'll also need some type of starch.  I use Sta Flo concentrate because it's cheap.  But any type of starch or sizing will work.


We've got our supplies, let's make an applique template.   I also made my pig and kitty applique using the scraps of freezer paper leftover from the center circle.

1. Cut a piece of freezer paper about 16 inches wide. 
2.  Next we need to cut it into 4 sections.  I did this by folding it in half and then in half again.  
3.  Using my square up ruler to cut away the folds.  This will give you 4 equal sizes.  
4. From this point on we will be working with the shiny side down.


Pre-shrinking the freezer paper is necessary to keep your templates from shrinking as you use them.  
1. With shiny side down spray each piece of paper with water. 
2. Then with a medium heat iron(wool setting), iron each piece separately to your ironing surface.  Yes they are going to stick to your ironing table.  Don't worry, there will be no residue left behind when you remove them.  Sometimes this shrinking process causes the paper to wrinkle.  No worries here either.  Just peel it off, don't spray with water, iron them separately again.  I've never been able to get them completely without wrinkles.   
3. Next peel up two of the papers.  Lay one of them on top of the one still stuck to the table.  Iron it. Repeat with the third piece. 
4.  You have 3 layers ironed together.  Allow them to cool before removing.


1.Next cut out the template provided in the pattern.  Cut outside the outer circle.
 2.Glue this circle to the non shiny side of the layered freezer paper.  I used quilt basting spray but any glue will work.  
3. Then carefully cut on the seam allowance line.  You now have a usable applique template.  
4. Iron the template shiny side to the wrong side of your circle fabric.  Cut 1/4 inch away from the template.  You might need to iron with the fabric on top.  Just make sure it's shiny side to the wrong side of your fabric.
5. Using a paint brush apply starch to the seam allowance.  
6. Then iron the seam allowance over onto the template.


1.Remove the fabric from the template and finger press in half and then in half again.  As you can see in the picture below I only pressed the very edges.  Use these pressing marks to line up with 4 seams on your dresden.  This will center the circle onto the dresden.  
2. flip over your circle to the back and add a few dots of  Roxanne's basting glue to temporally hold it in place.  
3. Turn it back over and line up your marks with 4 of the seams.  
4. Press with a medium iron to dry the glue  Elmer's washable school glue is a good substitute if you don't want to use Roxanne's .  Pinning it in place will work also.


See wasn't that easy?  In past projects I've used one template as much as 20 times and it still sticks.  Freezer paper applique is cheap and one roll will last a long time.   Saving money in one area of quilting allows me to spend more in other areas like thread and fabric.   To stitch my circle in place I used Invisifil 100wt thread.  It's a little more expensive but lasts forever.  This super fine thread melts into the fabric and is barely noticeable.


Just because it's fine doesn't mean it's not durable.  When I bought my first cone of thread I gave it the pull to break test.  OUCH!  This is some tough stuff. It nearly cut my finger.


Just look at those close up results.  


For the pig, kitty and embroidery I used Aurifil 50 wt.


It doesn't melt in quite as nicely but it was just the look I was after.  The embroidery work was done on my sewing machine with those fancy stitches we pay for and never use.


To stitch down my little critters I used a tiny blanket stitch and went very 
S-L-O-W.  Not much room for error!


But the results are Marvelous.


Well that's it, I hope this inspires some creative stitching.  

~ Lea Anne ~


Pin It

Related Posts Plugin for WordPress, Blogger...