Showing posts with label Scrap basket block. Show all posts

Tuesday, August 4, 2015

Mini Basket Finished

Hello quilting buddies!  I'm still here plugging along.  There's so much to do that my quilting is taking a backseat.  
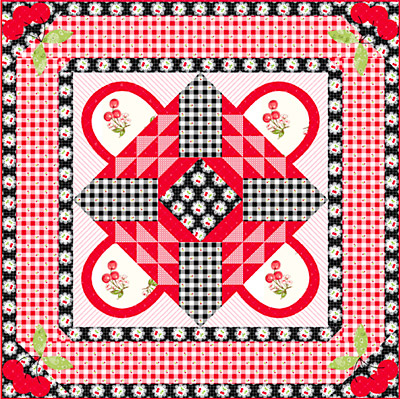
The original plan for this basket block was a larger quilt with several of these blocks and an applique border.   I may eventually make a larger quilt using the block design but for now I just want a finished project.  The base of the basket block(red gingham) is as wonky as it looks.  It was a scrap piece of gingham cut on the bias that obviously didn't get enough starch.


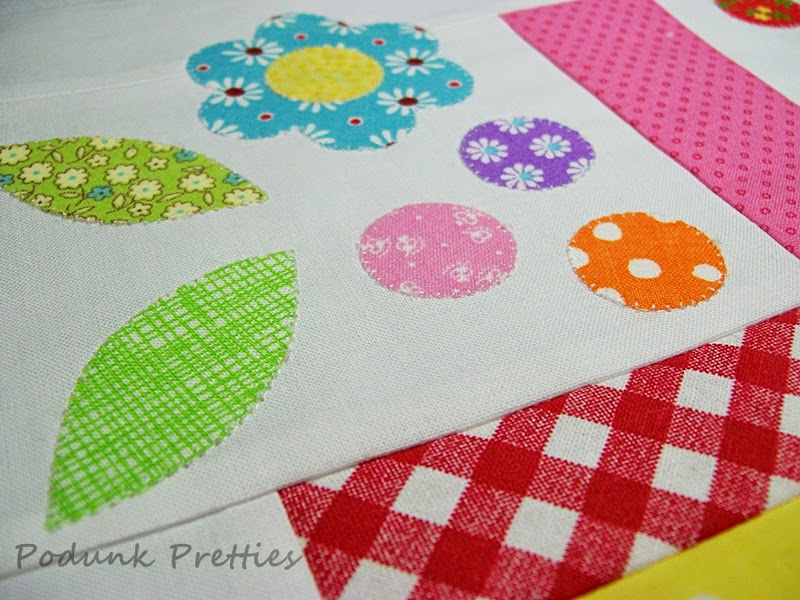
The simple little bud bloom has also inspired a couple other design ideas for other quilts.  For now they are just scribbles on paper .  However I did make a few more of the blooms just so I could have hands on playtime with design ideas.


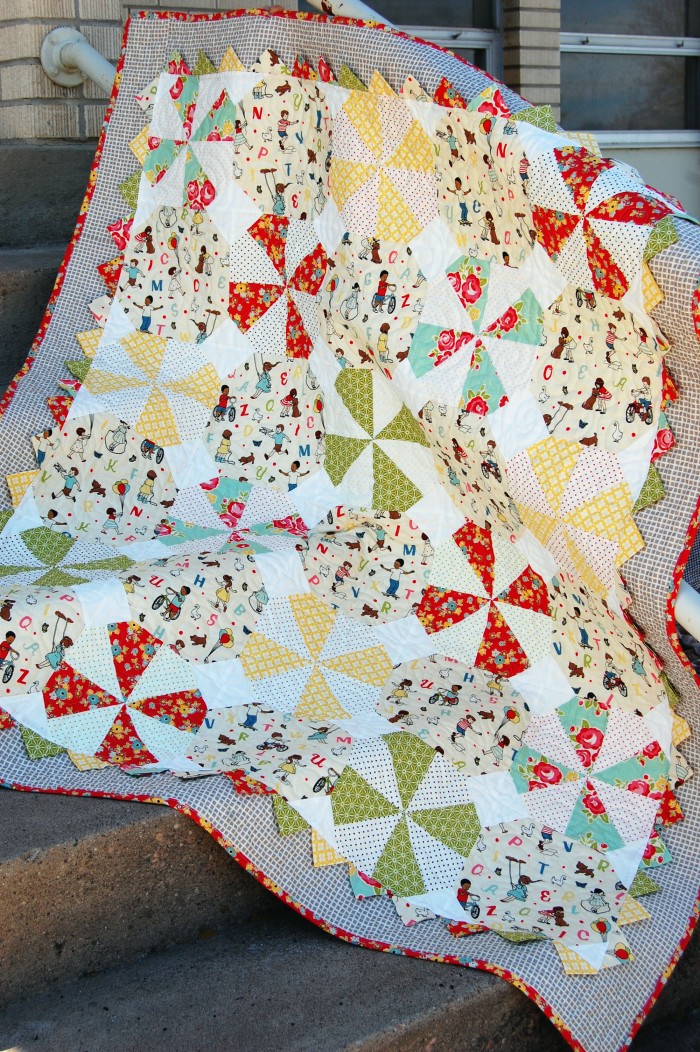
Due to the desperation of needing a finish the quilting was kept simple and done with  my walking foot on the domestic machine.  The backing pictures were horrible, so you'll just have to imagine what the polka dot binding would look like as the backing.


Linking up with 


~ Lea Anne ~
Pin It

Monday, May 26, 2014

Scrap Happy Baskets is ready

 Happy Monday and Memorial Day!   It's important to me to take the time to thank our Veterans and anyone who has lost a love one while protecting our freedom.  My gratitude is also extended for those who are serving and the families that wait stateside for their safe return.  Many blessing to you all.

So look what I finished a couple of days ago.  The battle of the borders gave me a little trouble until finally deciding to go simple with a small white border.  Then after quilting use a colorful binding for the "Pop" factor. 
So many fabrics, wishing now that I had counted how many.  Since I gave you the pattern for the block.  I'll give you a quick run down of how I finished the quilt just in case someone wants to make one.  The gingham was cut at 1.5" strips.  The yellow sashing is 2.5" strips.
 And the final white border is 2" strips.  
 Making this quilt top was so much fun that I just couldn't stop till it was done.  I'd really like to quilt it NOW but there's already a quilt on the frame.  So she's folded and is next in line.
 The scrappy mess was still scattered about the studio when I started another.  This one will be more traditional with lots of American Rose applique.  I might even do hand applique....maybe.  The only bad thing about hand applique is that it takes months instead of weeks to finish.  It's hard for me to stay focused for weeks let alone months.  

~ Lea Anne ~

Linking up with Judy over at Patchworktimes for Design wall Monday.


Today's freebie from Sewmamasew blog.  Designed by LittlemissShabby
http://www.sewmamasew.com/2014/04/mini-medallion-quilt-tutorial-sew-along/


Pin It

Tuesday, May 20, 2014

Scrappy Spring Basket Quilt Block Tutorial

The Cutting List

Background(white)fabric
(2) 12 1/2 x 2
(2) 5 3/4 x 4 1/2
(2) 5 1/2 x 2 1/2
(2) 2 1/2 squares

The handle(pink)
(1) 2 x 4 1/2

Basket(yellow and red)
(1) 8 1/2 x 1 1/2(red gingham)
(1) 8 1/1 x 4 1/2(yellow)
.
You can find the PDF file for the applique by clicking here. Make sure you print at actual size, no scaling.  The applique shapes are for raw edge fusible.  If you plan to do needle turn applique you need to add a seam allowance.  Another tip:  all circles are the same size.
Okay lets put this girl together!
For the basket you'll  need the 8 1/2 x  4 1/2 and both 2 1/2 squares.  On the left you can see that I've stitched from corner to corner.  This can be done by drawing a line and stitching or the method I prefer is using a guide on the bed of my machine.  If you save corner units like me don't forget to add that second line of stitching seen on the right. 
 Cut off those corners...
 Press towards the basket
 stitch the  8 1/2 x 1 1/2 to the top, pressing towards the gingham.
 Sew a 5 1/2 x 2 1/2 piece to each side, pressing towards the white.
 For the handle you'll  need to sew a 5 3/4 x 4 1/2 white piece to each side of the 
2 1/2 x 4 1/2 handle piece.  Pressing towards the handle.  For some reason I didn't picture the next step which is to sew this unit to the top of the basket, pressing towards the basket. In the picture this one is pressed towards the handle, I changed the direction on the next block.
 Add a 12 1/2 x 2 to the top and bottom. On the top piece I pressed open(makes the applique lay flatter) and the bottom towards the white.  And that's it!  So quick and easy.  After cutting each block can be pieced in under 5 minutes.  Seriously the cutting is the hardest part when working with scraps.  
 Now all you need to do is add the applique using the template and placement guide.
You can find more about my Scrappy Spring Baskets here and here.

~ Lea Anne ~

How about we link this up at Connie's over at FreeMotionbytheRiver.  Hop on over and link up with us, it's a great way to meet new bloggers and be inspired.  


Pin It

Monday, May 19, 2014

Scrap Happy Monday

Happy Monday Morning!  So did everyone have a good weekend?  Here in Central Indiana it was just gorgeous.    I managed to pry myself away from these blocks just long enough to step outside and soak up a little of the spring sunshine and Vitamin D.   Then it was back to business.  Cutting all the applique pieces by hand was quite the chore.  My index finger is still numb this morning.  Well worth all the effort.  I can't tell you how happy it makes me to make super scrappy bright quilts. 
 Today I'll be fusing the applique and hopefully there will be time to add the stitching to some of them.  I'm still playing around with the setting and sashings.
Here's one of the ideas I worked up in EQ.  Unless there's an epiphany moment before finishing the applique this will be the layout.  So are your ready for the tutorial?  Several of you express an interest so.... bright and early tomorrow(good lord willing and the creek don't rise) we'll tute this block cutie!  EDITED POST YOU CAN FIND THE TUTORIAL HERE.
Until then you need something to occupy your time right?   How about hopping over to Judy's at Patchworktimes.  You never know what quilt bloggers will share on her Design Wall Monday Linky.  EDITED to add a link up to Connie over at Freemotionbytheriver....this is a great place to share also, and so many wonderful inspirations!

~ Lea Anne ~

Todays Freebie
From the ClothParcel


Pin It

Saturday, May 17, 2014

Insomnia quilt block

For the last 2 days I've tossed and turned at night, while visions of quilt blocks bounce around the open space called my brain.  Putting the idea on paper is usually enough to stop the intrusive visions and allow my brain some rest.
Not the case this time.  So if I'm going to be awake I might as well be doing something.  Who would have thought that sleep deprivation could produce such a cute block.
 3 hours of sleep must be just the right amount for creative juices to start flowing. 
   Finally at 4 A.M this morning I felt as though I could sleep.
 At 6:32 A.M. I was bright eyed and headed for the coffee pot.  So much for my theory on creative minds.  Even though I've only had 5 hours total sleep in 2 days I feel pretty good.  And I'm ready to make a few more of these Scrappy Basket blocks.  
All 16 blocks are cut and ready to be pieced.  Well minus the applique.  Such a simple block that goes together quickly.  This is when saving every last piece of scrap comes in handy.  However digging for them makes quite the mess.
 You know as I sit here looking at the 3 blocks on the right...they could be umbrellas or mushrooms if you turn them over.  Much prettier as Baskets.  
  Anyone interested in making one of these blocks?  Should I write up a tutorial?  I took pictures of the block construction while piecing the test block.  So if your interested just let me know and we'll have a Tutorial Tuesday next week.

~Lea Anne~

Today's Freebie


Pin It
Related Posts Plugin for WordPress, Blogger...