Sunday, December 8, 2024

Purple Bow-Tie Quilt Blocks

 Hello Quilty Buddies!  Over the past week I slowly worked on finishing another (100) 3.5 inch Bow-Tie quilt blocks.  While pressing them I had to pull out a few of my favorite blocks.  Although I'm usually not fond of purple, I make exceptions for prints that are cute or pretty, allowing them a special place in my heart.  The six on the bottom are just a few.


The purple fabric scrap bins and stash was lacking enough prints to make the 100 different prints needed.  As planned at the start of this quilt, I dug deep into the scrap bins and fabric stash to make up the difference.  Another 100 prints with no repeat fabrics.  They aren't purple but they are not repeated and that's what's important.


The next three pictures are eye candy for the fabric lovers.


As someone who adores fabric, there's nothing better than when quilters give me a glimpse into their patchwork of prints. It's like playing a textile version of 'I Spy'.


Sometimes, it feels as though someone is watching you in return! The print featuring the red arrow is quite eerie! HAHA!  That's a new one for me, fabric so eerie it gives me goosebumps! It might just earn a one-way ticket to the trash.


For now, it's time to hide those creepy little fabric eyes.  The storage container of Bow-Ties is getting pretty full.


Let's see if I can close it without needing to sit on the box.


Shew!  It took a little while to get them all in there without wrinkling them.  Only 100 more blocks to make.  Wonder if all 900 blocks will fit in this storage bin?  I can't wait to find out!


The last 100 blocks will be the gray fabrics.  Yah! The end is near!


Pin It

Saturday, December 7, 2024

Happy Friend Mail!

Hi Quilty Friends!  This week a beautiful bundle of fabric came in the mail from one of my followers, Kathy.  We have had many online conversations over the years, but we have never met in person. 


She saw these fabrics on my Facebook page.  It was a repost I made from The Bear Creek Quilting Company.  They were having a flash sale on these fabrics.  Kathy and I fell in love with the bundle and agreed even on sale they were too expensive.  A couple of weeks later she asked for my mailing address so she could send me a surprise.  Sneaky gal!  I never dreamed the surprise would be a half yard of some of the cute fabrics we had discussed.  Y'all, I cried when I opened the package. I can't thank her enough. I love them and can't wait to put them into a quilt! 
  

All of these prints are from the line Garden Party by Whistler Studios for Windham Fabrics. 

Every print in this line is adorable.  You can find the bundle here.  It's no longer on sale but it's still cute!  The bundle has (27) 10.5" x WOF cuts.  Go on, buy them, buy them all.  I'm not sure how much longer I can keep this will power thing under control!


Pin It

Friday, December 6, 2024

Friday Finish ~ Twinkler Jelly Roll Quilt

 The Twinkler is finally finished!  My goodness it seems like I've been working on this thing for months.  Well I guess that's because it has been months.  It was started on September 12 then I made the test block on the 13th.


I'm happy with the way the quilting turned out even though it wasn't exactly as I had planned.  The arched lines in the sashing were supposed to cross over as shown in red below.  But when you don't want to pick out stitches you leave the error and call it a happy mistake.


The scraps from the Jelly Roll were used to make a simple quilt label using the font stitches on my sewing machine.  I like to add my labels to the middle of the backing before it's quilted.  This makes it hard to remove without ruining the quilt. I had no problems when quilting.


Someday I hope to find a cheap embroidery machine just for making labels.  The sewing machine fonts are not the best, but they will do for now.  It's better than any marker I've found. Yes, even the archival pens.  


The quilt was bound with the scraps from the white-on-white backing.  I used 2" strips so the binding would be thinner.  It's about a quarter inch on both front and back.  What you might not be able to see in this photo is I loaded the backing wrong with the white print facing inside the quilt...LOL!  I didn't realize it until I was trimming the quilt AFTER quilting!  Oh well she's still beautiful.


If you would like to make this quilt, I put together a tutorial with some basic instructions.  Some quilting knowledge is necessary.  It can be found here.


Pin It

Monday, December 2, 2024

Old Town Quiltville Mystery `~ Part 2

 Hey Quilty Friends!  This past weekend every spare minute was spent working on the second clue of the Quiltville Mystery quilt called Old Town.


It took me a bit longer than some to make these units because I chose not to follow the cutting and piecing instructions.  She suggested cutting and sewing strips of fabric, then subcutting into units.  


Strip piecing and cutting makes things faster but I don't really care for the results.  Often there will be large pieces of sewn strips leftover, the strips sets are harder to press accurately, and the top reason is I had a lot of tiny pieces in my scrap bins that I wanted to use first.


Once all my squares were cut it was pedal to the metal.  I had several design boards that look like the one below.  Bonnie asks that we not mention amounts and sizes of the pieces in her mystery quilts, so I'm showing only one board of blocks ready to be sewn.


What I can tell you is, so far there are hundreds of different fabrics used in the first two clues. I was hoping to only work from the scrap bins, but I ended up pulling seven blue fabrics from the stash. Sure, I could have cut more repeats from scraps, but I couldn't resist adding just a few more to the mix.  By the way, your eyes are okay, I blurred the lines on the cutting mat below because Bonnie asks that we not show them.  She likes to keep the sizes of everything a secret since this will eventually become a pattern in her shop.


You're probably curious about the fabric explosion on the table. Well, first off, playing with fabric is my kind of fun! And secondly, it's the best way to shuffle them for use in the quilt.


Anyway, my fabrics and just how many repeats do I have? I settled on the magic number of thirteen for fabric repeats, purely because that's how many squares I got from my first strip. Some ended up with fewer and a few with only one, no repeats.


The blocks could have been sliver trimmed to the exact size before storing but I'm not too concerned about slivers.  If I find one that is way off during quilt construction, it might get trimmed. 


If you are interested in joining this mystery you can find the FREE tutorial and FREE PDFs on Bonnie's blog called Quiltville.  If you don't have a AD blocker on your browser, you have been warned.  It's a hot mess of AD's.  I don't blame her, the gal is just making money.  The reason why I warn you is because I've accidently clicked on AD's trying to get the PDF.  The AD's just kept popping up and moving things around.  Be patient and let the page load before clicking.  The link to all PDF's can be found at the top of her blog, so you should be safe with the first click on the tab called Old Town Mystery.  Most of the AD's are down below the blog header.
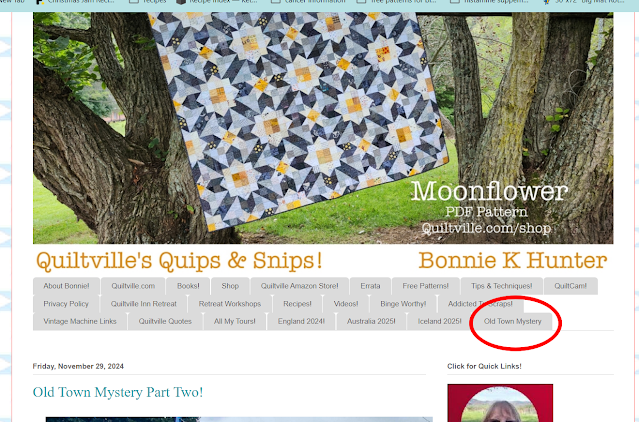

When you get to the next page you will need to read and scroll down to find the links to all the free PDF's she has shared so far.  Each Friday there will be a new PDF until all the clues are released.  Save them for later if you don't plan to make it now.  How many clues?  We don't know!  That's part of the fun.  We don't know what the quilt will look like or when it will end.  Normally all clues are released by the first couple of weeks of January, but you never know it might be earlier.  No matter when it ends the FREE PDF's will disappear from her blog in February and will become a purchased pattern in her shop. 


Pin It

Related Posts Plugin for WordPress, Blogger...