Showing posts with label my quilt design. Show all posts

Thursday, December 7, 2017

~ Christmas Memories Winners! ~

It's crunch time, I'm marathon sewing a quilt designed for my 8 yr.old grandson.  


Hoping to get it in the mail by next week so he can use it before Christmas on his bed.  My daughter said not to make it cute or in bright colors.  Geesh that's way out of my comfort zone.  EQ and me whipped up a couple ideas and sent the images to my daughter.  She choose the one below.  I think the name panel will be switched to the top and a red nose added to the deer. 


Most of the fabrics were pulled from my older stash, and a couple I had purchased for another quilt Christmas quilt that has been pushed aside to make this one.  


Thanks so much to everyone that participated in the Christmas Memories giveaway here on my blog and on Instagram.  The 2 lucky winners of the Christmas Memories PDF pattern......  Congratulations to....

GranChris
and
edithcsokmay

Could both of you please send me your email addresses so I can send them out ASAP.  If you do not respond by Monday December 11 I'll choose new winners. 

~ Lea Anne ~

Pin It

Wednesday, May 31, 2017

Adding a little WOW

Designing quilts is a passion of mine.  Sometimes the ideas flow in in like rain and I can't get them on paper fast enough.  Watching a quilt take shape is always a surprise.


The quilt design is never set in stone.   The original design is always subject to change.  The quilty wheels in my head are always in examination mode.


By my drawn pattern this quilt would be ready to quilt...but something could be done to take the pattern over the top a bit.  


Oh yes, you all know me well, we gotta add just a tad bit of applique.  Now it feels complete with a little WOW.   For now the bias strip is just pinned in place so I can figure out the placement.  Next I'll glue it in place with Roxanne's basting glue so I can stitch it in place.


The blue fabric is bias strips of fabric cut at 2.5 inches, then sewing in half.  If you youtube bias applique strips you'll find tons of videos.  Most videos call for bias pressing bars.  They don't make pressing bars wide enough for this project.  I  made mine by eyeballing pressing the seam to the back.  You can see my seam at the bottom of the picture above.  No fancy tools needed, just a little patience and time.

~ Lea Anne ~

Pin It

Friday, May 26, 2017

Seeing Stars

We've had a couple of rainy days here in Podunk.  A much needed rain.  My garden is loving every drop.  And I loved every drop also.  It gave ME some much needed quality time in my Studio.   This quilt was inspired by a much more complicated design that I'll share when the quilt top is complete.  My test block below stitched up super quick using raw edge fusible applique.


As I was cutting the applique I noticed the salvage, the only words "MADE IN THE USA".  Perfect for a patriotic quilt pattern!  I love that almost all the fabric used in this quilt is American made.  Yes I'm feeling a little Betsy Ross patriotic right now.


The border will be made using several different reds.  For my thrifty quilters out there, you might recognize the Walmart fabrics.  No fabric snobbery in Podunk.


30 blocks completed, and my quilty soul is feeling recharged.  Now it's back to the garden.


Pin It

Friday, March 3, 2017

Simple quilt finish and quicky tutorial

 A couple of weeks ago I finished a lap quilt and forgot to share it here on the blog.  This is the last of the simple quilts I made during the last few weeks of taking care of mom.  The simple designed allowed for mindless sewing for the soul and a quick finish.  


The idea for the quilt came from seeing this picture on google while searching for quick quilt patterns.  Sadly I cannot give credit where credit is due because the google picture links to pinterest and when I get to pinterest this picture isn't anywhere to be found.  So somebody is being cheated by google and pinterest.


With that little rant behind us lets get back to the pattern.  Here's my EQ7 drawing of a small lap quilt.   Since the quilt is basically scraps, except for the red border, I designed by how many 2.5 squares were already cut and ready to sew.  The sashing and background fabric were leftovers from a jelly roll and some 2.5 scraps.  

The quilt finishes at (64 x 72)


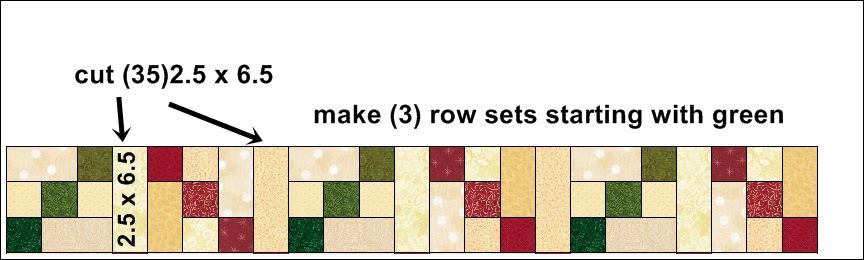
If you'd like to make this quicky quilt here's a quicky visual tutorial/pattern.  You'll need some quilting knowledge I'm not going to explain every step n the quilt top making process.  Don't forget my blog is printer friendly just scroll down to the bottom of this post, click on the print friendly icon to print this page in pdf format.  It will also allow you take out parts of this post you don't want to print.


Use the the picture above and the first full quilt drawing to help you with your layout.

~ Lea Anne ~
Pin It

Friday, February 24, 2017

Christmas Memories ~ Friday Finish

Hello sweet friends! There's a fabulous Friday finish to share with you today.  This quilt is my own design(sorta).  Since it's a lap quilt it was quick and easy.  A few weeks ago while sharing a sneak peek of the quilt I asked my creative followers to help with a name .  There were so many great suggestions.  Thank you so much for your advice.  Taking all the suggestions and rolling them into one sweet and simple name.  

"Christmas Memories


The truck block is huge measuring 24 x 24.  I'd like to take total credit for the  simple design, but it's an old pattern made new by Jenny Doan of Missouri Star quilt company.  While doing a search for a simple quilt pattern for my applique trucks and trees I saw a picture of the her quilt block.  To be honest I've not watched the video.   When saw a picture of her block I drew it in EQ7, then added my own special touch of applique.  


The video is Sticks and Stones.   The jelly roll and most of the other fabrics used in this quilt were custom cut from our local quilt shop "Coffee Cup Quilting"  


 The 24" truck block is 4 of the Sticks and Stones blocks sewn together to make one large block. Then the applique was added.  


 The scrap end pieces of the jelly roll were used to design the background for Christmas tree section in the middle and the thin inner border.


Whenever possible I like to add fabric from the vintage stash.  The vintage brown gingham (not cotton) added a special cozy feel.


And to keep the cozy feel, a simple custom quilting without quilting it to death.


~ Lea Anne ~
Pin It

Friday, November 18, 2016

Inspired Christmas trees and trucks

 Hi-diddly-o quilty friends!  I'm so glad you stopped by today.  I've missed hanging out in blogland.  Occasionally I get a chance to pop in and see what you've been stitching up on your blogs and instagram.  However there's not been much time for sewing here in Podunk.  I've managed to sneak in a few hours here and there.  Most of my time is spent away from home and my studio. By taking my laptop along I get my quilty fix designing quilts in EQ7.  This quilt was inspired by the Vintage Christmas quilt pattern I made earlier in the month.


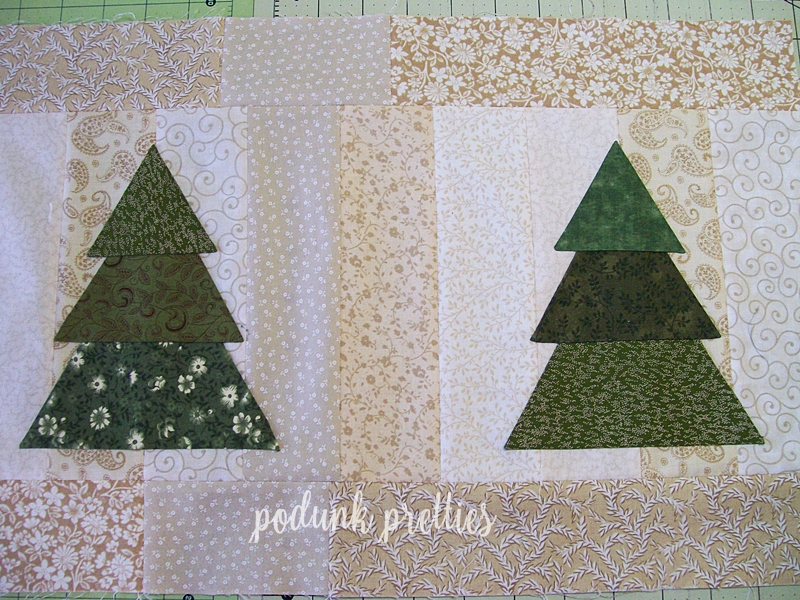
The pieced part of the 24 inch blocks are made using a cream jelly roll, the blocks go together super fast.  The jelly roll used was custom cut for me by Claranna @ Coffee Cup Quilting, a local quilt shop near Podunk.  The red and green fabric also came from the same shop.  They're leftovers from the fat quarters used in my last quilt top, Vintage Christmas by Erica Arndt.    Hopefully I can get some pictures later today.  You can read more about it here.


Of course you all know I love applique but don't like to do handwork so my applique is done by machine using Superior Threads Monopoly thread and a tiny  blanket stitch.  Once it's washed you need to be super close to see that its not hand stitched.


The original plan for this quilt was 6 truck blocks.  That was far too much applique for my limited time.  The trees are much easier to make and stitch into place.


The background for the trees were also from the same jelly roll. 


Here's a shot of my Studio floor....


...and here's what it should look like....eventually.  If you have any suggestions for the name of this quilt I'd love to hear them.  


~ Lea Anne ~
Pin It

Tuesday, July 5, 2016

Back Porch Blooms ~ Another Cutie

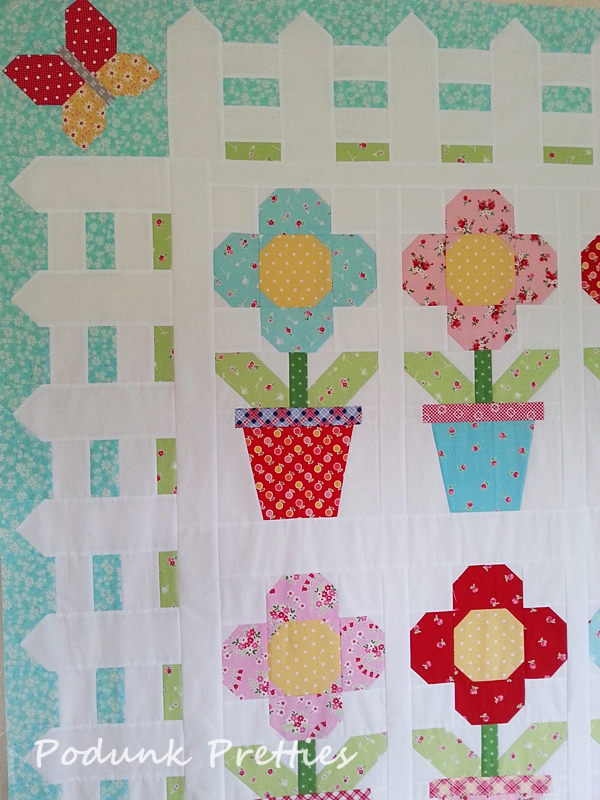
Hello sweet quilty friends!  I've got another super cute quilt to share with you. This is the third quilt in my "Back Porch Blooms" series of free quilts.   For some reason I'm coming up blank when trying to name this one, so if you've any suggestions let me know.


Tomorrow I'll start writing the pattern for the sashing and borders.   If you'd like to get a head start making the "Back Porch Blooms" blocks(flower and pots) you can find the tutorial here.


The corner Butterfly blocks are also a freebie here on my blog and can be found here.  TIP: The tutorial is for a 12 inch block.  You can make them 12 inch and trim them down to size later or you can make the 6 inch Butterfly and wait for new smaller on point instructions later this week.  My blog is a print friendly blog which means you can  print my tutorials in pdf just by clicking on a specific post and then clicking print friendly image at the bottom that page.  Print friendly allows you to remove any pictures or text that you don't want or need.


This quilt was designed after so many of you loved my quilt and chickens post.  The idea for a picket fence was in one of my first designs but it was a much smaller quilt.  It just occurred to me as I'm writing this post, you could replace the butterflies with baby chickens set on point...oh how cute would that be!?


Most of the prints in this quilt are Pam Kitty or Holly Holderman, Lakehouse fabrics.  The blue in the border is not.  It's a Bonnie and Camille print, I'm unsure which line of their fabric.


The border is actually made up of three blocks. The Butterflies and two different pickets and rails blocks.  Strip piecing made quick work of the fence borders.  


To see all the tutorials and posts about my "Back Porch Blooms" quilt block just click on this image in the sidebar.  Or you can find them in the tutorials tab at the top of this blog.


Don't forget there's a "Back Porch Bloom" linky party once a month.  You can link up your progress to be entered in a giveaway.   The only rule is you can only link up posts or pictures of your "Back Porch Blooms" project.   This month the prize is a bundle of half yard cuts of Indian Summer by Bentartex.   


So here's the plan.  Later this week I'll post the instructions for the fence quilt above.  Next Tuesday July 12- July18 you can link up any Back Porch Blooms projects.    Then the winner will be announced on July 19, 2016.  There will be at least one more linky party and giveaway next month so there's still plenty of time if you haven't started your blocks yet.  It doesn't need to be a finished project to link up.

Happy Stitching!
~ Lea Anne ~
Pin It

Monday, April 4, 2016

Patriotic Picnic

Just popping in to share my quilt top "Patriotic Picnic".    


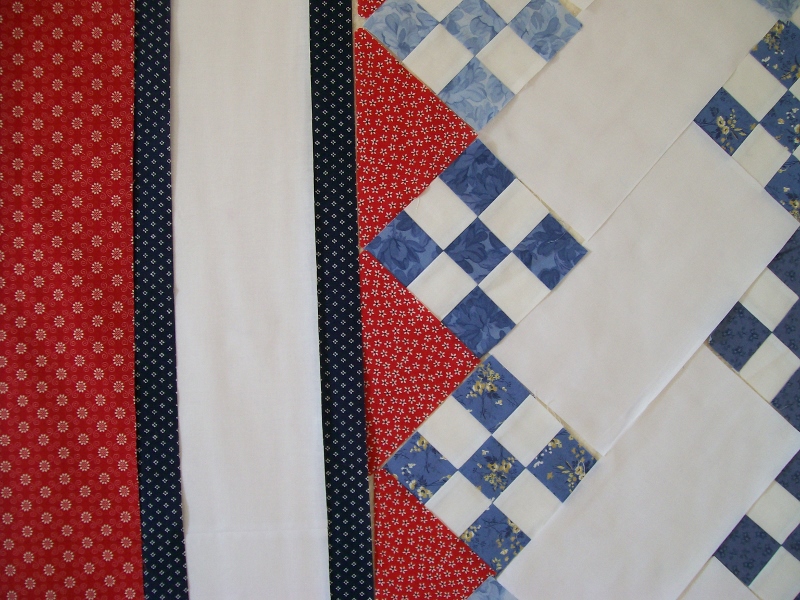
I designed this quilt so I could use up the 90 or so nine patch UFO blocks .  It's a large quilt, finishing at 90 inch square.


The low volume background was a real challenge since my go-to background is usually plain ole Kona White.  It takes a lot more planning and paying attention to detail when working with the many different background prints, but well worth the effort, don't you think?


Well I didn't use up all those nine patches.  48 more on the wall.  Another design challenge.  Make a quilt that uses exactly 48 nine patches.  It took a lot of trial and error but I came up with a plan using exactly 48.


How about a little peak at my design wall. Plenty of white space for applique or quilting, I'm leaning towards applique.


A close up of the border fabrics that were also leftover from the Patriotic Picnic quilt.  The navy blue is from my vintage stash and the red is brand spanking new.


Hope to see you in a few with another finished quilt top.

~ Lea Anne ~


Pin It

Thursday, March 17, 2016

Dresden Baskets, another UFO

As I  dug through the UFO bins last week I ran across 2 dresden basket blocks I started designing months ago.   With Easter right around the corner it only seemed appropriate to get this one finished.  The Moda Bandana charm pack by Me and My Sister Designs played well with some other fabrics hidden in my stash.  In the block below there are 3 fabrics that are not part of this line.  The handle, the pink basket and the print to the far left.


One of the advantages to working on UFO's is brewing time.  It seems after they have time to fester in my brain for awhile, and take up much needed space in my studio they go together much quicker.  Making several more basket blocks seemed so time consuming.  I needed a new design with fewer blocks but using up all the partial dresden rings.


I've used this applique method of making a mock wedding ring before in a quilt called Hillbilly Hook-up that you can find here.

psst... the white fabric to the left of the cherries and the sashing isn't from this line either.

The hardest part is deciding what will hide the fabric edges.  


In true Podunk style I added a simple flower.  How cute is that?  A fun little twist to the standard double wedding ring.


Hmmm... what do you think about a scalloped border that follows the curve of the wedding rings followed by the sashing fabric for the binding?


Just a few more hours of pedal to metal invisible machine applique and she'll be ready for the needs to be quilted pile(mountain).


~ Lea Anne ~

Pin It
Related Posts Plugin for WordPress, Blogger...