Showing posts with label baby quilt. Show all posts

Thursday, February 2, 2023

Throwback Thursday ~ Baby Dresden Quilt

Just thought I would pop in today and share pictures of a quilt I made and gave away back in 2015.  She's a little cutie made for my youngest granddaughter named Scarlet.  Back in those days I didn't name or label my quilts like I do today.  So we'll just call her this baby quilt.  
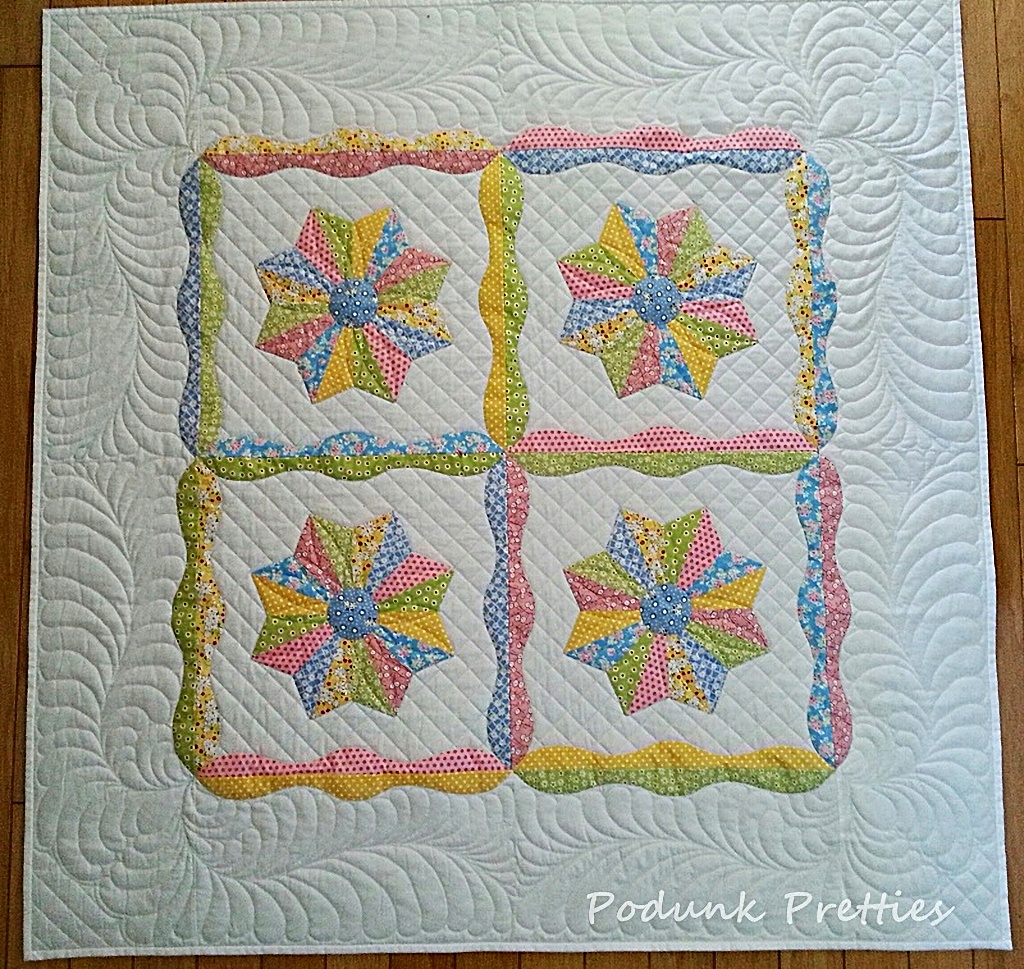

This baby quilt was my own creation drafted with good old fashion pencil and paper.  If interested you can see more about that process here.  Designing quilts has been a passion of mine since the very beginning of my quilting journey.  The quilting part however is a real struggle.  I did a pretty good job quilting up this little gal.   You just can't go wrong quilting it to death with feathers and crosshatching.


She turned out really cute but she had her issues when making the applique.  I learned a very valuable lesson about shrinking freezer paper applique templates.  Again...if your interested in that story click here.  


Here's a picture of the back of the quilt showing all the quilting.  Taking a look back in time makes me want to make another one for me.  I bet if I dig deep enough in the studio I could find these templates.  Maybe...but not today.  Stay focused on the  UFO plan Miss Lea Anne.


Until next time...
 
I hope you find time to stitch up something sweet!


Pin It

Thursday, October 22, 2015

Friday Finishes

Back in January I deicided to take a break from quilting on the frame.  Feathers and ruler work require lots planning and marking.  I was sick of it!  Well my quilty groove is back.  Today I feel like quilting every quilt top in my Studio.  I know this feeling will soon pass, but if feels good at the moment.  Here's the little quilt (48x48) I designed a few weeks ago for my new granddaughter.  She was born last Sunday.  It may be a little to fancy and white for a newborn but what the heck.
  

If you look closely you can still see my blue markings.  Most longarm quilting gals can remember their quilting designs without needing to mark, I'm not quite that talented.  


The best thing about feather quilting....THE BACK!  Two quilts in one.


Oh yes there's more quilt finishes.  I'm so glad this one is done and can be shipped far, far away from my studio.  Not one of my favorite quilts or color pallet, but the grandkids will love it.

  
Here's a shot of the back, it's ugly also.


This ugly fabric just keeps multiplying....so I made another quilt.  The backing is just more of the ugly stuff.


A couple of reversible treat bags.  They're identical, I reversed one so you could see the inside fabric.


Everything is washed and ready to ship to the young'ens. 


I'm linking up at the following places


~ Lea Anne ~
Pin It

Monday, August 17, 2015

Feather Ready!

Well after hours of fiddling with different applique idea for this quilt I've decided, it's a quilt top, ready for quilting.  No more applique just tons of feathers, maybe some cross hatching.


Just look at all the wide open spaces....oh yes... just right for feathers galore.


After all the fussing about the applique it came together in the middle perfectly, what a relief.


I'll start marking it for quilting this afternoon and hope to have it on the frame by tomorrow morning.  Dolly(my BHQ 15) has been sitting idle for over 6 months.  Waiting patiently for me to get over my keeping it simple stage.  The wait is over!   I'm dusting her off, giving her a lube job and taking her for a test drive to blow out the gunk....YeeHaw!  My Mojo is back!  Hold on tight old Dolly, I'm putting the pedal to the metal and we're making up for lost time!  See you gals in a few days with sneak peak at what me old Dolly can do when we team up!


I'm linking up today's post with these fun linky parties.


Pin It

Tuesday, August 11, 2015

Freezer paper applique WARNING!!

After yesterdays internal struggle things didn't get any easier in the studio.  By the looks of the picture below you'd never know expletives were bouncing around the studio walls like a flock of birds trapped in glass house.  Oh yes, the foulest of words with a few paper crumbling, foot stomping, scissor slamming temper tantrums.   Normally I'd just fix the issue and move on, but with my time being so limited it just...well...got the better of me.  So what's my problem?


Shrinkage!  The little red arrow areas I can live with.  Once in the quilt no one would know there was shrinkage on the scallops.  But that circle area, that's another story.


It's a critical area, these HAVE to be perfect in order to meet at the corners with no gaps.  That's almost a quarter inch off.  Now I bet your wondering how many I made that were too short.  TWO!  And the only reason I caught it was....


When I tried to line up my template with the edge of the fabric... I couldn't.  They started out straight as an arrow, cut with my handy dandy old rotary cutter and ruler.  I've been using freezer paper applique for years with no issues, but I've never needed such accuracy in my applique pieces.  A little shrinkage or distortion on an appliqued leaf, who's going to notice?   Templar would have been the better option for these pieces, but all my pieces of templar were to small.  And going to the closest store that carries it is a 30 minute drive.  I'm way to practical(cheap) to do that. 


Now this is where the foul mouth really comes into play.  I used my last piece of Studio stash freezer paper to make the incredible shrinking templates.  $#@!  And I knew the roll in the kitchen was almost gone.  $#%!!  Luckily Mr. Podunk keeps a roll in the garage for processing deer during hunting season.  Yeah!  Using a template only once seems wasteful to me but it's cheaper, and quicker than running into town.


It all worked out in the end, and I felt rather silly for getting so upset.  My goal for the day was getting all the border pieces made, and I accomplished it, along with all my other Podunk chores.  So a good day can come with it's valuable lessons on shrinkage.


Linking up with some great bloggers today!  There's always tons of inspiration even if you don't link up you should hop over for excessive amounts of eye candy.  It's a good thing eye candy is calorie free otherwise I'd gain 10 lbs a week from all the sweet projects!


~ Lea Anne ~
Pin It

Monday, August 10, 2015

That inner voice

The ideas have been flowing in like a tidal wave!  So many cute ideas.  The problem with that is I'm a visual/hands on kinda quilter.  Which means I need to see it, feel it, play around with it and that makes scrap pieces when there's several ideas.  I could use EQ7 to draft a quilt, but it can take longer, especially when drawing applique pieces.  So most of the time I use good old paper and pencil.  Another problem is my mind sees elaborate applique that me, myself and I have no interest in making.  The little pink mustache or grammar school bird shape was one of those ideas.


Here's the little birdy shape strutting her stuff.  Oh yes, a scallop around this dresden would be ADORABLE!  But the three musketeer alter ego's rejected the plan. What a lazy gang of naysayers.   They quickly put in their two cents of how long it would take to make the pieces, let alone stitch them down. (sigh)  So what's a gal to do but take the advice of a group that knows me so well.  They know if I go with this plan it'll become a UFO.  I tried my best to let them know that it's ONLY a four block setting, and they reminded me that it's canning season in Podunk, and free time for quilting is very limited.  The voice of reason, where were you when I buying fabric, templates I'll never use and what about during the expensive sewing machine purchases?   I don't recall you helping me out then!  Oh well what's a gal to do, this is a democracy. So me, myself and I have voted to go with the easier plan.  But I want everyone in bloggyland to know Lea Anne wants the scallops!


The one thing that we all agree on is linking up at these great linky parties.  We voted and its unanimous you should visit each of these links, and of course link up your lovelies too!  If you don't have a blog that's okay, because most linky parties let you link from other social media.  Me, myself and I are very powerful persuaders so...see you there!


Pin It

Friday, August 7, 2015

Finding time to play

 There's been little time for sewing in the last couple of weeks.  Most of my time is spent in the garden or in the kitchen, but my mind is always thinking of quilting.  In between the batches of preserving food I've played with an idea or two in the Studio. 


Drafting the dresden block was a little easier on paper than it was in EQ7.  After drafting it I needed to make a template.  As you know I often make my own Acrylic templates, but if I can use one that I already have that's even better.


So I pulled out every template in my stash and this one is the only one that fit in the wedge shape.  Glow line tape was added for easy placement onto the fabric.


My test block was a success!  Well...one fabric placement booboo but it can stay in the quilt.  It sticks out like a sore thumb to me, can you see it?


Now the playing begins.  This is my favorite part of the designing process.  I always have a general idea, but there's always room for improvement and improvising.  The circle and petal pieces were left overs from the my last little quilt that you can find here.  Not so sure that the red one is going to make it into this project but it's doing a good job of being useful as a visual aid.


I love the octagon shape that's made when the dresden tips are put together.  It wasn't part of the plan but I could play around with it a little bit more later on. 


For now the playtime is over and it's time to get busy doing the so called "important stuff".


So do you design your own quilts?  Do you play with the design after cutting a few test pieces?  What's your designing process?

~ Lea Anne ~
Pin It

Friday, January 4, 2013

Square it up

 Working a little on the commissioned baby quilt.  After reviewing my plans it just wasn't scrappy enough, the scrap box took care of that.  There will be 18 different fabrics!   Here's my EQ7 rotary cutting printout with tons of scribble plans.
                     

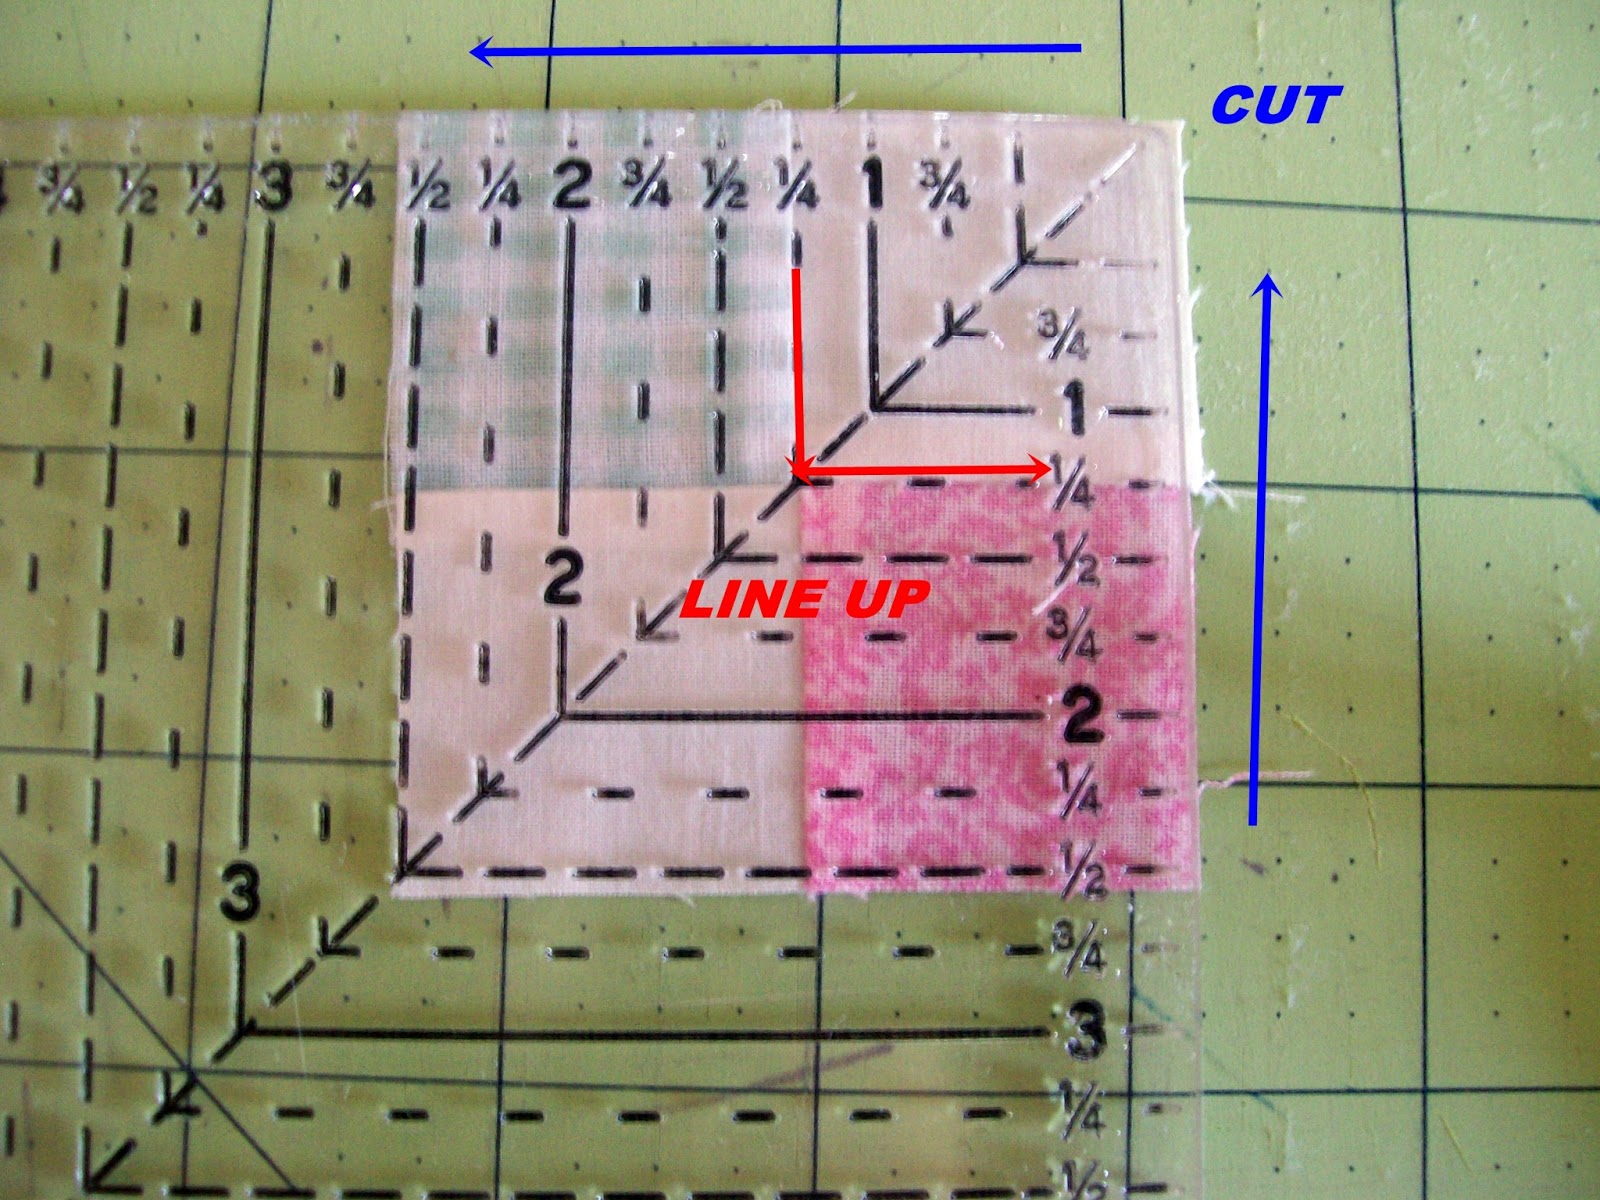
I started with the corner unit, using a scant 1/4 seam so I could square them up.  This is the ruler I use to square up my blocks.  It will do up to 12 1/2 inch block.

The units are to be square at 2 1/2.  Lining up my block unit at the 1 1/4 then cut.

Turning to cut the other two sides, line up again at the 1 1/4 mark and cutting
                      

TaDa!  Perfect 2 1/2
                      

Only 79 more to go!

Until next time "Quilt out of your Comfort Zone!"
Lea
Pin It

Friday, June 8, 2012

Hand Applique finished FINALLY!

My fingertips are celebrating its finish.  Now to get the machine piecing done.  I'm liking this little gal so much, another one for me may be in order!  Its on the long list of "gonna do's". 
Pin It
Related Posts Plugin for WordPress, Blogger...