
For about a year now I've been eyeing this new gadget called Applipops. They seem to be all the rage in the applique world. Since I do a little applique from time to time I was eager to try them out but wanted to wait to see what others were saying about them. Well I couldn't wait any longer. A couple of weeks ago I finally click on BUY.

What kept me from clicking BUY was the price. It seemed a little steep. After much arguing with me, myself and I, we decided to get the best deal and order 2 double sets. In the image below the two sets on the left are the same and the two on the right are the same.
One set is one of set of circles on one clip for $24.99 + $5.00 shipping.
One of each size is two sets of circles on 2 clips for $39.99, free shipping.
Two sets with the 2 different sizes on 4 clips is $59.99, free shipping
....and I had a promo code for 10% off. So it made sense to me to buy the biggest set.

I made every size circle in the sets and was not impressed. I had trouble getting the circles to nest without pushing them all the way through. So I took a break from them for a day or two. Then came back and made a few more. And like magic they were working great. What was difference? It took me a few more circles to figure out that there is a dull side and a shiny side to the Applipops. They seem to nest better when I used dull side up.

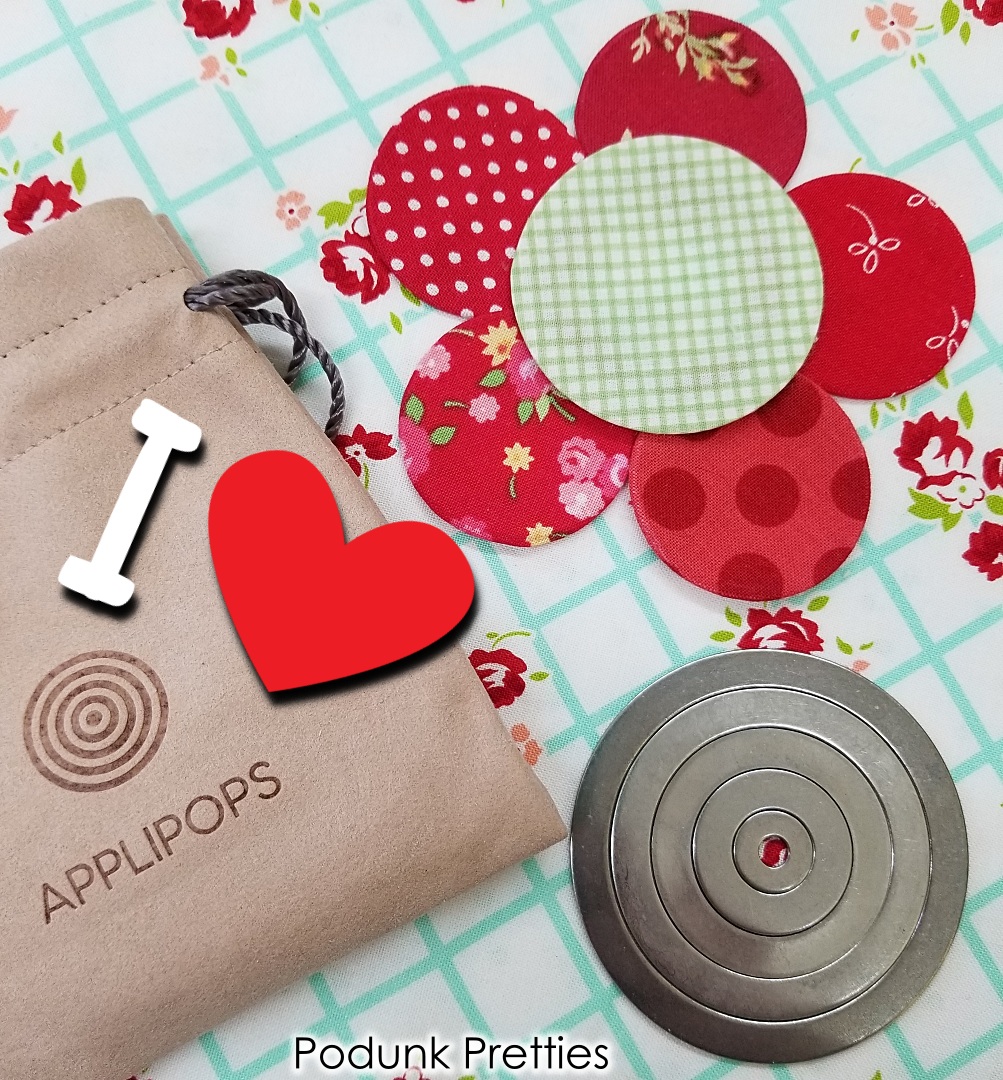
With the problem solved I started making oodles of circles. Before I show you how to use them I wanted to share with you my Applique kit. Notice the little flower made of circles on the front.

Inside the kit is several different glues that I use when making applique, any applique templates I may be using for the current project, paint brush and bowl for starch and water paint pens for starch, fabric scraps, and a ziplock bag for current shapes being made.

I also pulled out my bin of small scraps for making smaller circles. I knew this bin of itsy bitsy scraps would come in handy some day!

To test out the Applipops I pulled out a water color paint pen, and a paint brush and a bowl for the starch. Of course an iron, scissors, fabric and the Applipops.

So lets make a circle.
Place the larger of two nesting circles shiny side down on the pressing surface.
Lay the fabric right side down on top of the larger circle.

Pop the smaller circle into the center, being careful not to push it all the way through. I found it harder to push the circle through with the dull sides up,

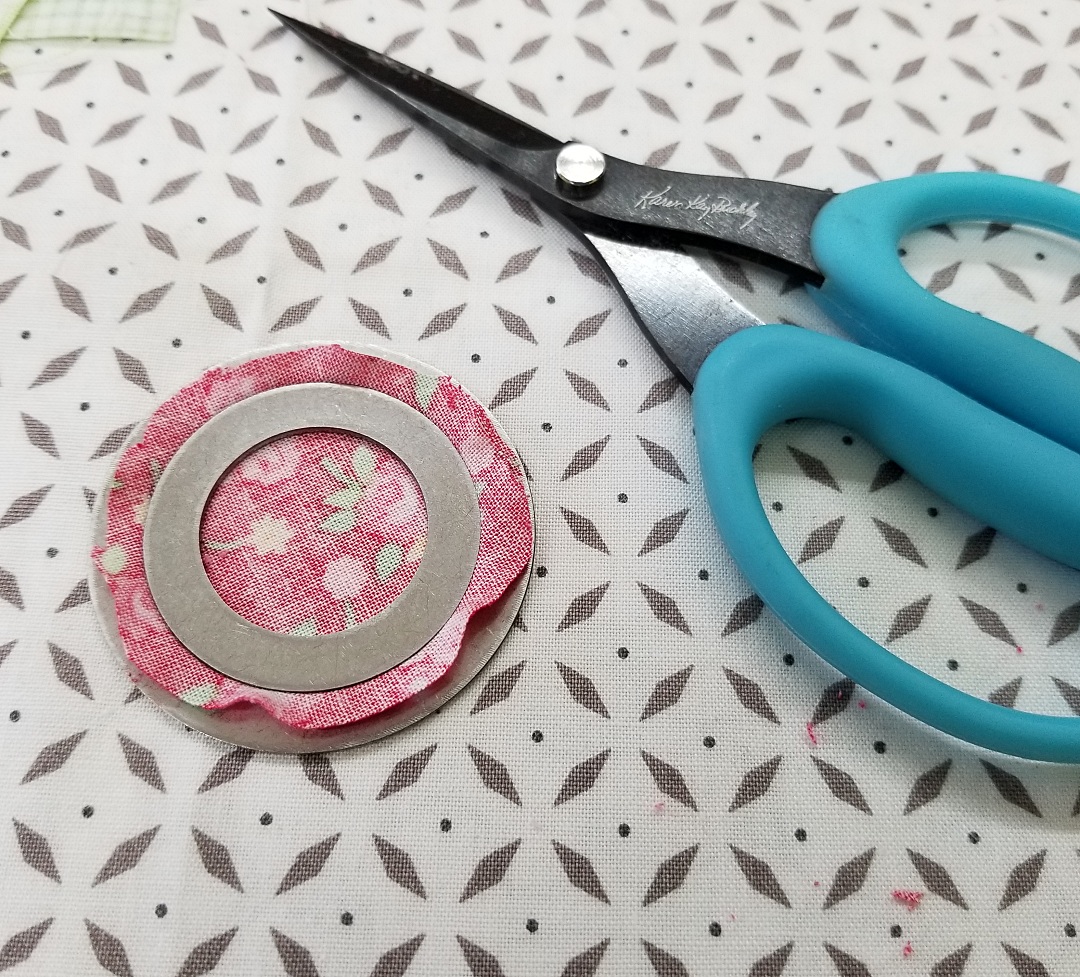
It should look like this on the other side. You don't want the center circle sticking out passed the larger circle. This will make your applique thicker.

Next cut around the circle leaving a 1/8 " to 1/4" seam.

I let my scissors ride on the outside of the larger circle to make the cut.
The water color paint pen was filled with starch to make applying the starch a little easier.

But the paint brush works just as well if that's what you have on hand. And in a pinch a Q-Tip works too.

After applying the starch around the edge, push up the fabric to make it easier to press the seam inward.


Because my iron is about 40 or 50 years old it is a little hotter than the newer irons so I've turned the heat down to wool to prevent scorching of my circles and pressing mat. It's a steam setting but I never use water in my iron.

Press all the way around the circle until the seam is dry or close to dry. I used a pair of tweezers to help me rotate the circle while pressing. Those metal templates get super hot! Be careful!

Of course you can use any thing to help. I tried out using a pencil with an eraser and it worked great.

Give it one last press.

After allowing the template to cool remove the circle template. While waiting for it to cool you can make another circle with the other set of circles. Or if you are like me use the tweezers to pull out the hot circle template. I'm so impatient...HAHA!

This is the part that concerned me the most...the thickness. Look how thick the circle is after removing the template. This isn't good for applique. The applique edge needs to be fairly thin. Leaving like this would not be good.

Will pressing it cause the circle to go wonky, more like an oval or egg?

Pressing it flattened it pretty nicely!

Look how much flatter it is now. I've stacked one pressed circle on top of one that has not been pressed after removing the template.

They turned out great. I can honestly say I'm very pleased with the Applipops. They really do make perfect circles every time.


1. Cost
$59 - They are a little high priced but I think worth the money to make perfectly round circles quickly. I don't regret my purchase and would buy it again should I lose them or think I need more.
EDITED 5/5/21
I just saw on Facebook an ad for Applipops. Use code SPRING at checkout on their website for 10% off. It does not say when it expires.
2. Ease of Use
Yes, very easy to use once you get the hang of using them. Purchasing more than one set allows you to assembly line make circles without burning your fingers. One can cool while you make another.
3.Efficiency
The Applipops definitely speed up the process of making turned edge applique circles. And they are perfect every time.
You can find Applipops at this link.
You might be able to find a discount code for them on the Applipops Instagram or Facebook. I found a code for 10% off on Facebook.
I also made a video review for YouTube. As usual it's corny and I ramble on and on but that's me, corny and I talk way to much all the time.
For more Nifty Notions Reviews Click on the image below or in the sidebar of this blog. This will take you to all reviews in order from oldest to newest.

As always, Thanks for stopping by my little spot in Podunk!

Pin It

Lea Anne! Thank you so much for reviewing these! I just got them myself last week. I bought the $59 set, one for myself and one for a friend as a gift. She appliqués, and I’m hoping with these I’ll try! You’re tip, is so helpful, I think I’d been lost otherwise. I thought their print instructions weren’t helpful at all. Your step by step photographs and explanation is exactly what they need! I just bookmarked your page, so I know exactly where to come back to, when I attempt to appliqué. Thank you, thank you!
ReplyDeleteLove when you do the gadget reviews!!!
ReplyDeleteThe good...bad and To Hot to touch!
Lea Anne, I bought two sets of AppliPops months ago, put them in the drawer with my other applique gizmos, and am ashamed to say that I haven't touched them since I put them there. Thanks for the tip about shiny side versus dull side of the templates!
ReplyDeleteI’ve been contemplating buying these for a very long time and your review convinced me to go ahead. Thanks for being so thorough in your review. I look forward to and enjoy all your posts. Keep them coming.
ReplyDeleteGreat step by step review and tutorial on how to use. Thanks
ReplyDeleteInteresting, had not heard of these. Thanks.
ReplyDeleteThanks for your detailed tutorial! I’ve just ordered them and can’t wait to use on the Spinning Spools quilt I’m makeinf on the Alex Anderson page on Facebook. I never knew there were paint pens that work with starch.
ReplyDeleteThanks for your detailed tutorial! I’ve just ordered them and can’t wait to use on the Spinning Spools quilt I’m makeinf on the Alex Anderson page on Facebook. I never knew there were paint pens that work with starch.
ReplyDelete