Showing posts with label Bumpkin Baskets Quilt. Show all posts

Thursday, April 10, 2025

Bumpkin Baskets Ready To Be Quilted

 After many years of on again off again quilt progress, this quilt is ready for the frame. My Bumpkin Baskets quilt is a variation of my original quilt using my original design of the Dresden Baskets block.  You can see the original block design and quilt design here and here.


The full border applique was glued to the quilt and then invisible machine applique was used to secure it in place.  And that's why this has taken so long to complete.  Wrangling a 90 x 90 quilt in a 7 inch throat space was just too much fun (sarcasm). 


Two different prints were pulled from the stash to make the backing.  It's not the ideal fabrics but it is the most budget friendly.  I'm trying to work with what I have most of the time.  Oh, I'm not claiming to be in a no buying phase.  I'm just trying to use my will power whenever possible.  It didn't work out so well last week while in the quilt shop picking up April's 2 bucks a block.  A few lonely fat quarters needed a new home.


To make the quilt label for this quilt I used the scrap from the backing fabric.


Then added the scrap from the basket handles to make a border on the label.  Yep, it's kind of busy with the stripes going every which way but it's and eyecatcher!


The binding fabric was also pulled from my stash fabric.  After cutting and piecing the strips and having a long quilt staring session, I don't like that shade of blue with this quilt.  I may need to dig deeper in the stash or start shopping for a new binding fabric.


For now, she has been safely wrapped in plastic and stored away until I decided what to do about the binding and how to quilt her.


I'm not exactly sure when I started this quilt but I did find this short video I made for instagram in 2019.  But I know I started it at least a year before this video.


Pin It

Sunday, December 15, 2024

Switching Projects ~ Baskets Of Fun

 Hi-diddly-O! Quilting Friends!  My recent injuries from tripping over the dog will not keep from sewing.  I may not be able to cut fabric but I'm pretty sure I can still manage a few stitches on the sewing machine.  So, I pulled my Bumpkin Baskets quilt out of the WIP's cart. 


All that's left to do on the Bumpkin Baskets quilt is to stitch the border applique into place using the invisible machine applique method.  The appliqued pieces were glue basted in place months ago using Elmers washable school glue in a Roxanne's basting glue bottle.  The Elmers is cheaper and works just as well as Roxanne's glue. It was also easier to find locally when I ran out of Roxanne's Basting Glue.


Invisible machine applique can be stitched with any thread that matches your fabric or with invisible thread.  I prefer Superior Threads Mono-poly.  It's a clear monofilament thread that can hide in almost all fabric.  They also sell a brown Mono-Poly to use with darker fabrics.  Typically, a walking foot is my go-to for machine applique, but it's a no-go today. Attaching it requires a screwdriver twist, and my sprained wrist just gave me a big thumbs down!


The reading glasses are helpful when working with invisible thread.  Especially if your machine is like mine and refuses to thread the needle with the automatic threader.  Painting the end of the thread with a black sharpie marker helps when manually threading the needle.  I sometimes use the camera on my phone to find the thread, I can zoom in on the thread.  It shows up pretty good in the picture below, but I couldn't see it when taking the picture, it must be the angle of the light.


Making the smallest stitch possible is also what helps make the stich invisible.  I prefer a very narrow blanket stitch.  In the picture below, the left image shows the needle in the background fabric.  On the right the needle is in the applique. TINY stitch!   


This quilt is my own design, no pattern is available, but you can get an idea of how I made baskets and border at the following links.

The first link shows my inspiration for the basket block.

The second link is the basket block redesigned and used in a small quilt.

Well, I've rambled on long enough.  It's time to get this quilt top finished and ready for the quilt frame.  Oh, I won't be quilted anytime soon.  That will need to wait until sometime next year.


Pin It

Monday, September 2, 2024

Bumpkin Baskets ~ The Final Border

 After wasting many hours trying to make this border tickle me pink, I gave up and decided to call it good enough.  It makes me happy to throw in the towel.  You know what they say... Finished is better than perfect!


The picture above is a bit deceiving.  Let's take a closer look.  See the gazillion pins?  Two days of my life was wasted pinning on the border, unpinning the border, trying different applique and pinning again and again and again.


The only way for me to know if I like the border is to see each little piece in its place.  Thank goodness I stockpile quilting supplies because I had to dig into the pin stash.  Hundreds of pins were needed.  About 200 pins, maybe more.  I didn't count how many I already had in the magnetic pin holder. 


It took another day and a half to glue the applique into place using Elmer's washable glue in an old Roxanne's basting glue bottle.  I like the fine tip on the Roxanne's bottle.  It puts the perfect amount of glue on the applique every time. To dry the glue quickly I set the iron on the silk setting.  The lower temperature setting will dry the glue with scorching it or the fabric.


For the next few days I'll be stitching the applique to the quilt top using the invisible machine applique technique.  My go to thread for this technique is Superior Threads Monopoly for the top and bobbin.  I say it all the time...I love this thread for applique.  


 A tiny little blanket stitch is perfect for hiding the stitching.  Once the quilt is washed, the stitches will be...INVISIBLE!  


I'm linking up this post at the following blogs.  Hop over to each link and be inspired!

and
and
and


Pin It

Monday, August 26, 2024

This Weeks Plan

 The top priority for the week is to get the border applique glued in place on my Bumpkin Baskets quilt. 


Before that can happen I need to finish recovering my pressing boards.  I started this late last night.  Normally I recover each of these 3 or 4 times a year.  I'm pretty sure these were neglected all last year because they looked horrible. (I have a video for how to make pressing boards)  The two smaller boards will be recovered with the fabric you see below.  On the largest board the fabric was washed and will be reused. Since this my ironing board for almost all fabric it gets more wear and tear.  It needed a total rehaul after more than 10 years of use.  All the layers under the cover have been replaced.


About a year ago I purchased this fabric at Joann's to recover my large board.  It's just too cute and I can't bring myself to use it for an ironing board cover.


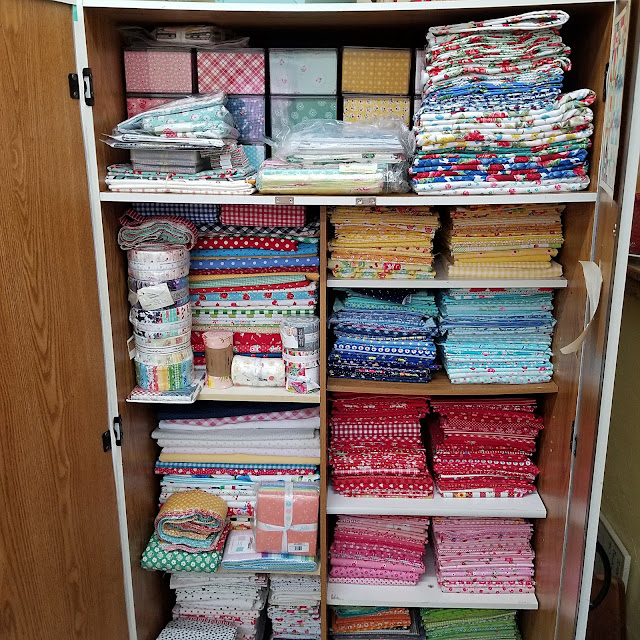
I also need to do a little cleaning.  Remember the fat quarter break up blog post?  Well, I'm still working on the organizing of the fabric cabinets.  Here's what it looks like so far.  Worse than it did before!  It's a work in progress.  Today I'd like to deal with the tall stack of yardage on the top right shelf.  

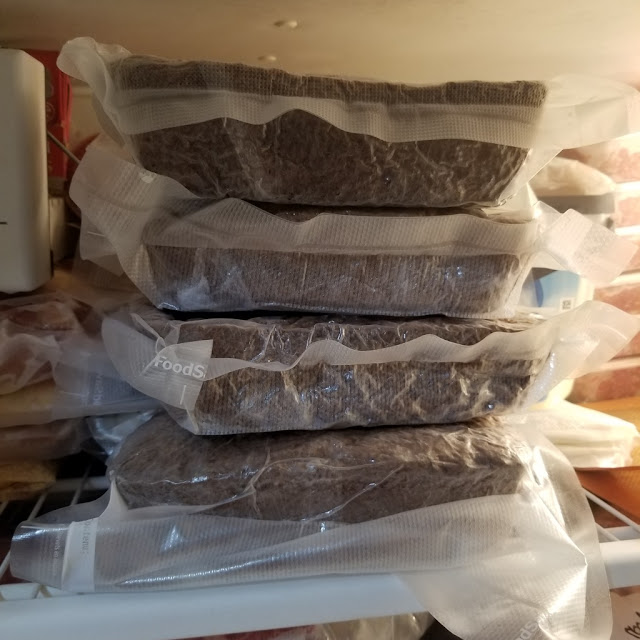
BUT, before I can even step foot in the Studio I need to finish preserving Zucchini bread.  I made five batches of bread this weekend.  One batch makes two loaves of bread.  They are frozen and used throughout the year.  I froze six loaves a couple of weeks ago and four more this weekend.


I also made a few mini loaves for Mr. Podunk.  He loves a sweet treat every now and then in his lunch box. These have been in the freezer overnight and today the need to be vacuum sealed.


 Under the mini loaves is the zucchini muffins that have already been vacuum sealed.  Once the mini loaves have been vacuumed I can put them along with the muffins in a bag for storage in the deep freezer. 

A few more chores need to completed after processing the bread.  Hopefully by noon I can get back to work in the studio.


Pin It

Friday, August 9, 2024

Applique Ideas

 The Bumpkins Baskets quilt is slowly coming to life and evolving along the way.  Below is one option for the final border applique.


And then there's the next option.


The original plan below was ditched when it came time to make those small cluster of flowers.  One big flower is easier and in my mind it looks better.


Some of the applique on this quilt is raw edge and some of it is prepared edge.  To make prepared edge applique some type of template is needed.  Normally I would use multiple layers of freezer paper to make the templates but not today.  The template below was made with No Melt Mylar Quilters Template.  It's sold in     18" x 12" sheets for around $6 to $7 at the local quilt shop, Joann's and of course Amazon.  I've been hoarding a couple sheets for years.  It's easy to store and forget under the cutting mat.  


The template material is smooth and slippery when trying to turn the edges under.  To stop the template from sliding a little basting glue is helpful.  I spray the back of the template, lay it on the fabric then cut about 1/4" away from the template.  


A watercolor painting pen filled with starch makes the turning process a little faster.


After ironing the edges into place, the template is removed.  The inner points of the flower need a little anti-fraying protection.   A very tiny amount of Aleene's Ok To Wash-it does the trick without being super stiff.  I've used this for years with no issues when stitching the applique by machine or by hand.


The hardest part of the process is deciding if I want blue or yellow in the center of each flower.  Maybe both?  What do you think?


I'm going to end the chat with a little real life photography.  Not so pretty.  I often wonder if every quilter is this messy.


Pin It

Monday, August 5, 2024

Design Wall Monday ~ Bumpkin Baskets

 Hi Quilty Friends!  A little progress was made on my Bumpkin Baskets quilt.  The first inner border of background fabric was a breeze.  The 120 half square triangle border is coming along slowly.


It would have been quicker had I remembered to move the needle on my sewing machine.  You see, when I turn on my sewing machine it automatically goes to the SCANT quarter inch seem setting.  I wish I could change this auto setting.  It's rare for me to use a scant seem allowance.  


Trimming them was pretty quick with the homemade locking ruler.  I kept telling myself  to be grateful because to big is better than too small.  


The plan for today is to finish piecing this border and sew it to the quilt.  Then it's time to take a break and do a little clean up and organizing in the studio.
   

This post is being linked up over at Small Quilts and Doll Quilts


Pin It

Monday, July 29, 2024

Bumpkin Baskets ~ The Original ~ A New Quilt Plan

 Hello Quilty Friends!  After a week of this quilt hanging on my longarm I finally found(made) the time to take a picture.  This is the quilt I thought I quilted and gifted to my daughter about nine years ago.  Last Monday I shared a peek inside my quilt designing brain while I tried to come up with a plan for a new quilt using the same basic basket block in red, white and blues.  I'm happy to finally announce I have a final quilt design!  Woohoo!


The drawing was made in EQ8.  It's a rough drawing of the blocks and arcs.  I just didn't want to take the time to make it look exactly like the real blocks.  You can see the real blocks and see more about the designing process for this quilt by clicking here.


The flower applique on the border arcs may change once the arcs are glued in place.  Using the same size flower on the border as in blocks makes for a ton of work.  The original quilt has one large flower instead of a cluster of flowers.  But it also doesn't have flowers in the basket block.  I'm wondering if a larger flower might look odd when I have small flowers in the baskets.  We'll just have to wait and see.


Now that I have a plan, last night I started doing the math for the quilt.  And wouldn't you know it, I'm short 17 arcs.  Remember this quilt was started in 2019 and it was a different plan.  


So I dug through the project bin to see if had enough scraps to make more arcs.  If not I can pull from the stash.


Hallelujah! Jackpot! I found more assembled arcs and extra wedges to make more arcs! Yeehaw!  Yes, even as I tell you this I get the same giddy feeling and do a happy dance wiggle in my chair.  


For those of you that want see how this quilt came to be from the very beginning about nine years ago I searched my blog and found two blog post.  The first one is how I came up the idea for the basket block from a vintage block.  Click here.  The vintage block and my first idea to recreate the block are both very different than the blocks in my two quilts above.

The second link is a year after it became a UFO in 2016.  Click here.


Pin It
Related Posts Plugin for WordPress, Blogger...