I was hoping for this to be a quilt top by now. Slow progress is better than no progress. Maybe by next Monday the quilt top will be ready to quilt. The prints are cut for the remaining 20 blocks, but the background fabric is being cut as I go. I think today I'll finish cutting the fabric for the rest of the quilt. That seems to light a fire in my piecing process.
Monday, September 30, 2024
Design Wall Monday ~ Twinkler
Hi Quilty Friends! The Twinkler quilt blocks now fill the design wall. Twenty-two little shining stars.
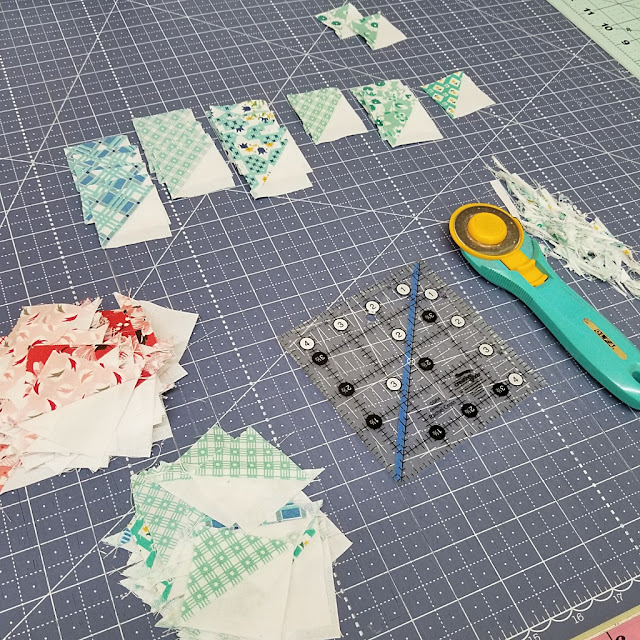
Trimming the flippy corner bonus HST's is first on the list today. This quilt will produce 336 bonus HST's. Trimming a few at a time is easier on the neck and shoulders. I'm not complaining because I know these little cuties will someday become part of a darling quilt.
One of my biggest problems is I like to play with the blocks and pet the fabrics. There was no reason for me to stage this picture other than I thought it would look cute. Wasted time, but it makes me happy!
After playing for a bit, all the blocks were removed from the design wall to make room for the remaining blocks to be made. This orange block was placed on the top of the stack as a reminder. We'll talk more about that later in the week.
Here's a little earworm for the day. A blast from the past and my high school years.
🎵🎵You must be my lucky star 🎵🎵cause you shine on me wherever you are🎵🎵
🎵🎵I think of you and I start to glow🎵🎵
And I need your light and baby you know
🎵🎵Starlight, Starbright...First Star I see tonight 🎵🎵
Click below to play Lucky Star
This post is being linked up at the following linky parties. Click on the links to see more inspiring quilters shine!
Wednesday, September 25, 2024
Mini Simple Folded Corners Ruler
Hello Happy Quilty Friends! After years of watching quilters use this ruler and love it, I had to try it for myself. It's sold in two sizes. Since I'm skeptical about its amazing powers, I chose to first try the smaller mini ruler because it is cost less.
The packaging is a nice Ziplock style bag. I wish all rulers were packaged so nicely. It would make storing the instructions with the ruler much easier.
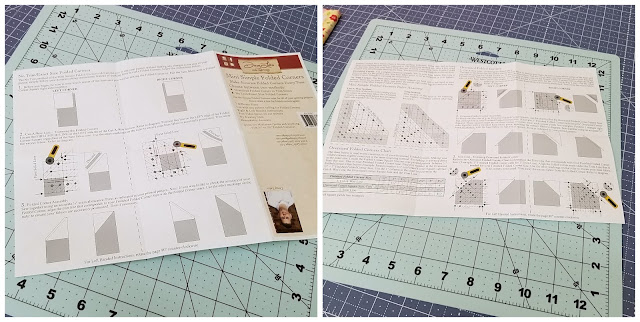
Whoa! would you look at the instructions. Very well done with visuals and well written instructions that seem to make a simple process very complicated.
The first thing I noticed about this ruler is there's a lot of markings. Even with reading glasses, I can't make out the numbers in the small diamond shapes. I had to take a picture of them on my phone and enlarge the image in order to see that these are fractions.
This ruler is supposed to make snowballing the corner easier than other methods. There are other names for snowballed corners. Stitch and flip or flippy corners are two examples. Most of the time I use the tape on the bed of my sewing machine to stitch from corner to corner.
Then I will stitch a second line about a half inch away from the first. Then cut in between the two stitched lines and press each piece to the dark.
Here's my thought from the first time I saw the Simple Folded Corner ruler. Why can't I use any quilt ruler with a quarter inch line? So, I grabbed one off the shelf, lined up the quarter inch line on the corners of the white square. Looks like the cut would be the same, right?
Let's test my theory. On the left I'll use the Folded Corners ruler and on the right side I'll use the Companion Angle Ruler. I've marked the white fabric on the left with an M for the Mini Folded Corner ruler. The white fabric on the right corner is labeled with a C.
The first cut was made. I didn't notice the ruler had shifted until I edited the photos for this post. You can see there's a little of the green fabric showing between the line on the ruler and the white square.
A couple pins added to prevent shifting of fabric.
And sewed the seams.
A quick press. Can you use any ole ruler and get the same result? Yes, you can!
In all fairness, this little bit needing to be trimmed on the Folded Corner Ruler is my fault, not the rulers.
And the other side.
There are instructions for using the same ruler for trimming the corner if needed. I can do the same with any ruler. Just line up the edge of the ruler with green fabric and trim. Flip the block around and trim the other side.
As you might have already guessed, I think this ruler was a waste my money. The markings are hard to read, it over complicates a very simple process. And the most important to me because I'm cheap...the same thing can be done with any ruler.
However, it has made me rethink my process for making the snowballed corners. I'm going to try using the cut first then sew method. But I'll be using a different ruler that has less markings so I can see what I'm doing.
If you have this ruler and love it, leave a comment below to let others know why. What works for me may not work for you and vice versa. That's one of the great things about quilting, there's more than one way to get the same result.
I found a video (after I order the ruler) that shows all that this ruler can do. It was made by the Fat Quarter Shop and the designer of the ruler. Click here hop over and watch it on YouTube.
Tuesday, September 24, 2024
Digging For Scraps
Hello Quilty Friends! Raise your hand if you are like me and love digging through the scrap fabrics in your stash. I love it so much I couldn't stop until it was time for bed.
The plan for this quilt is 100 different prints in each color. Only pulling from the scrap bins. No cheating and cutting from fat quarters or yardage. I knew purple and orange would probably not be able to follow this rule. I need 57 more purple.
And 50 more orange. Even if I cut from fat quarters and yardage, I don't think I could come up with those numbers. And the idea is to use as many scraps as possible, not make more. So, I think the no repeat fabric rule just flew out the window.
Before throwing in the towel and changing the plan I'll take a little break from the Bow-Tie quilt. The corner of the cutting table is getting pretty full of WIP's(works in progress). But there's still plenty of room for cutting background fabrics for the Twinkler quilt.
Fourteen blocks were loaded onto design boards and are ready to sparkle and shine.
In other news. Happy mail! When a gal finds a good sale on her favorite background fabric, she has to order a couple of bolts.... and two charm packs of Nana Mae 8 by Henry Glass because it's so cute and also on sale. I know I said I wasn't going to buy anymore precuts smaller than a fat quarter, but it was so cute!
Imagine my surprise when I opened the box and found three bolts of white and one bolt of bone. And no oh so cute charm packs. Do you think maybe the powers that be are making me be a good girl and stick to my fabric buying rule?
Of course, I contacted them via email to let them know the order was wrong and that I'm very happy with what they sent me with no price adjustment. Who wouldn't be? Four bolts of fabric for the price of two.
Monday, September 23, 2024
Pretty In Pink
Hi Quilty Friends! The calendar said yesterday was the first day of Autumn. Most quilters are stitching up fall leaves, pumpkins and bat quilts, not me, I'm loving the bright happy colors of Spring.
The weekend started with the search for 100 pink fabrics in the scraps. Between the two scrap bins of pink fabrics, 99 different pinks were found. I could pull a pink fabric from the fat quarter stash or the yardage stash, but I decided it would be cheating since this is supposed to be a true scrap quilt. I was hoping to have no repeat prints but it's looking like that might not be doable. I still need to make the yellow, green, gray, brown, orange and purple blocks. Sigh...we'll see if I can pull an extra print out of another color.
Me and the color pink go way back. Maybe it comes from the love of Barbie when I was a child. Or maybe it's just a girly thing. Whatever the reason, pink has always dominated my fabric stash. Some of the fabrics are upcycled fabrics from sheets, curtains and cloths. I also have two pink fabrics from my mom's fabric stash. One of them has seen its way into many of my quilts.
It's an old Swiss dot. The fuzzy kind of Swiss dot. She gave me three different colors of these, mint green, baby blue and pink. The baby blue is long gone. I still have about a fat quarter of the mint green and as for the pink, just this small piece. As most of you know, this is not 100% cotton. And to be honest, I don't know if it's polyester. It doesn't melt like a poly. Well, it doesn't matter to me, it's fabric and it can be stitched.
Such a sweet little block with so much history. Mom had this fabric in her stash when I was child. I don't remember seeing her use it until my daughter was born. She made her a dress and matching bonnet. And silly me didn't keep them when she outgrew them.
There's one more fabric from Mom's stash. It's even thinner than the Swiss dot. And again, not cotton, but holds up well to ironing.
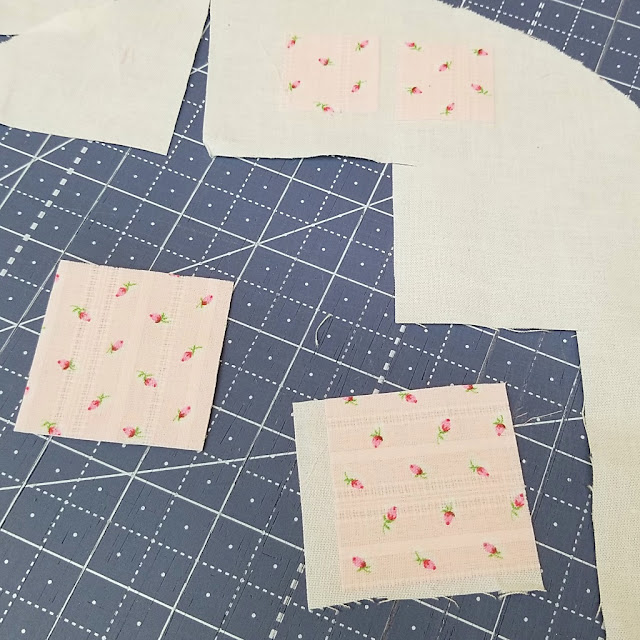
To use it in the quilt it will need to be backed with something to cover up the holes(weave) in the fabric design. I have stabilizers and interfacings, but I didn't like the way it looked. So, I used quilt basting glue to attach the fabric to white cotton.
This will close up those holes, stop the fraying while piecing and stop the batting from poking through the holes.
She turned out pretty cute! The seams are a little bulky, but I don't think I'll have any trouble quilting it on the frame.
All of Pink Bow-Tie quilt blocks are finished...
...and waiting for the rest of the rest of the blocks to join the party. Only about 600 more blocks to go!
Friday, September 20, 2024
100 Blue Bow-Tie Blocks
Hi Friends! It's so exciting to have 100 more Bow-Tie blocks completed. These little blocks are addictive.
I don't know why it makes me smile to think of someday finishing a quilt with (900) three inch Bow-Tie blocks. As the work area was being prepped I took a step back to admire the many prints. It's hard to believe I had 100 different blue prints in my scrap bins. My fabric stash building didn't start until 2005. Before 2005 I was making quilts from upcycled and repurposed fabric. I had never heard of building a stash.
Back then I had the basics. An old free sewing machine from my old high school that was going to be trashed. No quilt books or patterns. I had one of my mom's old pin cushions with about 50 old short metal head pins.
Today in my studio, I have more fabric than I'll ever be able to use. And the same goes for patterns and books, I could never make them all. Pins? Yes, I stock pile pins of all types. Fine pins, thick pins, flower head, large ball head, small ball heads, glass heads, pearl heads. However, I'm happy to report the silicone head pins have not made it into the pin stash...yet.
The pin stash came in handy this week. I had to open a package of fine glass head pins so I could put three pins in each block to hold the two halves of the blocks together perfectly. Of course they were put back into the pin stash after sewing the blocks together.
Even with all the pinning a few of the blocks needed a little trimming and squaring up.
Some of the blues look a little greener than I thought. That's okay, I'm sure when I get to sorting in the green bins I'll find some prints that look a little closer to blue than green.
To keep them tidy and easy to count later on, I'm clipping them together in groups of ten.
Only about 700 more to go!
Next up is the pink scrap bins. I'll start the sorting today and keep going until I feel the need to switch to another project. For the time being this one has my attention. But you know that can change in the blink of an eye.
Subscribe to:
Comments (Atom)


